This topic explains how to update the progress of any type of event, available through the Workflow module.
Changes made to the properties of an event generate records in a history of activities that can be viewed in the Progress tab of an event. This makes it possible to monitor and update the event stages, as well as close or cancel events that will no longer be needed. Event properties updated automatically due to execution of workflow rules created in the Customizations section of the Administration module are also logged in this history, and changes made to child events will appear in the parent event's history if the View child events option is selected. Files can also be attached to events through this tab, and any files added through Attachment attributes associated with the event will be listed here with a link to the attachment.
Options are available to order the history by date, filter the list by any changes made to the properties of events, attachments, or the event progress, and filter by the Updated By field. In addition, the list can be exported to an excel spreadsheet.
Note that the progress of events can be updated through the event itself or through the main list of events. If you select more than one event in the main list and click on Update Progress, the progress of all the events selected will be updated.
Operations for changing the status of an event are discussed in Chapter 10: Workflow -> Events -> Closing Events, Cancelling Events, Reopening Events, and Deleting Events.
1. Access the Workflow module.
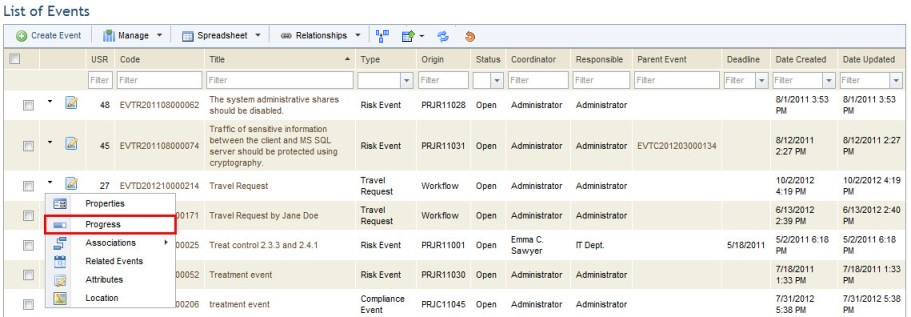
2. In the Events section, click Edit next to the event whose progress you want to change and select Progress from the drop-down list that appears (see figure below).
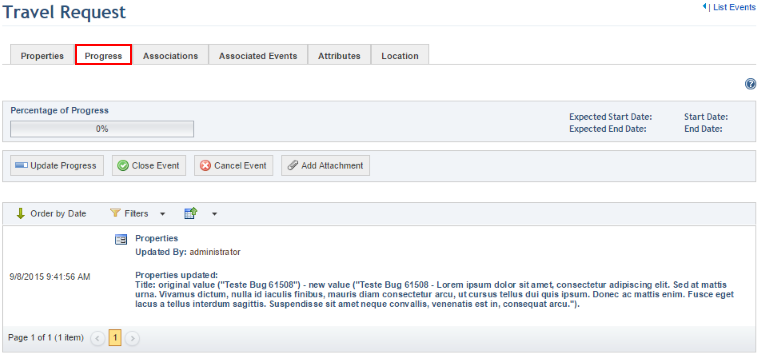
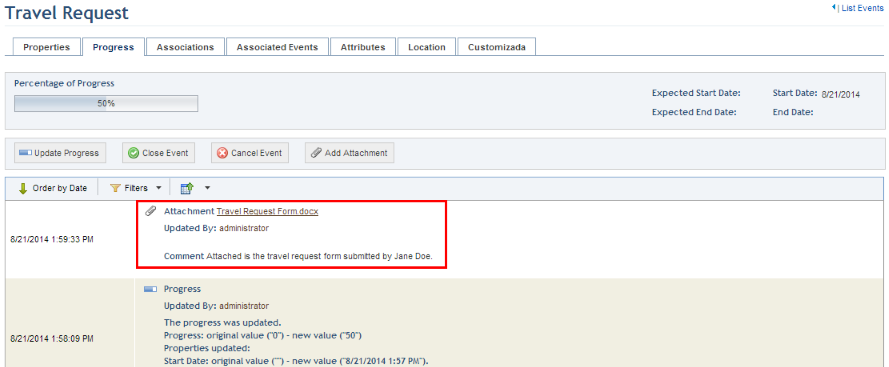
The system displays the Progress tab for the event, where the log of activities related to the event can be viewed, files can be attached, and where its progress can be updated (see figure below).
Note: For events treating vulnerabilities, a notification can be displayed on this tab when a vulnerability that was imported through an integration task and sent to treatment through a project is not found in a subsequent execution of the task. The option to display notifications must have been enabled when the integration task was created.
3. Click Update Progress.
The system displays a window where the event progress can be updated (see figure below).
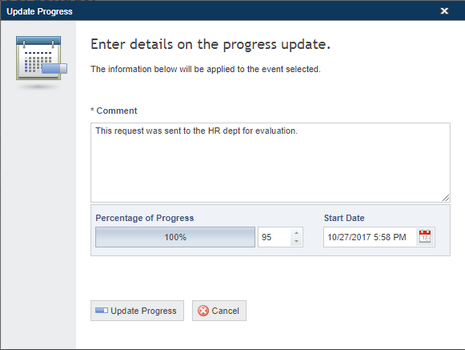
4. In the Comment field, enter information on the progress of the event using a maximum of 10,000 characters.
5. In the Percentage of Progress field, enter a value between 0 and 100 to indicate the event’s progress.
6. In the Start Date field, select a start date for the event (see figure below). By default, this field is completed with the current date.
7. When finished, click Update Progress. If you want to quit the operation, click Close.
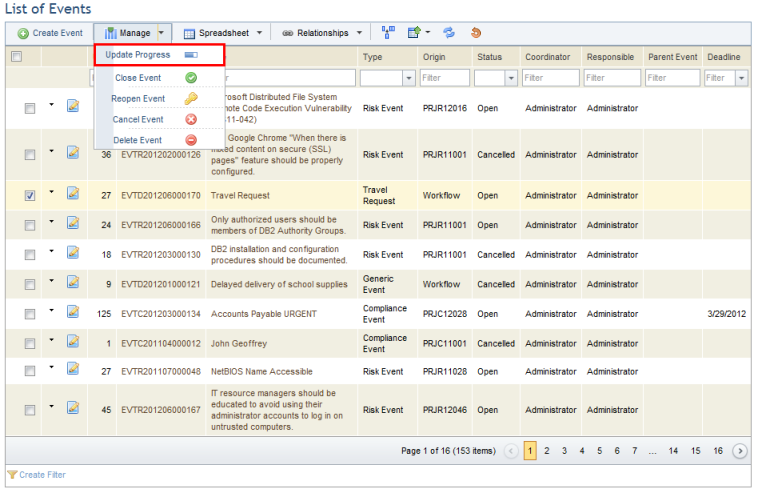
Note: Another way to update the progress of an event is by selecting it from the list of events, clicking Manage, and selecting Update Progress from the list that appears (see figure below). Steps 4-7 listed above can then be followed. The progress entered will apply to all events selected.
8. To attach a file to the event, click Add Attachment.
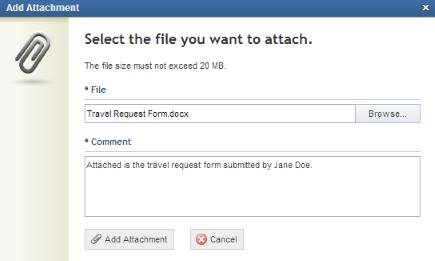
9. In the window that appears, select the file to be attached to the event by clicking Browse.
10. In the Comment field, enter a comment on the file being attached to the event. This field accepts a maximum of 10,000 characters.
11. Click Add Attachment to confirm (see figure below). If you want to quit the operation, click Cancel.
The system displays the file name with the link to the attachment and the comment in the log of the event’s activities (see figure below).
12. Mark the View child events checkbox to view the history of changes of the associated child events.
The system will display the history of the child events, if any.
13. To order the history by date, click Order by Date.
The system will order the list by date, in ascending or descending order, depending on your selection.
14. Click Filters and select mark the checkboxes next to the options you would like to filter the list by. You can filter the list by changes to the properties, attachments, or progress of the event.
15. In the Updated By field, enter the name of the person or group responsible for the event changes that you would like to view.
Note: For events updated by the Qualys Scanner Remediation task, the name displayed in the Updated By field will be the name set in the Responsible for Event Updates field of the integration task, which can be configured in the Administration module. For details, see Chapter 17: Administration -> Integrations -> Integration Tasks -> Creating a Task to Synchronize with Qualys Remediation.
16. When finished, click Filter.
The system displays the list of entries according to the filters selected.