 ) next to the attribute you want to
delete (see figure below).
) next to the attribute you want to
delete (see figure below).This topic explains how to mark a custom attribute for deletion. Keep in mind that this operation is not applicable to default attributes and to custom attributes created for Workflow events. For details on deleting event attributes, see Chapter 17: Administration -> Customizations -> Objects and Attributes -> How to Delete an Event Attribute.
Once marked for deletion, attributes can be permanently removed from the system through the Publish/Delete Objects and Attributes option. For details, see Chapter 17: Administration -> Customizations -> Objects and Attributes -> How to Publish and Delete Objects and Attributes.
1. Access the Administration module.
2. Select Objects and Attributes from the Customizations option on the menu.
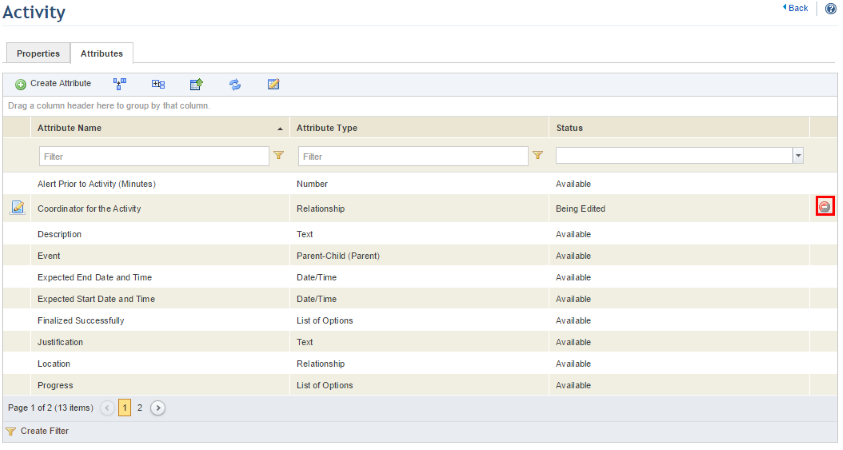
3. Click Edit next to the object for which you want to delete an attribute and select the List Attributes option from the drop-down menu that appears.
4.
Click Mark for Deletion () next to the attribute you want to
delete (see figure below).
Note: If the attribute has not yet been published, it
can be deleted immediately by clicking Delete ( )
next to it and confirming deletion.
)
next to it and confirming deletion.
The system requests confirmation to mark the attribute for deletion (see figure below).
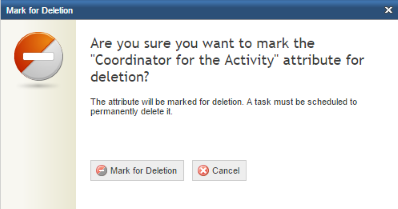
5. To confirm deletion, click Mark for Deletion. If you want to quit the operation, click Cancel.
The system displays a success message, and the status of the attribute becomes "Marked for Deletion". Note that a task must be scheduled for it to be permanently deleted from the system. For details, see Chapter 17: Administration -> Customizations -> Objects and Attributes -> How to Publish and Delete Objects and Attributes.