This topic explains how to export the spreadsheet template used to import scheduled events, their associated activities, and the resources assigned to them. It includes details on how to complete the spreadsheet correctly to ensure that no errors occur when importing them.
1. Access the Events solution.
2. In the Export/Import section, click Export/Import Events.
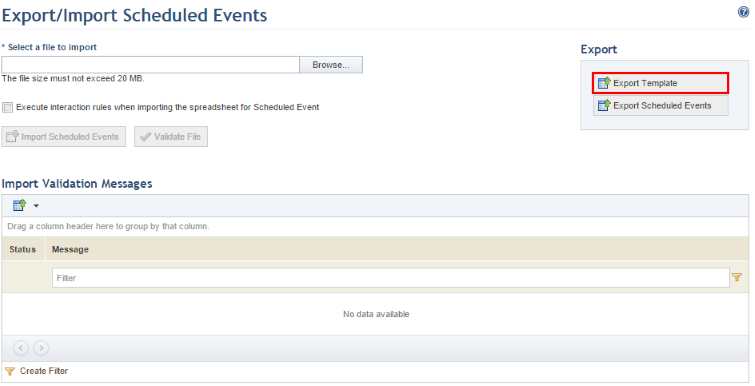
The system displays a page where scheduled events, their associated activities, and any resources assigned to them can be exported and imported.
3. In the Export section, click Export Template (see figure below).
4. Save the file to your computer and open it.
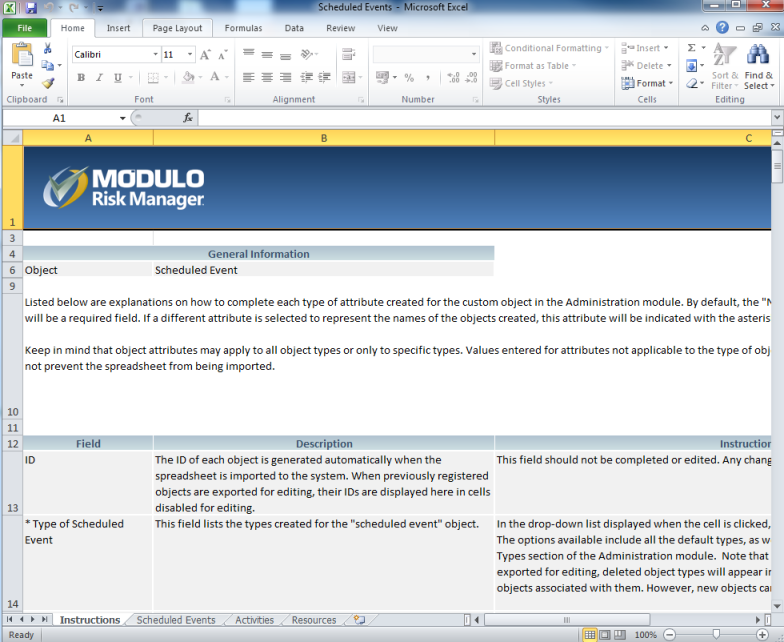
When the file is opened, the template is displayed in Microsoft Excel.
The file includes four worksheets: Instructions, which details how the template should be completed; Scheduled Events, where the properties and attributes of the scheduled events can be provided; Activities, where the activities to be executed in each of the events can be registered and associated with their scheduled events; and Assigned Resources, where the resources necessary for each event can be assigned (see figure below).
The tables below explain how each field from the Scheduled Events, Assigned Resources, and Activities worksheets should be completed. Fields marked with an asterisk are required.
•Scheduled Events:
|
Field |
Instructions |
|
ID |
The ID for each scheduled event is generated automatically when the spreadsheet is imported to the system. When existing events are exported for editing, their IDs will be displayed in this field as read-only values. This field should not be completed or edited, and any changes made to it will be ignored by the system. |
|
*Type of Scheduled Event |
Select the type of the scheduled event being created from the drop-down list displayed when the cell is clicked. Default types as well as any custom types created in the Object Types section of the Administration module will be listed. Note that when the list of existing events is exported for editing, deleted types will be displayed if there are still events of the type registered in the system. However, new events cannot be created with these deleted types, nor can the type be edited through the spreadsheet. |
|
*Context |
Select the context to which the event belongs from the drop-down list that appears when the cell is clicked. Contexts are registered in the Manage Contexts section of this solution. Note that an event's context can be changed at any time. |
|
*Name |
Enter a name to identify the event being created by inserting plain text with 1 to 2,500 characters. |
|
*Description |
Provide a description of the scheduled event by entering plain text using 1 to 5,500 characters. |
|
*Start Date and Time |
Specify the date and time on which the event is scheduled to begin by entering a value in the following format: mm/dd/yyyy hh:mm tt. The start date and time must be earlier than the expected end date and time. |
|
*Expected End Date and Time |
Specify the date and time on which the event is scheduled to end by entering a value in the following format: mm/dd/yyyy hh:mm tt. The end date and time must be later than the expected start date and time. |
|
*Status |
Indicate the current status of the event by selecting one of the available options from the drop-down list that appears when the field is clicked. The possible values for this attribute are: Cancelled, In Progress, Finalized, and Scheduled. |
|
Location |
Specify the venue at which the event is taking place by selecting an Environment-type asset. This attribute is single-selection and should be completed with the path of the asset. The path is specified as follows: parent perimeter name > subperimeter name > asset name. If more than one asset is registered in the system under the same name, an error will be displayed and the spreadsheet will not be imported. In this case, the alphanumeric identifier of the asset should be used, which can be found by entering the name of the asset in the general search field of the system and clicking on the corresponding result. Alternatively, you can locate the asset in the Manage Assets section of the Organization module. The identifier will appear at the end of the URL. If the identifier is used, it should be preceded by "id:". |
|
Routes |
This field is used to assign one or more routes to be used in the scheduled event. This type of attribute can be single or multiple selection and should be completed with the names of the routes, separated by a semicolon and no spaces. For example: Airport x Hotel;Hotel x Stadium. If more than one route is registered in the system under the same name, an error will be displayed and the spreadsheet cannot be imported. In this case, the numeric identifier of the route should be used. If the identifier is used, it should be preceded with the tag "id:". |
|
Participants |
This field is used to assign one or more people as participants in the event. This attribute is multiple-selection and should be completed with the names of the people being assigned, separated by a semicolon and no spaces. For example: Mary Campbell;Andy Larson;Daniel Matthews. If more than one person is registered in the system under the same name, an error will be displayed and the spreadsheet cannot be imported. In this case, the alphanumeric identifier of the person should be used, which can be found by entering the name of the person in the general search field of the system and clicking on the corresponding result. Alternatively, you can locate the person in the Manage People section of the Organization module. The identifier will appear at the end of the URL. If the identifier is used, it should be preceded by "id:". |
|
Associated Risks |
Enter the IDs or the names of the enterprise risks registered in the ERM solution (on demand) that you want to associate with the scheduled event. To enter more than one enterprise risk, use a semicolon (";") and a space. For example: Enterprise Sale Risk; Legal Risk. To disassociate a risk, simply delete the associated ID or name. |
|
Attachments |
This field should not be completed or edited. Any files attached through the system will be listed here when editing scheduled events through a spreadsheet. Note that, when creating a scheduled event through a spreadsheet template, files must be attached after the spreadsheet is imported. These will be displayed within brackets separated by semicolons, with no spaces. For example: [file name.pdf];[file name 2.doc]. |
|
Scheduled Event Attributes |
The scheduled event attributes displayed in the template were previously created and published in the Objects and Attributes section of the Administration module. When an attribute does not apply to a certain type of scheduled event, an alert will be displayed when importing the spreadsheet and any information entered in the field will be ignored. If the attributes are marked as required in the system, they must be completed for the spreadsheet to be imported.
These fields should be completed according to the type of attribute, as follows: •Attachment: Files cannot be uploaded or deleted through the spreadsheet. However, any files attached through the system will be displayed within brackets separated by semicolons. For example: [file name.pdf];[file name 2.doc].
When creating a scheduled event through the spreadsheet, this field will be imported blank, even if it is marked as required. •Date/Time: The format for this type of field is defined when configuring the attribute in the system. If the attribute is registered as "Date", the field should contain only the date; if "Time", the field should contain only the time; and if "Date/Time", it may contain either. If only the date is provided, the time will be 0:00; if only the time is provided, the date will be the date on which the spreadsheet is imported. The date may be in two formats: MM/dd/yyyy or yyyy-MM-dd. The time should be in 24-hour format: HH:mm tt. •E-mail: E-mails should be entered using a maximum of 100 characters in the following format: username@domain.com. •Formula: This is a read-only field, so it is not possible to insert or edit values. These values will be re-calculated once the spreadsheet is imported. •Georeference: Specify a value for this attribute by providing the coordinates in the following format: To define a point: {"type":"Point","coordinates":[-0.09046,51.51095]} To define a set of points: {"type":"LineString","coordinates":[[-0.09046,51.51095],[0,07446,44.51095]]} The coordinates for the points must be entered between brackets, in the following order: "Longitude,Latitude". •Image: Image files are attached through the system and cannot be added through the spreadsheet. The files attached through the system will be displayed in brackets and separated by a semicolon, for example: "[image.jpeg];[image2.jpeg]".
When creating a scheduled event through the spreadsheet, this field will be imported blank, even if it is marked as required. •Link: Links should be entered as: http://www.domain.com or \\server\path. •List of Options: Attributes of this type should be completed with the options available for the attribute, separated by semicolons if more than one value is accepted. •Number: This type of attribute uses the decimal separator (".") and optionally the comma separator (",") to separate thousands. For example, the number 1200 should be filled in as "1,200.00". •Outline: This type of attribute should be completed with the entries using a maximum of 100 characters with each separated by semicolons. For example: Entry 1;Entry 2;Entry 3. •Paragraph: This type of attribute should be completed with normal text. •Relationship: This type of attribute can be single or multiple selection and should be completed with the alphanumeric identifier or the paths of the objects being associated. If more than one object with the same name has been registered in the system, the paths of the objects cannot be used to create relationships and the system will not allow the spreadsheet to be imported. Note that for multiple selection attributes, the paths or identifiers of the objects must be separated by semicolons (";") and no spaces when completing the cells. The identifier of each object should be preceded by "id:" with no spaces after the tag. The identifier is available through the API and can also be found by inserting the name of the object in the general search field and clicking on the corresponding entry, which will then display the identifier at the end of the URL. For business components, the path is specified as follows: business component level > business component type > business component name. For perimeters, the path is specified as follows: parent perimeter name > perimeter name. For assets, the path is specified as follows: parent perimeter name > subperimeter name > asset name. For other objects, simply enter their names. When the spreadsheet is exported, the list of related objects might be truncated if the maximum number of characters allowed in the cell is exceeded. If the cell is not edited, the spreadsheet will be imported and all existing relationships will be kept. To edit the relationships, the ellipses and brackets must first be removed. Note that, in this case, the new relationships will be imported and any previous ones will be deleted. •Text: This type of field should be completed with normal text, respecting any character limits or regular expression masks configured for the attribute in the system.
For details on creating attributes, see Chapter 17: Administration -> Customizations -> Objects and Attributes. |
|
Author |
This field lists the name and username of the person who registered the scheduled event. It should not be completed or edited, and any changes made to it will be ignored by the system. |
|
Date Created |
This field lists the date on which the scheduled event was registered. It should not be completed or edited, and any changes made to it will be ignored by the system. |
|
Updated By |
This field lists the name and username of the person who updated information on the scheduled event. It should not be completed or edited, and any changes made to it will be ignored by the system. |
|
Date Updated |
This field lists the date when information on the scheduled event was updated. It should not be completed or edited, and any changes made to it will be ignored by the system. |
•Assigned Resources:
|
Field |
Instructions |
|
ID |
The ID for each assigned resource is generated automatically when the spreadsheet is imported to the system. When existing resources are exported for editing, their IDs will be displayed in this field as read-only values. This field should not be completed or edited, and any changes made to it will be ignored by the system. |
|
Row of Parent Object |
This field will be ignored if the Parent Object ID field is completed, in other words, if the scheduled event to which the assigned resource belongs was already registered in the system. However, if this event is being created through the spreadsheet, enter the row where it was registered in the Scheduled Events tab. This field will be required if the Parent Object ID field is blank. |
|
Parent Object ID |
This field is disabled for editing and will be completed with the ID of the scheduled event to which the assigned resource belongs. This ID is generated automatically by the system and cannot be modified. |
|
* Type of Associated Asset |
This field is used to indicate which type of asset the resource represents, and should be completed with the name of the asset type. |
|
* Quantity Assigned |
This field is used to indicate the number of resource units necessary for the scheduled event, and should be completed by entering a whole, positive number. |
|
Assignment Start Date |
Specify the date and time on which the resource will start being assigned to the event by entering a value in the following format: mm/dd/yyyy hh:mm tt. The assignment start date and time must be earlier than the assignment end date and time. Once this field is completed, the Assignment End Date field will be required. |
|
Assignment End Date |
Specify the date and time on which the resource will stop being assigned to the event by entering a value in the following format: mm/dd/yyyy hh:mm tt. The assignment end date and time must be later than the assignment start date and time. Once this field is completed, the Assignment Start Date field will be required. |
|
Assigned Resource Attributes |
The assigned resource attributes displayed in the spreadsheet were previously created and published in the Objects and Attributes section of the Administration module. If the attributes are marked as required in the system, they must be completed for the spreadsheet to be imported.
These fields should be completed according to the type of attribute, as follows: •Attachment: Files cannot be uploaded or deleted through the spreadsheet. However, any files attached through the system will be displayed within brackets separated by semicolons. For example: [file name.pdf];[file name 2.doc].
When creating an assigned resource through the spreadsheet, this field will be imported blank, even if it is marked as required. •Date/Time: The format for this type of field is defined when configuring the attribute in the system. If the attribute is registered as "Date", the field should contain only the date; if "Time", the field should contain only the time; and if "Date/time", it may contain either. If only the date is provided, the time will be 0:00; if only the time is provided, the date will be the date on which the spreadsheet was imported. The date may be in two formats: MM/dd/yyyy or yyyy-MM-dd. The time should be in 24-hour format: HH:mm tt. •E-mail: E-mails should be entered using a maximum of 100 characters in the following format: username@domain.com. •Formula: this is a read-only field, so it is not possible to insert or edit values. These values will be re-calculated once the spreadsheet is imported. •Georeference: Specify a value for this attribute by providing the coordinates in the following format: To define a point: {"type":"Point","coordinates":[-0.09046,51.51095]} To define a set of points: {"type":"LineString","coordinates":[[-0.09046,51.51095],[0,07446,44.51095]]} The coordinates for the points must be entered between brackets, in the following order: "Longitude,Latitude". •Image: Image files are attached through the system and cannot be added through the spreadsheet. The files attached through the system will be displayed in brackets and separated by a semicolon, for example: "[image.jpeg];[image2.jpeg]".
When creating an assigned resource through the spreadsheet, this field will be imported blank, even if it is marked as required. •Link: Links should be entered as: http://www.domain.com or \\server\path. •List of Options: Attributes of this type should be completed with the options available for the attribute, separated by semicolons if more than one value is accepted. •Number: This type of attribute uses the decimal separator (".") and optionally the comma separator (",") to separate thousands. For example, the number 1200 should be filled in as "1,200.00". •Outline: This type of attribute should be completed with the entries using a maximum of 100 characters with each separated by semicolons. For example: Entry 1;Entry 2;Entry 3. •Paragraph: This type of attribute should be completed with normal text. •Relationship: This type of attribute can be single or multiple selection and should be completed with the alphanumeric identifier or the paths of the objects being associated. If more than one object with the same name has been registered in the system, the paths of the objects cannot be used to create relationships and the system will not allow the spreadsheet to be imported. Note that for multiple selection attributes, the paths or identifiers of the objects must be separated by semicolons (";") and no spaces when completing the cells. The identifier of each object should be preceded by "id:" with no spaces after the tag. The identifier is available through the API and can also be found by inserting the name of the object in the general search field and clicking on the corresponding entry, which will then display the identifier at the end of the URL. For business components, the path is specified as follows: business component level > business component type > business component name. For perimeters, the path is specified as follows: parent perimeter name > perimeter name. For assets, the path is specified as follows: parent perimeter name > subperimeter name > asset name. For other objects, simply enter their names. When the spreadsheet is exported, the list of related objects might be truncated if the maximum number of characters allowed in the cell is exceeded. If the cell is not edited, the spreadsheet will be imported and all existing relationships will be kept. To edit the relationships, the ellipses and brackets must first be removed. Note that, in this case, the new relationships will be imported and any previous ones will be deleted. •Text: This type of field should be completed with normal text, respecting any character limits or regular expression masks configured for the attribute in the system.
For details on creating attributes, see Chapter 17: Administration -> Customizations -> Objects and Attributes. |
|
Author |
This field lists the name and username of the person who registered the assigned resource. It should not be completed or edited, and any changes made to it will be ignored by the system. |
|
Date Created |
This field lists the date on which the assigned resource was registered. It should not be completed or edited, and any changes made to it will be ignored by the system. |
|
Updated By |
This field lists the name and username of the person who updated information on the assigned resource. It should not be completed or edited, and any changes made to it will be ignored by the system. |
|
Date Updated |
This field lists the date when information on the assigned resource was updated. It should not be completed or edited, and any changes made to it will be ignored by the system. |
•Activities:
|
Field |
Instructions |
|
ID |
The ID for each activity is generated automatically when the spreadsheet is imported to the system. When existing activities are exported for editing, their IDs will be displayed in this field as read-only values. This field should not be completed or edited, and any changes made to it will be ignored by the system. |
|
Row of Parent Object |
This field will be ignored if the Parent Object ID field is completed, in other words, if the scheduled event to which the assigned resource belongs was already registered in the system. However, if this event is being created through the spreadsheet, enter the row where it was registered in the Scheduled Events tab. This field will be required if the Parent Object ID field is blank. |
|
Parent Object ID |
This field is disabled for editing and will be completed with the ID of the scheduled event to which the assigned resource belongs. This ID is generated automatically by the system and cannot be modified. |
|
*Description |
Provide a description for the activity by entering plain text using 1 to 5,500 characters. |
|
*Progress |
Specify the status of the activity by selecting an option from the drop-down list that appears when the field is clicked. |
|
*Responsible for Activity |
This field is used to assign a group of people as responsible for the activity. This attribute is single-selection and should be completed with the name of the group being assigned. If more than one group is registered in the system under the same name, an error will be displayed and the spreadsheet will not be imported. In this case, the alphanumeric identifier of the group should be used, which can be found by entering the name of the group in the general search field of the system and clicking on the corresponding result. Alternatively, you can locate the group in the Manage Groups of People section of the Organization module. The identifier will appear at the end of the URL. If the identifier is used, it should be preceded with the tag "id:". |
|
*Expected Start Date and Time |
Enter the expected start date and time for the activity. If only the date is entered, the time will be 0:00; if only the time is entered, the date will be the date on which the spreadsheet is imported. The date may be in two formats: MM/dd/yyyy or yyyy-MM-dd. The time should be in 24-hour format: HH:mm tt. |
|
*Expected End Date and Time |
Enter the expected end date and time for the activity. If only the date is entered, the time will be 0:00; if only the time is entered, the date will be the date on which the spreadsheet is imported. The date may be in two formats: MM/dd/yyyy or yyyy-MM-dd. The time should be in 24-hour format: HH:mm tt. |
|
*Alert Prior to Event (Minutes) |
This field is used to indicate how many minutes prior to the activity you would like to view alerts regarding it. |
|
Location |
Specify the venue at which the activity is taking place by selecting an Environment-type asset. This attribute is single-selection and should be completed with the path of the asset. The path is specified as follows: parent perimeter name > subperimeter name > asset name. If more than one asset is registered in the system under the same name, an error will be displayed and the spreadsheet will not be imported. In this case, the alphanumeric identifier of the asset should be used, which can be found by entering the name of the asset in the general search field of the system and clicking on the corresponding result. Alternatively, you can locate the asset in the Manage Assets section of the Organization module. The identifier will appear at the end of the URL. If the identifier is used, it should be preceded with the tag "id:". |
|
Routes |
This field is used to assign one or more routes to be used in the activity. This attribute is multiple-selection and should be completed with the names of the routes, separated by a semicolon and no spaces. For example: Airport x Hotel;Hotel x Stadium. If more than one route is registered in the system under the same name, an error will be displayed and the spreadsheet cannot be imported. In this case, the numeric identifier of the route should be used. If the identifier is used, it should be preceded with the tag "id:". |
|
Activity Attributes |
Any activity attributes displayed in the template were previously created and published in the Objects and Attributes section of the Administration module. If the attributes are marked as required in the system, they must be completed for the spreadsheet to be imported.
These fields should be completed according to the type of attribute, as follows: •Attachment: Files cannot be uploaded or deleted through the spreadsheet. However, any files attached through the system will be displayed within brackets separated by semicolons. For example: [file name.pdf];[file name 2.doc].
When creating an activity through the spreadsheet, this field will be imported blank, even if it is marked as required. •Date/Time: The format for this type of field is defined when configuring the attribute in the system. If the attribute is registered as "Date", the field should contain only the date; if "Time", the field should contain only the time; and if "Date/time", it may contain either. If only the date is provided, the time will be 0:00; if only the time is provided, the date will be the date on which the spreadsheet was imported. The date may be in two formats: MM/dd/yyyy or yyyy-MM-dd. The time should be in 24-hour format: HH:mm tt. •E-mail: E-mails should be entered using a maximum of 100 characters in the following format: username@domain.com. •Formula: this is a read-only field, so it is not possible to insert or edit values. These values will be re-calculated once the spreadsheet is imported. •Georeference: Specify a value for this attribute by providing the coordinates in the following format: To define a point: {"type":"Point","coordinates":[-0.09046,51.51095]} To define a set of points: {"type":"LineString","coordinates":[[-0.09046,51.51095],[0,07446,44.51095]]} The coordinates for the points must be entered between brackets, in the following order: "Longitude,Latitude". •Image: Image files are attached through the system and cannot be added through the spreadsheet. The files attached through the system will be displayed in brackets and separated by a semicolon, for example: "[image.jpeg];[image2.jpeg]".
When creating an activity through the spreadsheet, this field will be imported blank, even if it is marked as required. •Link: Links should be entered as: http://www.domain.com or \\server\path. •List of Options: Attributes of this type should be completed with the options available for the attribute, separated by semicolons if more than one value is accepted. •Number: This type of attribute uses the decimal separator (".") and optionally the comma separator (",") to separate thousands. For example, the number 1200 should be filled in as "1,200.00". •Outline: This type of attribute should be completed with the entries using a maximum of 100 characters with each separated by semicolons. For example: Entry 1;Entry 2;Entry 3. •Paragraph: This type of attribute should be completed with normal text. •Relationship: This type of attribute can be single or multiple selection and should be completed with the alphanumeric identifier or the paths of the objects being associated. If more than one object with the same name has been registered in the system, the paths of the objects cannot be used to create relationships and the system will not allow the spreadsheet to be imported. Note that for multiple selection attributes, the paths or identifiers of the objects must be separated by semicolons (";") and no spaces when completing the cells. The identifier of each object should be preceded by "id:" with no spaces after the tag. The identifier is available through the API and can also be found by inserting the name of the object in the general search field and clicking on the corresponding entry, which will then display the identifier at the end of the URL. For business components, the path is specified as follows: business component level > business component type > business component name. For perimeters, the path is specified as follows: parent perimeter name > perimeter name. For assets, the path is specified as follows: parent perimeter name > subperimeter name > asset name. For other objects, simply enter their names. When the spreadsheet is exported, the list of related objects might be truncated if the maximum number of characters allowed in the cell is exceeded. If the cell is not edited, the spreadsheet will be imported and all existing relationships will be kept. To edit the relationships, the ellipses and brackets must first be removed. Note that, in this case, the new relationships will be imported and any previous ones will be deleted. •Text: This type of field should be completed with normal text, respecting any character limits or regular expression masks configured for the attribute in the system.
For details on creating attributes, see Chapter 17: Administration -> Customizations -> Objects and Attributes. |
|
Author |
This field lists the name and username of the person who registered the activity. It should not be completed or edited, and any changes made to it will be ignored by the system. |
|
Date Created |
This field lists the date on which the activity was registered. It should not be completed or edited, and any changes made to it will be ignored by the system. |
|
Updated By |
This field lists the name and username of the person who updated information on the activity. It should not be completed or edited, and any changes made to it will be ignored by the system. |
|
Date Updated |
This field lists the date when information on the activity was updated. It should not be completed or edited, and any changes made to it will be ignored by the system. |
5. When finished, save the file to your computer.
Note: For details on importing events created through the spreadsheet, see Chapter 14: Events -> Export/Import Scheduled Events, Available Resources, and Routes -> How to Import Scheduled Events, Available Resources, and Routes through a Spreadsheet.