This topic explains how to create a knowledge base from scratch through the import template. Modulo provides a spreadsheet template in Excel format specially prepared to help you create knowledge bases offline. The content entered on this spreadsheet can then be imported to the system, and a new knowledge base will be created.
In addition to creating knowledge bases from scratch through a template, you can also export an existing knowledge base to a template, edit it, and import it back to the system. The imported document can then be published and used in risk management projects. This process of editing knowledge bases offline allows modifications to be made without connecting to the system. For details on exporting an existing knowledge base to edit it, see Chapter 8: Knowledge -> Risk Knowledge -> Knowledge Bases -> Exporting a Knowledge Base.
1. Access the Knowledge module.
2. Select Knowledge Bases from the Risk Knowledge option on the menu.
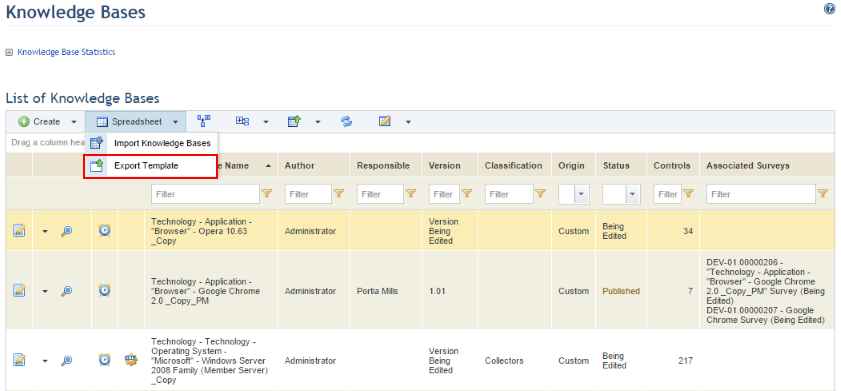
3. In the Knowledge Bases section, click Spreadsheet and select the Export Template option from the drop-down list that appears (see figure below).
The system requests confirmation to export the template (see figure below).
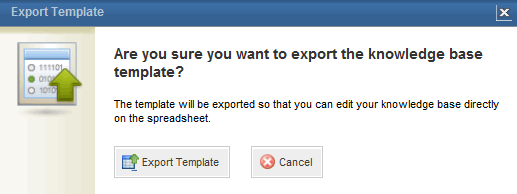
4. Click Export Template to confirm. If you want to quit the operation, click Cancel.
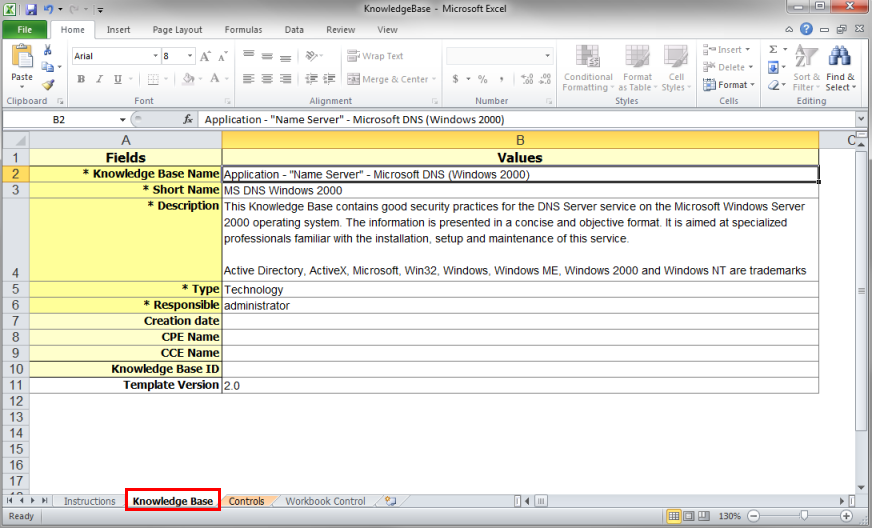
5. Open the spreadsheet template in Microsoft Excel (see figure below).

Note 1: The spreadsheet includes 4 worksheets:
•Instructions: This worksheet provides instructions on how to correctly complete the spreadsheet and is purely informational. There are no fields to be completed.
•Knowledge Base: This worksheet is where general information on the knowledge base being created can be entered.
•Controls: This worksheet is where the knowledge base controls and their attributes can be entered.
•Workbook Control: This worksheet contains information that will be used to validate the spreadsheet. It checks for errors in information entered in the fields that may hinder the data from being correctly imported to create the knowledge base. If problems are detected, they should be corrected before the spreadsheet is imported.
Note 2: The spreadsheet fields are case sensitive; that is, the system will distinguish uppercase characters from lowercase ones.
6. Fill out the Knowledge Base worksheet, entering the properties of the knowledge base you want to create (see figure below).
The table below explains how to fill out each field in the Knowledge Base worksheet from the import template. Note that some fields are required, while others are optional.
|
FIELD |
INSTRUCTIONS |
|
*Knowledge Base Name |
The name of the knowledge base should be composed of the categories to which it belongs, according to the following structure:
Name of knowledge base = Category Level 1 + Category Level 2 + ... + Category Level “X”.
For example: Operating System – “Microsoft” – Windows NT 4.0 Server. |
|
*Short Name |
Name of the knowledge base that will be used throughout the system to refer to it. |
|
*Description |
Brief description that provides the objectives and characteristics of the knowledge base. |
|
*Type |
A knowledge base should be classified according to one of the following options: person, process, technology, or environment. |
|
*Responsible |
Username of the person or name of the group responsible for importing the knowledge base and other activities related to it in the system. Group names should be preceded by an asterisk and a space (for example: * financedept).
This role is responsible for keeping information on the knowledge base and its controls up to date and by default receives permission to view and edit knowledge bases to which they were assigned. Note that this person or group must be included in the list of restrictions for this role in the Role Restrictions section of the Administration module, and must also be included in the Knowledge Module Users profile to gain access to the module. |
|
Date Created |
Date on which the knowledge base was created in the <MM/DD/YYYY> format. |
|
CPE Name |
Used only for technology knowledge bases and consists of structured standards for IT system names. For details on CPE names, see Chapter 8: Knowledge -> Risk Knowledge -> CPEs. |
|
CCE Name
|
Is used only for technology knowledge bases and consists of a standard that defines unique identifiers for IT system configurations. For details on CCE names, see Chapter 8: Knowledge -> Risk Knowledge -> CCEs. |
|
Knowledge Base ID |
This field is used to identify knowledge bases in the system. It should not be completed. |
|
Template Version |
Indicates the version of the spreadsheet template being used. |
7. Click the Controls worksheet to create the controls for the knowledge base (see figure below).
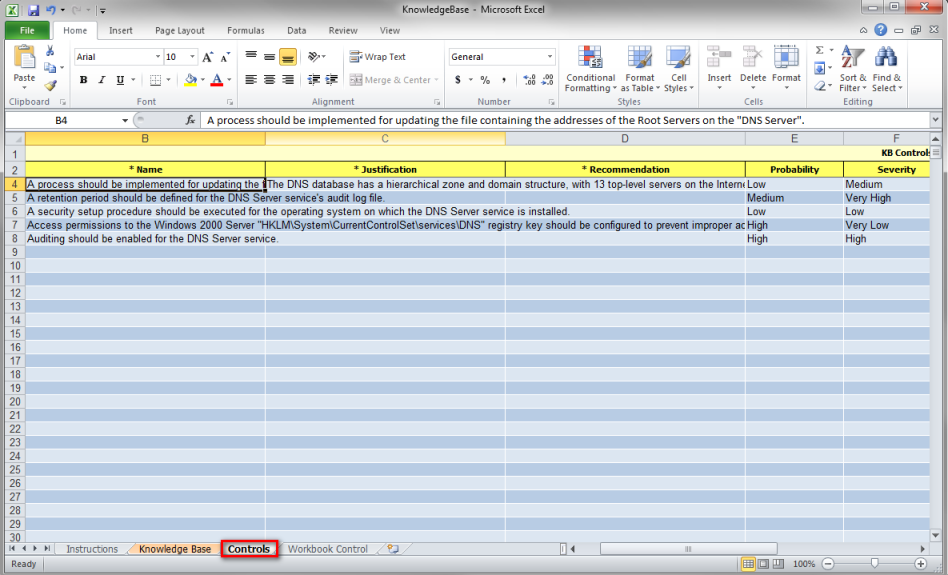
The table below explains how to fill in each field of the Controls worksheet:
|
FIELD |
INSTRUCTIONS |
|
Control ID |
The field is used to identify each knowledge base control. It should not be completed. |
|
*Name
|
A brief definition of the best practice or rule to be analyzed in the asset component should be entered here. To maintain an optimized knowledge standard, the control names should be at most two or three lines and should use the expression “should + verb”.
For example: The Windows NT auditing feature should be enabled. |
|
*Justification
|
This field should be completed with a description of the benefits that implementing the control may provide or any repercussions from not implementing it. |
|
*Recommendation
|
This field should contain a description of the procedures for implementing the control. This description should be standardized as follows:
•Use the following opening statement: “This control can be implemented through the following procedure:”. •Describe the steps for implementing the control, numbering them sequentially. •Add notes, if necessary. Alternatively, enter the important points for implementing the control when it refers to a document (standard, procedure, etc.). •For controls with general purposes (that is, non-exclusive), the following notice should be included at the end: “Attention! Control prepared for generic environments. Evaluate applicability and possible impacts before implementing in a production environment.”
For example:
This control should be implemented through the following procedure:
1. Login as the administrator. 2. Click “Start” -> “Settings” -> “Control Panel”.
NOTE: In addition to enabling the audit logs, the auditing itself must be configured properly.
Attention! Control prepared for generic environments. Evaluate applicability and possible impacts before implementing in a production environment. |
|
*Probability
|
In this field, select the estimated level of exposure or the probability that the absence of the control is exploited by the threats associated with it. Decide among one of the following:
Very Low: is very unlikely Low: is unlikely Average: is likely High: is very likely Very High: is almost certain
Note: The following criteria should be used when selecting the level of probability: •The probability should be proportional to the reach of the control; •If unsure, always use the lower value; •Avoid using the “Very High” and “Very Low” extremes indiscriminately; •Maintain coherence between the scores for each control. |
|
*Severity
|
In this field, select the estimated degree of severity if the absence of the control is exploited by one of the threats associated with it. Choose one of the following options:
Very Low: almost no impairment Low: not very severe impairment Medium: severe impairment High: very severe impairment Very High: extremely severe impairment
The same criteria used to determine the probability should be used when determining the severity. |
|
*Threats |
In this field, select the threats to which the asset associated with the control will be exposed in the absence of the control. Threats should be separated by semicolons (“;”). Only threats directly associated with the absence of the control should be associated, thus avoiding the association of indirect threats.
For details, see Chapter 8: Knowledge -> Risk Knowledge -> Threats and Threat Sources. |
|
*Grouping |
Select the grouping under which the control will be listed, allowing similar controls to be more easily found and analyzed.
Note: For details, access Chapter 8: Knowledge -> Risk Knowledge -> Groupings and Grouping Types. |
|
CCE-ID |
This field should be completed with identification of the CCE name associated with the control. This field is only used in technology knowledge bases. |
|
References |
Enter additional information on the control and its implementation in this field. This information may be, for example, the name of the document or the link where the document can be downloaded. |
|
Source |
Enter the sources of information used for preparing the control in this field. This information may be, for example, the name of the document or the link where the document can be downloaded. |
|
OVAL-ID |
Enter the corresponding OVAL identifier for the control. For example: oval:com.modulo.SQL2005:def:77982. This field is only used in technology knowledge bases. |
|
Delete? |
This field should only be used when the knowledge base is being edited. Existing controls can be marked for deletion and deleted from the system when the spreadsheet is imported. |
8. The spreadsheet can be imported to the system to create a knowledge base once you have finished completing the fields. Before it can be used in risk management projects, it must be published.
Note: For details on how to import the knowledge base created through the template, see Chapter 8: Knowledge -> Risk Knowledge -> Knowledge Bases -> Importing a Knowledge Base. For details on how to publish a knowledge base, see Chapter 8: Knowledge -> Risk Knowledge -> Knowledge Bases -> Generating Notifications and Publishing Knowledge Bases.