This topic explains how to view and edit the continuity requirements of a business component in the Continuity Requirements tab, which is only displayed if the Continuity module, an on-demand solution provided by Modulo, was installed. Note that this tab must also be enabled for each type of business component in the Customizations section of the Administration module. For details on enabling this tab for each type of business component, see Chapter 17: Administration -> Customizations -> Display Options -> How to Configure Options for the Continuity Module.
The impact the interruption of a business component could have on different aspects of the organization is specified in the BIA Data tab. This information is later used in calculating the Impact Score (through the default formula), once an impact analysis is performed in the Continuity module. Based on this score, continuity managers can define a business component as critical or not to the organization, and then specify the requirements needed to ensure the continuity of the process or activity represented by it through this tab.
1. Access the Organization module.
2. In the Business Components section, select the Manage Business Components option.
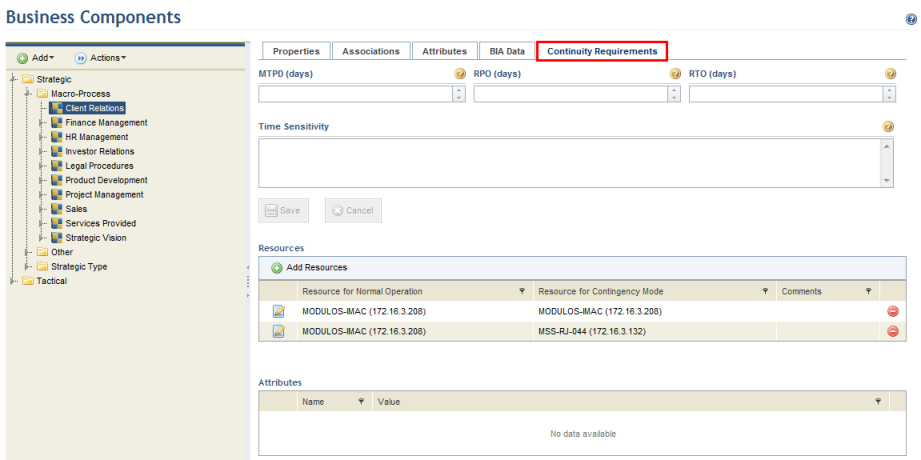
3. Expand the level and type of the business component for which you want to view continuity requirements, select its name, and click the Continuity Requirements tab (see figure below).
4. In the MTPD (hours) field, specify the maximum period of time an interruption of the business component can be tolerated by the organization. This field accepts positive numbers with decimals.
5. In the RPO (hours) field, specify the maximum tolerable period of time in which data might be lost due to an interruption. This field allows managers to determine whether their data backup system is sufficient. For example, consider that the backup frequency for data related to a certain component is every 24 hours. This implies that, in the worst-case scenario, only data registered more than 24 hours prior to an interruption could be recovered. In this case, if the value specified in this field by the manager was less than 24 hours (indicating that more recent data should be available for recovery), the backup configuration should be changed to fit this specification. This field accepts positive numbers with decimals.
6. In the RTO (hours) field, specify the amount of time after an interruption occurs that the business component must be resumed. This field accepts positive numbers with decimals. The value entered here must be less than that entered for the MTPD.
7. In the Time Sensitivity field, specify the period (week, month, season, year, etc.) on which an interruption of the business component would have the greatest impact. This field accepts a maximum of 2,000 characters.
8. In the Resources field, click Add Resources to associate resources (assets) with the component. There are two types of resources that can be added here: those required for the process or activity represented by the business component to operate normally (Resource for Normal Operation), and those that will allow it to function should an interruption occur (Resource for Contingency Mode).
The system displays an area where each type of resource can be selected, as well as a field for comments (see figure below).
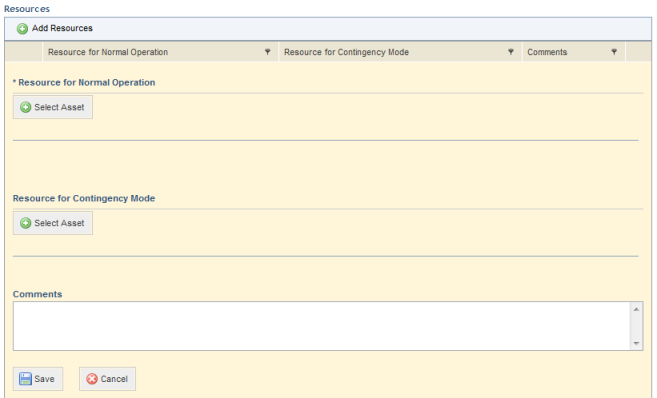
9. In the Resource for Normal Operation field, click Select Asset.
10. In the window that appears, mark the radio button next to the name of the asset you want to add and click Add Asset (see figure below). If you want to quit the operation, click Cancel.
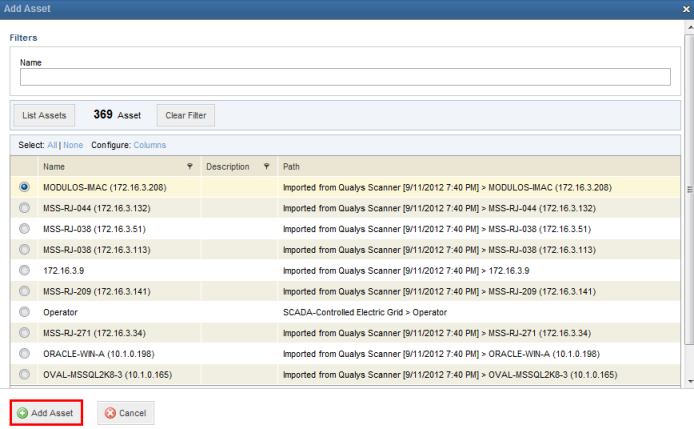
11. In the Resource for Contingency Mode field, click Select Asset, mark the radio button next to the asset you want to add, and click Add Asset. If you want to quit the operation, click Cancel.
12. In the Comments field, enter any relevant information regarding the resources added. This field accepts a maximum of 5,000 characters.
13. When finished, click Save. If you want to quit the operation, click Cancel.
The system displays a success message.
14. In the Attributes area, you can view the attributes applied to the type of the business component in question that were enabled for display here through the Display Options section of the Administration module. To enter or edit the value of an attribute, click Edit next to it (see figure below). Note that the information accepted by attributes depends on the type of each. For example, some attributes only accept files, while others only accept numeric values.

15. After
entering or editing the value of an attribute, click Save ( ). If you want to quit the operation,
click Cancel (
). If you want to quit the operation,
click Cancel ( ).
).
The system displays a success message.
16. To clear
the value of an attribute, click Remove ( )
next to its name.
)
next to its name.
The system requests confirmation to remove the attribute (see figure below).
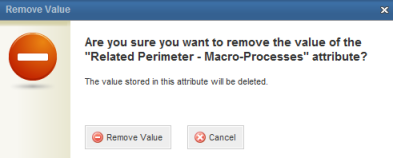
17. Click Remove Value to confirm. If you want to quit the operation, click Cancel.
The system displays a success message.