1. Access the Events solution.
2. In the Scheduled Events section, select Manage Scheduled Events.
The system displays the list of scheduled events.
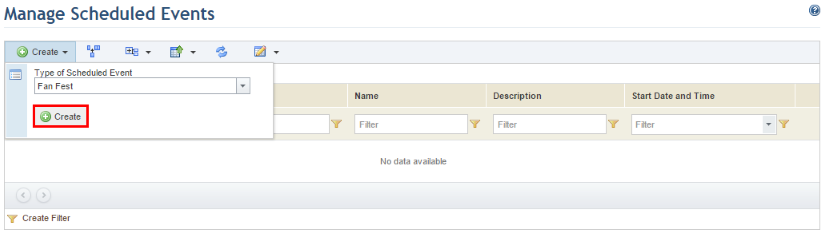
3. To create an event, click Create, select a type of scheduled event from the list, and then click Create (see figure below). Any custom types of scheduled events created in the Object Types section of the Administration module will be listed here.
The system displays a page where the properties of the scheduled event being created can be completed (see figure below). Any attributes created for scheduled events in the Objects and Attributes section of the Administration module will be displayed here.
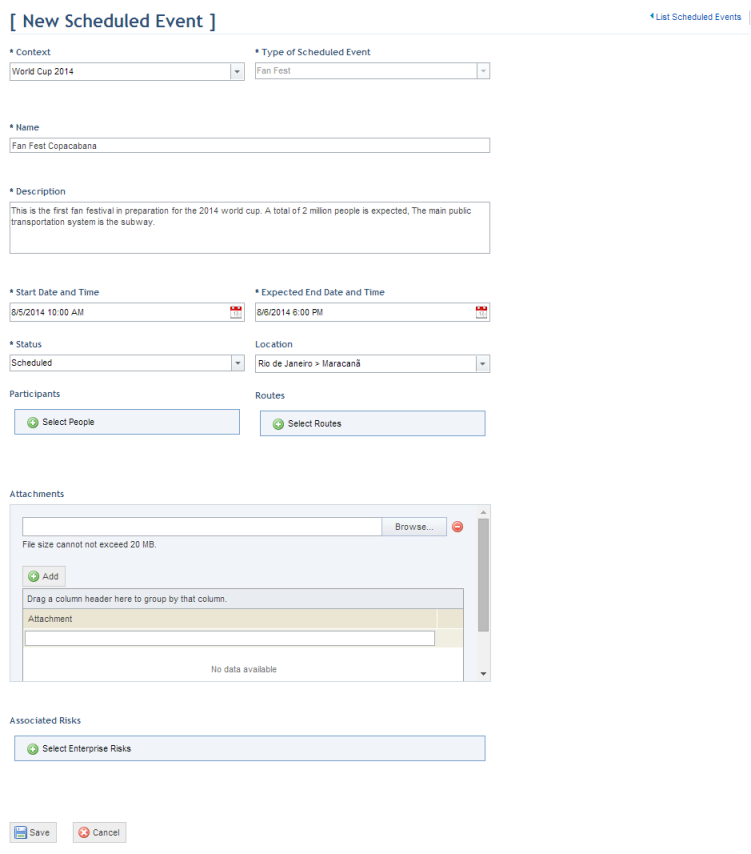
4. In the Context field, select the context to which the event belongs. Contexts are registered in the Manage Contexts section of this solution. Note that an event’s context can be changed at any time.
5. In the Name field, enter a name to identify the scheduled event using up to 2,500 characters.
6. In the Description field, provide additional details on the scheduled event using up to 5,500 characters.
7.
In the Start Date and Time and the Expected End Date and Time
fields, click Calendar ( ) and select the respective dates and
times when the event is scheduled to begin and end. The start date and time must
be earlier than the expected end date and time.
) and select the respective dates and
times when the event is scheduled to begin and end. The start date and time must
be earlier than the expected end date and time.
8. In the Status field, select the current status of the event. You can update this status at any time.
9. In the Location field, select an asset with the location of the event. All assets registered in the Organization module will be listed; however, the asset selected must have a defined location for the event to be displayed on the map.
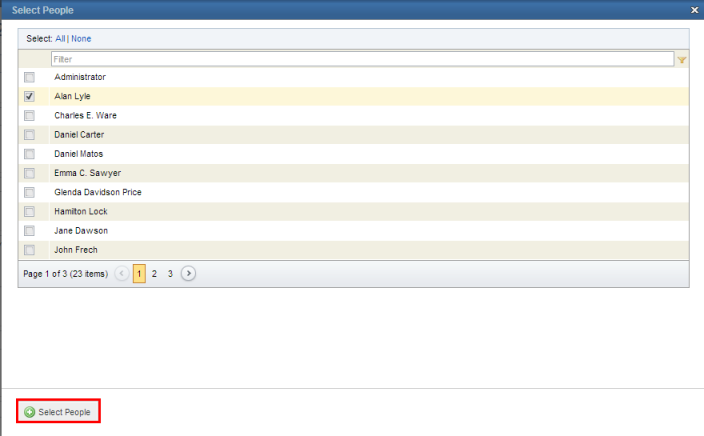
10. In the Participants field, click Select People to assign people previously registered in the Organization module as participants in the event.
11. In the pop-up window that appears, mark the checkboxes next to the people you want to assign and click Select People (see figure below).
12.
To remove a participant, click Remove ( )
next to their name.
)
next to their name.
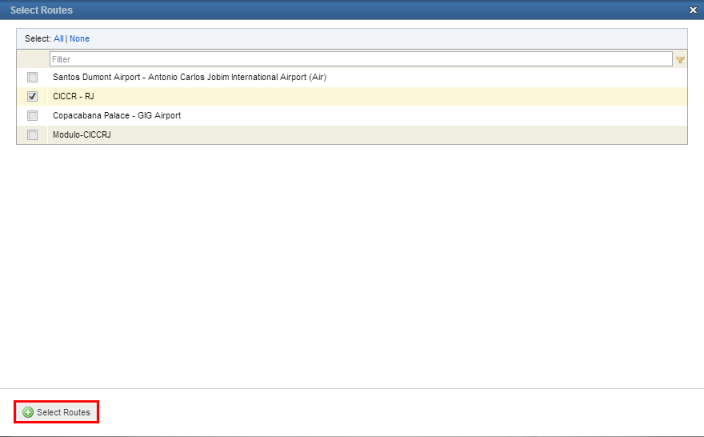
13. In the Routes field, click Select Routes to associate the routes to be used in the scheduled event. These routes are registered in the Manage Routes section of this solution.
14. In the pop-up window that appears, mark the checkboxes next to the routes you want to associate and click Select Routes (see figure below).
15.
To remove a route, click Remove ()
next to its name.
16. In the Attachments field, click Browse, select the file you want to associate with the event, and then click Add. To include more attachments, click Add and repeat the procedure. The attachments will be listed once the scheduled event is saved. Any number of files in any format can be included with a maximum size limit of 20 MB each.
17.
To remove an attachment, click Remove ()
next to its name.
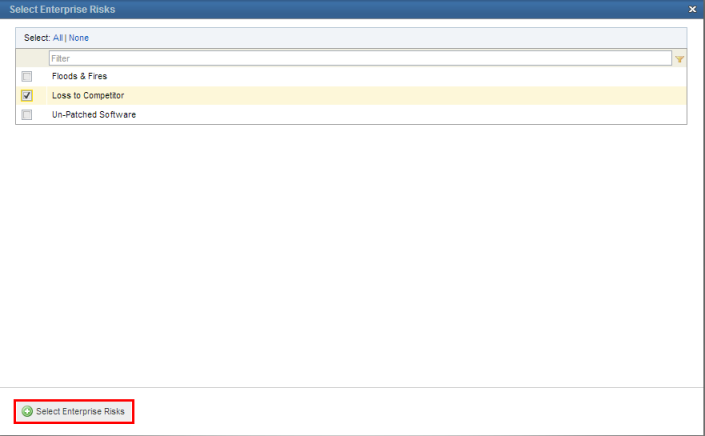
18. In the Associated Risks section, click Select Enterprise Risks to associate enterprise risks with the scheduled event. By default, any type of enterprise risk can be associated and all enterprise risks registered in the ERM solution are available for selection.
19. In the pop-up window that appears, select the enterprise risks you want to associate with the scheduled event and click Select Enterprise Risks (see figure below).
20. When finished, click Save. If you want to quit the operation, click Cancel.
The system displays a success message and enables the Activities and Assigned Resources tabs. Once saved, additional information on the scheduled event will be displayed, which will also be available as column options in the main list of events.
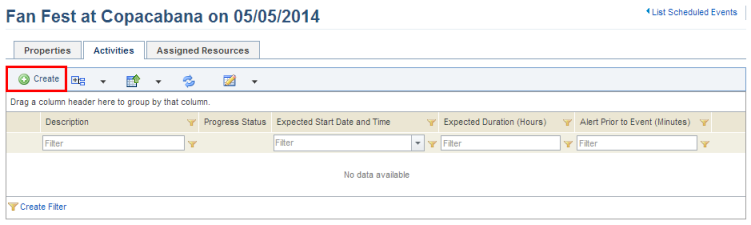
21. Click the Activities tab to associate the activities required to execute the event.
The system displays the Activities tab, where one or more activities can be registered and associated with the event.
22. To register an activity, click Create (see figure below).
The system displays a page where the properties of the activity can be registered (see figure below). Any attributes created for activities in the Objects and Attributes section of the Administration module will be available here.
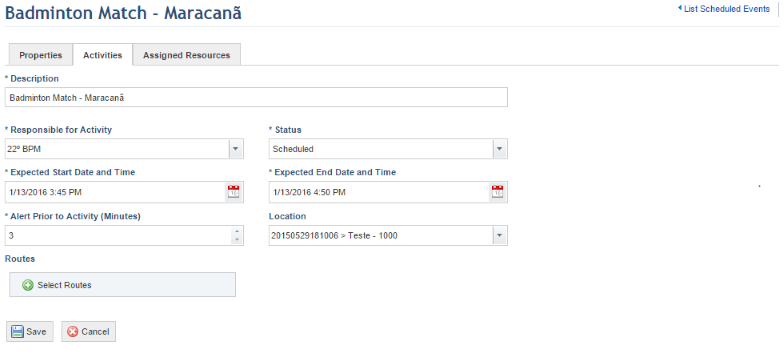
23. In the Description field, provide details on the activity using up to 5,500 characters.
24. In the Responsible for Activity field, select the group of people who will be responsible for the activity. Groups are registered in the Manage Groups of People section of the Organization module.
25. In the Status field, select the current status of the activity. You can update this status at any time.
26.
In the Expected Start Date and Time and Expected End Date and Time
fields, click Calendar () and select the respective dates and
times when the activity is expected to begin and end. The expected start date
and time must be earlier than the expected end date and time.
27. In the Alert Prior to Activity field, indicate how many minutes prior to the activity you would like to view alerts regarding it. These alerts will be displayed to all users in a pop-up window in the Event and Activity Map and Timeline sections.
28. In the Location field, select an asset to define the location of the activity. All assets registered in the Organization module will be listed; however, the asset selected must have a defined location for the activity to be displayed on the map.
29. In the Routes field, click Select Routes to associate the routes to be used in the activity. These routes are registered in the Manage Routes section of this solution.
30. In the pop-up window that appears, mark the checkboxes next to the routes you want to associate and click Select Routes (see figure below).
31.
To remove a route, click Remove ()
next to its name.
32. When finished, click Save. If you want to quit the operation, click Cancel.
The system displays a success message.
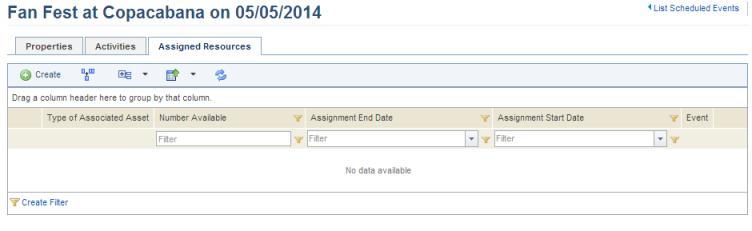
33. Click the Assigned Resources tab to create and assign resources that will be used in the event.
The system displays the Assigned Resources tab, where assigned resources can be registered (see figure below). Assigned resources are those that will be used in a particular event and can be created even if no corresponding available resources were registered in the Manage Available Resources section. For details on available resources, see Chapter 14: Events -> Scheduled Events -> Manage Available Resources.
Note: When the quantity of an assigned resource is greater than that of the corresponding available resource (indicating an insufficiency of resources), the system will identify and indicate this conflict in the Event and Activity Calendar section. However, for assigned and available resources to be correctly tested for conflicts, they should always use the same asset type.
34. To create and assign resources to the event, click Create.
The system displays a page where the properties of the assigned resource can be registered (see figure below). Note that, in addition to the default fields, any custom attributes created for assigned resources in the Objects and Attributes section of the Administration module will be available.
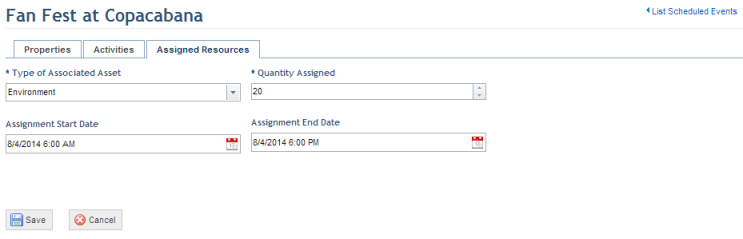
35. In the Type of Associated Asset field, select the asset type representing the resource. Note that any custom asset types registered in the Object Types section of the Administration module will be available here.
36. In the Quantity Assigned field, enter the number of units of the asset type selected that will be assigned to the event.
37.
In the Assignment Start Date and Assignment End Date fields, click
Calendar () and select the time interval
indicating when the resource will be assigned to the scheduled event. The start
date and time must be earlier than the end date and time. Note that once one of
these fields is completed, the other will be automatically required.
38. When finished, click Save. If you want to quit the operation, click Cancel.
The system displays a success message.