1. Access the Intelligence solution.
2. In the Intelligence Reports section, click Generate Intelligence Reports.
The system displays the list of all available intelligence reports to which you have permission. The Origin column indicates if the report was created in the system or if it was provided by Modulo.
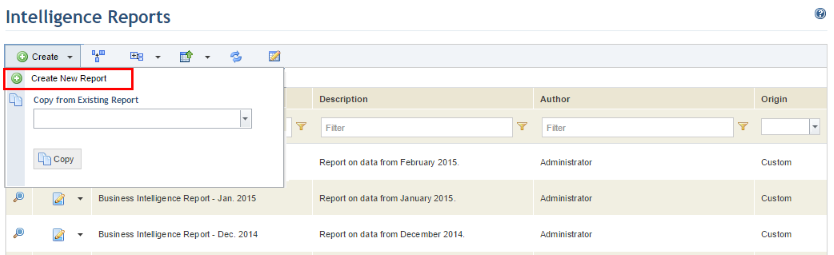
3. To create a custom report, click Create and select Create New Report (see figure below). If you want to create a report based on a copy, click Create, select the report you want to copy in the Copy from Existing Report field, and click Copy. Keep in mind that only reports of which you are the author or an audience member will be available for selection.
The system displays a page where you can specify the properties of the report.
4. In the Name field, enter a name for the report using a maximum of 100 characters.
5. In the Perspective field, select a perspective for the report. All the perspectives to which you have permission will be listed.
Note: If the report was copied and it uses a perspective to which you do not have permission, a new perspective must be selected before the report can be used. You can receive permission to perspectives by being included in their audiences through the Manage Perspectives section of this module, or by being granted the privilege to access perspectives for intelligence reports.
6. In the Description field, provide a description for the report using a maximum of 2,000 characters.
7. When finished, click Save. If you want to save the report and edit it through the Power View report editor, click Save and Edit Report. If you want to quit the operation, click Cancel.
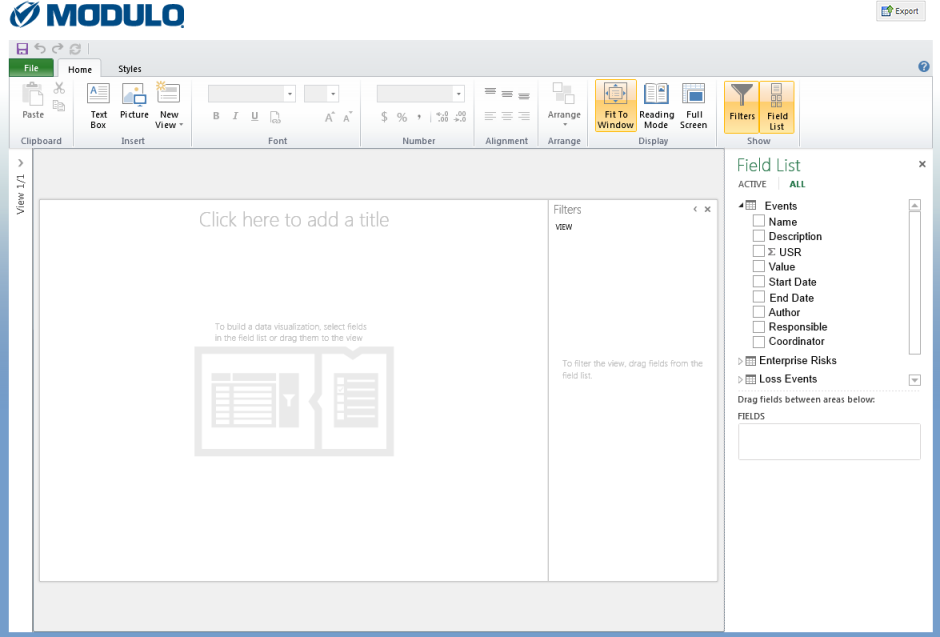
If you simply saved the report, the system displays a success message and returns to the main list of reports. If you saved it for editing in Power View, the system loads a blank report in Power View with all the tables available in Microsoft Analysis Services (see figure below). For details on using the features available in Power View, see Chapter 16: Intelligence -> Intelligence Reports -> Creating Reports in Power View, or http://technet.microsoft.com/en-us/library/hh213579.aspx. Note that users must have Microsoft Silverlight installed on their machines to access the reports. For more details on installing Microsoft Silverlight, see http://www.microsoft.com/getsilverlight/Get-Started/Install/Default.aspx.
8. To export the data used in the report to an Excel spreadsheet, click Export in the upper right corner of the report.
9. When finished configuring the report, click Save. If you want to quit and return to the list of reports, click Close in the upper right corner.
The system displays a success message.
10.
To view a report, click View ( ) next to it in the main
list.
) next to it in the main
list.
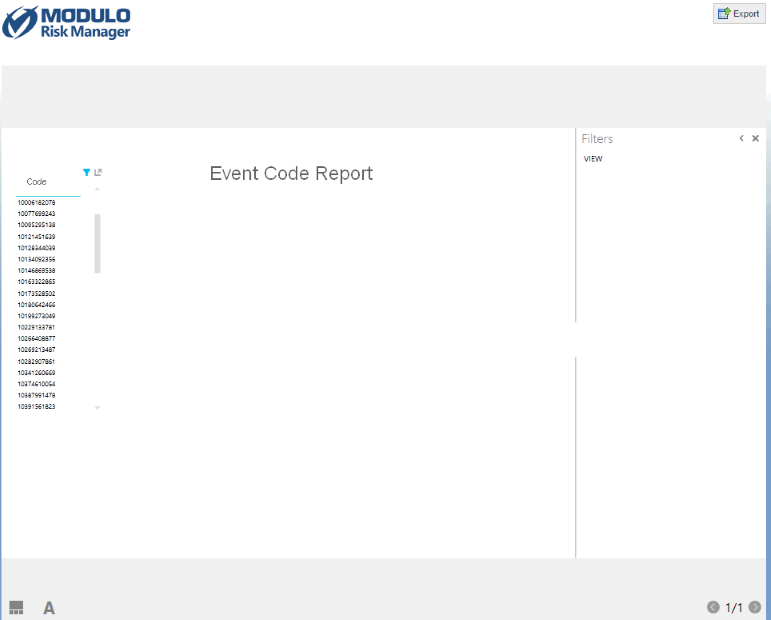
The system displays the report in a new window (see figure below).
11.
To display the results in full screen, click Pop-out ( ).
To select filters for the report, click Filters (
).
To select filters for the report, click Filters ( ).
).
The results will be displayed in full screen and the filters available will be displayed on the right.
12. Click
Expand ( ) to view the list of filters and
select the entries you would like to filter the report by. You may also search
for a filter by entering its name in the search box and clicking Search
(
) to view the list of filters and
select the entries you would like to filter the report by. You may also search
for a filter by entering its name in the search box and clicking Search
( ).
).
13.
To filter the results using the advanced filters option, click Advanced
Filter ( ) and select the conditions for the
search.
) and select the conditions for the
search.
14.
To clear the filters, click Clear Filter ( ).
).
15.
To close the report, click Close ( )
in the upper right corner.
)
in the upper right corner.
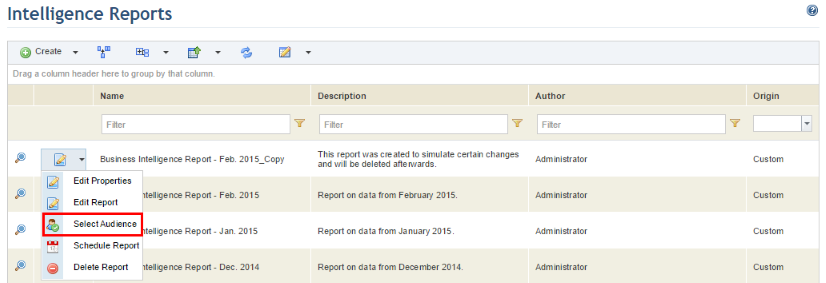
16. To include people or groups in the audience of a report, click Edit next to the report in the main list and click Select Audience (see figure below). These people and groups will receive permission to view the report in the Intelligence Reports section of the Home module and in this section, if they have permission to it. Any audience members with permission to manage intelligence reports will also be able to copy the report. Note that for default reports, only users with permission to view and edit them will be able to define their audience.
The system displays a page where the audience can be selected.
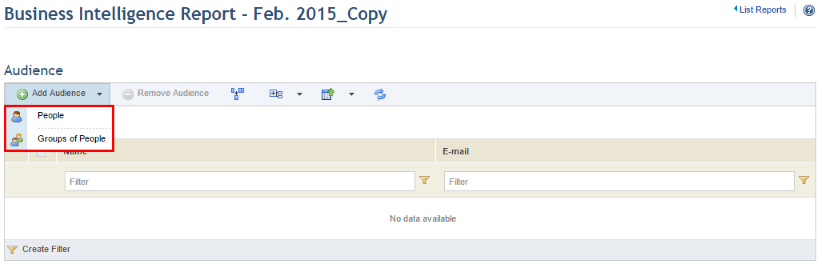
17. Click Add Audience and select People or Groups of People from the drop-down list that appears (see figure below).
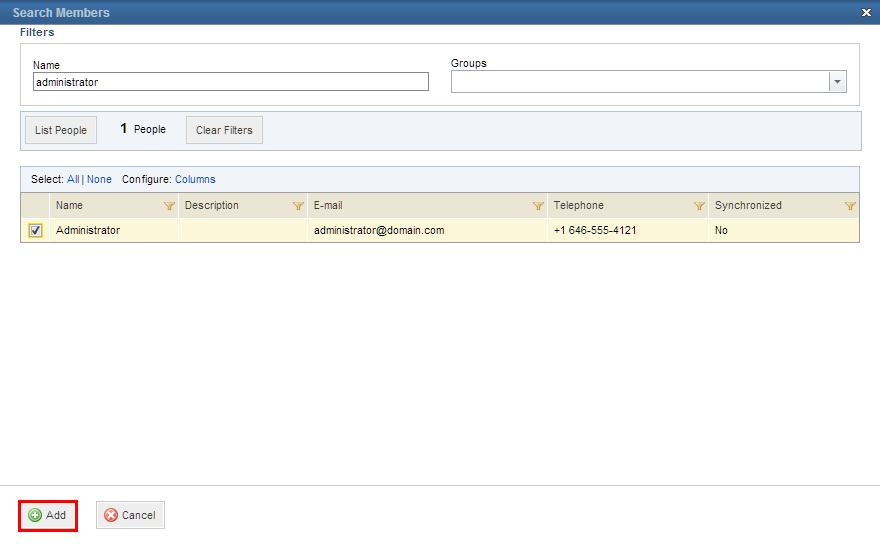
18. In the window that appears, select the people or groups of people you want to include in the audience of the report and click Add (see figure below).
The system displays a success message.
19. To remove people or groups from the audience, mark the checkboxes next to their names and click Remove Audience.
The system displays a success message.
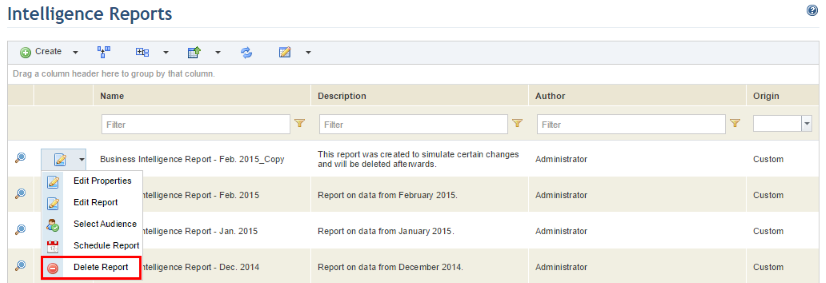
20. To delete a report, click Edit next to the report in the main list and select Delete Report (see figure below). Note that custom reports can only be deleted by their authors, while default reports can only be deleted by users with the specific privilege to delete them.
The system requests confirmation of the operation (see figure below).
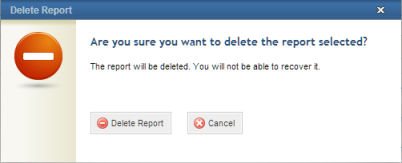
21. Click Delete Report to confirm. If you want to quit the operation, click Cancel.
The system displays a success message.