 )
(see figure below).
)
(see figure below).This topic explains how to enable and disable layers on the map. These layers can contain the results of system queries to georeferenced objects or custom maps created to display additional geographic information on the main map. Some default layers may be provided with the installation of the Integration module and the Events and Dispatch solutions, and additional layers can be configured as needed. By default, when a layer is created for use in a module or solution, it will also be available in the other modules and solutions that use the map. However, to view the layer in each solution you need to have access permission in the respective solution, as well as permission in the query, for query layers.
All layers can be enabled and disabled, with the exception of the layer for calls and occurrences, which is permanently enabled in the Dispatch solution. Note that, for query layers, you will only be able to view layers containing results of queries of which you are the author, editor, or an audience member.
Layers are configured ,in an XML file located in the installation folder for the system. However, in certain system installations, additional layers containing scheduled events from the Events solution are provided by Modulo and cannot be customized. For details on how to configure layers, see Appendix -> Layers for the Integration Map.
1. Access the Integration module, the Events solution, or the Dispatch solution.
2. Click Integration Map, View Event and Activity Map, Manage Calls, Manage Dispatches, or Monitoring.
3.
In the side menu to the right, click Layers ( )
(see figure below).
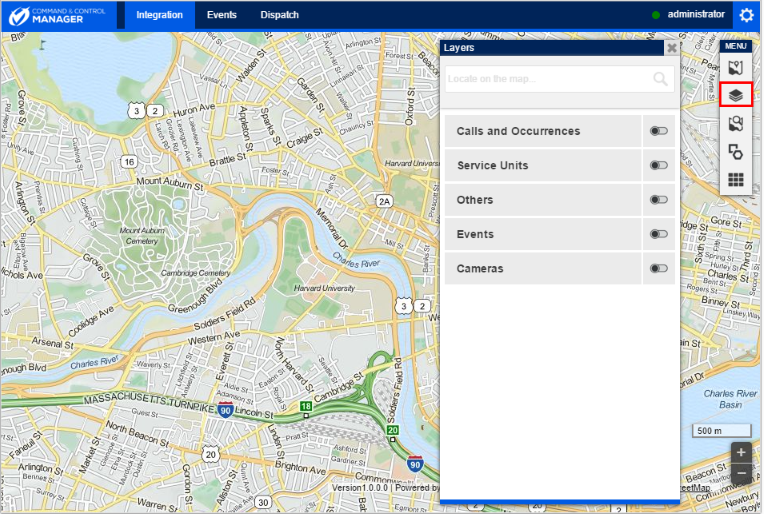
4. Click the name of a group layer to view the layers it contains and select the layers you want to enable.
5.
To enable all layers at once, click Enable/Disable ( )
next to the name of a group layer.
)
next to the name of a group layer.
The system plots the information from the layers selected on the map and the layers enabled are marked in blue.
6.
To refresh the results in a layer, click Refresh ( )
next to the enabled layer you want to refresh.
)
next to the enabled layer you want to refresh.
7.
To disable a layer, click its name or select Enable/Disable ()
next to the name of a group layer to disable all the layers under it.
Note: The system will display an error message for a query layer if one or more columns (properties) configured as required in the XML file for configuring layers are either not included in the query results or are included but left blank. For details, see Appendix -> Layers for the Integration Map -> How to Configure a Query Layer.