This topic explains how to create an attribute for an event. A maximum of 100 attributes can be created per event type with an additional 100 applied to all event types, as long as the total number of event attributes created in the system does not surpass the limit of 500.
Note that event attributes do not need to be published before they are made available for use. Once created, they will immediately be available in the Attributes tab of the Workflow module for the types of events they were associated with.
Default values can be provided for some of the attributes so that when the attribute is not completed in forms throughout the system, the value provided here for the attribute will be used by default. The default values are respected in workflow rules and also when creating and editing events through a spreadsheet, as long as the option to use the default values is marked when importing the events. However, default values are not respected in integration tasks to import events through an XML file.
If the type of an event is changed, the information provided for the attributes related to that type will be deleted, and the attributes pertaining to the new type will be displayed in the Attributes tab.
1. Access the Administration module.
2. Select Objects and Attributes from the Customizations option on the menu.
3. Click Edit next to Event and select the List Attributes option from the drop-down list that appears.
The system displays the list of attributes previously created for events.
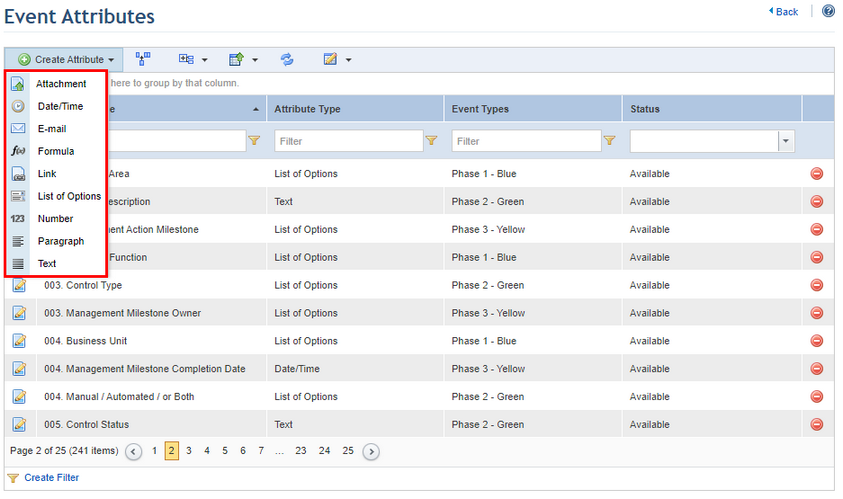
4. In the Event Attributes section, click Create Attribute and select the type of attribute you want to create (see figure below).
The types of attributes that can be created are as follows:
•Attachment: used to attach files related to events (see figure below). The attached files will also be displayed in the progress of the events. Note that, in the event spreadsheet, the fields for this attribute are disabled for editing.
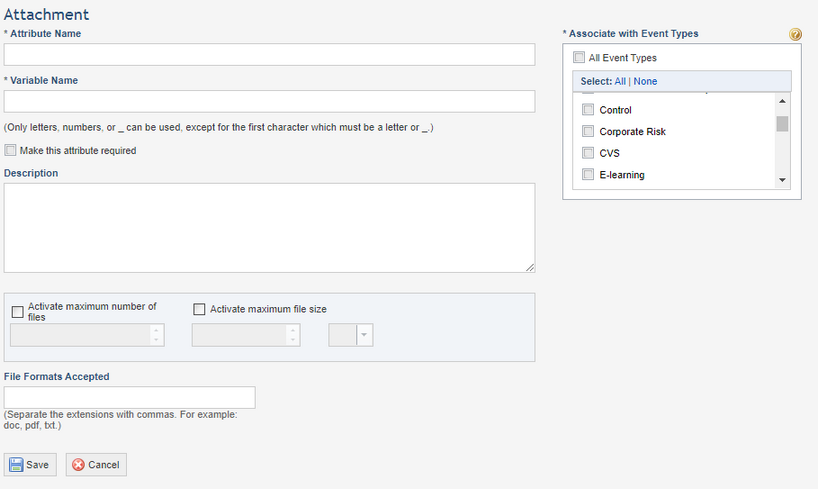
Listed below are explanations for each field to create an Attachment attribute:
|
Field Name |
Description |
|
*Attribute Name |
Enter the name of the attribute, as it will appear throughout the system. This field accepts a maximum of 50 characters and the name provided does not need to be unique. |
|
*Variable Name |
This variable will be suggested automatically based on the name of the attribute. It cannot be modified once saved; neither can it be the same as any other registered variable. It accepts letters, numbers, or an underscore, except for the first character, which must be a letter or an underscore. This field accepts a maximum of 28 characters. |
|
Make this attribute required |
Mark this checkbox if you want the attribute to be a required field in the event when it is completed through forms or the API. Note that workflow rules and integration tasks to import events from XML files and scanners will not respect this configuration. This behavior also applies when importing events created through spreadsheets, in which case this attribute will be imported blank to the system, even if marked as required. |
|
Description |
Enter a description to help identify the attribute. This description will only appear in the Objects and Attributes section of the Administration module. This field accepts a maximum of 400 characters. |
|
*Associate with Event Types |
Mark the checkboxes next to the event types you want to associate with the attribute, or select the option to apply the attribute to all types of events. Any custom types created in the Administration module will be also available for selection in this field. In the Workflow module, the attribute will only be available in events of the types selected here.
Keep in mind that in changing the type of an event, the attributes associated with the previous type will be removed and substituted by the attributes of the new type. |
|
Activate maximum number of files |
Mark this checkbox if you want to restrict the number of files that can be uploaded and enter the number in the field below. The maximum number of files accepted by the system is 20. If the checkbox is left unmarked, the system sets the limit to 20 files. |
|
Activate maximum file size |
Mark this checkbox if you want to restrict the file size, and then fill out the value and the measurement unit (bytes, kilobytes, or megabytes) in the fields below. If the checkbox is left unmarked, the system sets the limit to 20 MB. |
|
File Formats Accepted |
Enter the file formats you want to accept, separated by a comma if there is more than one. No period is necessary before the file extension. This field is not case sensitive. |
•Date/Time: used to register information on the event in one of three formats: date, time, and date and time (see figure below).
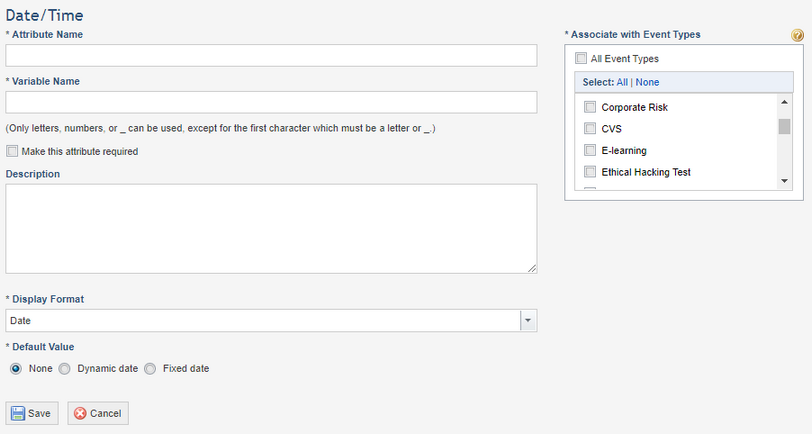
Listed below are explanations for each field to create a Date/Time attribute:
|
Field Name |
Description |
|
*Attribute Name |
Enter the name of the attribute, as it will appear throughout the system. This field accepts a maximum of 50 characters and the name provided does not need to be unique. |
|
*Variable Name |
This variable will be suggested automatically, based on the name of the attribute. It cannot be modified once saved; neither can it be the same as any other registered variable. It accepts letters, numbers, or an underscore, except for the first character, which must be a letter or an underscore. This field accepts a maximum of 28 characters. |
|
Make this attribute required |
Mark this checkbox if you want the attribute to be a required field in the event when it is completed through forms, spreadsheets, or the API. Note that workflow rules and integration tasks to import events from XML files will not respect this configuration. |
|
Description |
Enter a description to help identify the attribute. This description will only appear in the Objects and Attributes section of the Administration module. This field accepts a maximum of 400 characters. |
|
*Associate with Event Types |
Mark the checkboxes next to the event types you want to associate with the attribute, or select the option to apply the attribute to all types of events. Any custom types created in the Administration module will be also available for selection in this field. In the Workflow module, the attribute will only be available in events of the types selected here.
Keep in mind that in changing the type of an event, the attributes associated with the previous type will be removed and substituted by the attributes of the new type. |
|
*Display Format |
Specify if you want the only the date, only the time, or both the date and time to be entered as a value for the attribute. |
|
Default Value |
Set a default value for the attribute, which can be dynamic or fixed for date, time, or both date and time. In the Workflow module, the attribute will be automatically completed with this value, which can be edited as needed. The default value is also used if the attribute is left blank when importing events through a spreadsheet. |
•E-mail: used to include an e-mail address related to the event (see figure below).
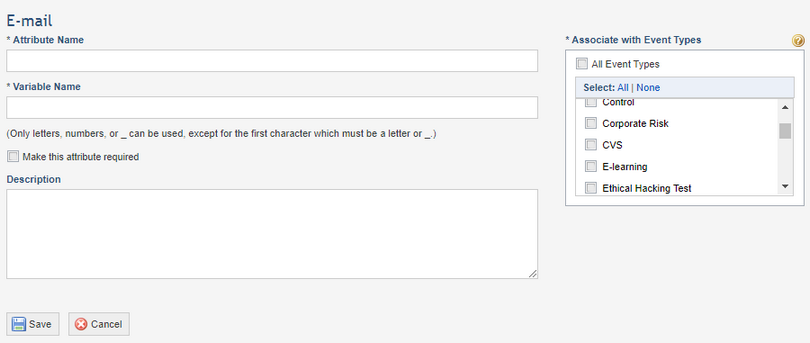
Listed below are explanations for each field to create an E-mail attribute:
|
Field Name |
Description |
|
*Attribute Name |
Enter the name of the attribute, as it will appear throughout the system. This field accepts a maximum of 50 characters and the name provided does not need to be unique. |
|
*Variable Name |
This variable will be suggested automatically, based on the name of the attribute. It cannot be modified once saved; neither can it be the same as any other registered variable. It accepts letters, numbers, or an underscore, except for the first character, which must be a letter or an underscore. This field accepts a maximum of 28 characters. |
|
Make this attribute required |
Mark this checkbox if you want the attribute to be a required field in the event when it is completed through forms, spreadsheets, or the API. Note that workflow rules and integration tasks to import events from XML files will not respect this configuration. |
|
Description |
Enter a description to help identify the attribute. This description will only appear in the Objects and Attributes section of the Administration module. This field accepts a maximum of 400 characters. |
|
*Associate with Event Types |
Mark the checkboxes next to the event types you want to associate with the attribute, or select the option to apply the attribute to all types of events. Any custom types created in the Administration module will be also available for selection in this field. In the Workflow module, the attribute will only be available in events of the types selected here.
Keep in mind that in changing the type of an event, the attributes associated with the previous type will be removed and substituted by the attributes of the new type. |
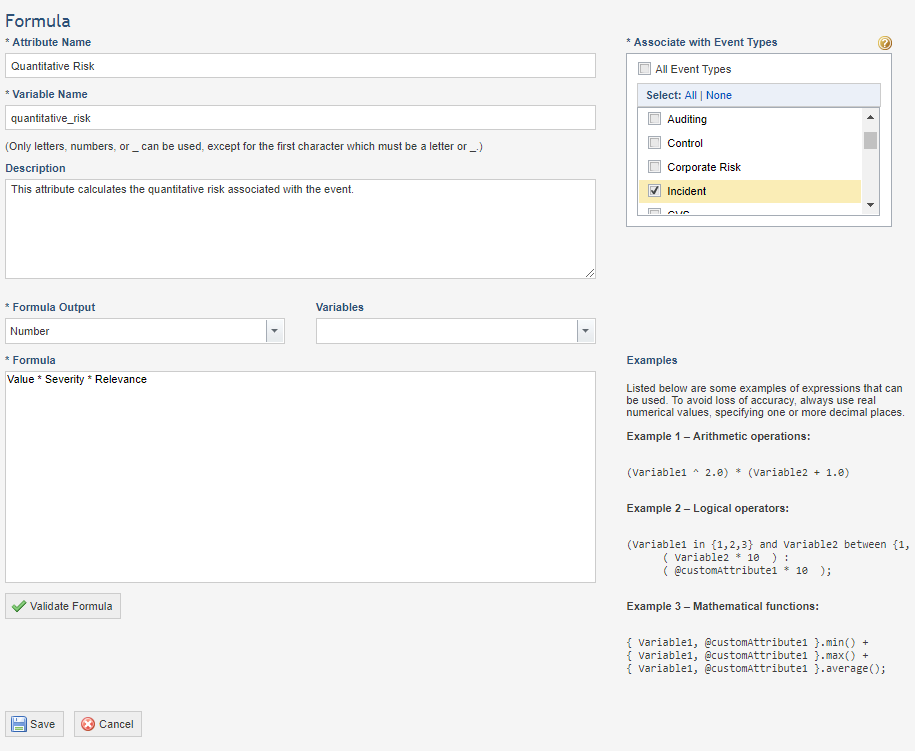
•Formula: used to calculate a value based on the properties and attributes of the event (see figure below). This value can be in the following formats: Date/Time, Number, or Text. Formulas with a numeric output accept numeric properties as variables, while Date/Time formulas accept numeric and date/time properties. Default properties and any custom attributes created for the event type, except for Attachment and Formula attributes, can be used in formulas with Text output. These properties and attributes will be available for use through the Variables field. You can also create custom variables for use in formulas by using the pound (#) as a prefix. For more information on how to write formulas, see Appendix -> Configurations for Formula Attributes.
Note that the fields to define the formula will be disabled until at least one event type is selected in the Associate with Event Types field, so that the corresponding variables may be used.
The value calculated will be updated each time the event is saved in the Workflow module. However, values must be provided for the properties and attributes used in the formula. Otherwise, the value of the field in the Attributes tab of the event will be "Undefined Value". Likewise, the formula will be invalid if it contains a variable referring to an attribute that was deleted from the system, in which case the field will display "Invalid Formula (deleted attribute)" in the object. If the formula is divided by zero, the "Invalid Formula (division by zero)" tag will be displayed in the event.
Keep in mind that the value generated by the formula is disabled for editing and that the values from the attributes or properties used in the formula or the formula itself must be changed for a new result to be generated. Also note that, in spreadsheets, the fields for this type of attribute will be disabled for editing and their values will only be recalculated when the spreadsheet is imported.
Listed below are explanations for each field to create a Formula attribute:
|
Field Name |
Description |
|
*Attribute Name |
Enter the name of the attribute, as it will appear throughout the system. This field accepts a maximum of 50 characters and the name provided does not need to be unique. |
|
*Variable Name |
This variable will be suggested automatically, based on the name of the attribute. It cannot be modified once saved; neither can it be the same as any other registered variable. It accepts letters, numbers, or an underscore, except for the first character, which must be a letter or an underscore. This field accepts a maximum of 28 characters. |
|
Description |
Enter a description to help identify the attribute. This description will only appear in the Objects and Attributes section of the Administration module. This field accepts a maximum of 400 characters. |
|
*Associate with Event Types |
Mark the checkboxes next to the event types you want to associate with the attribute, or select the option to apply the attribute to all types of events. Any custom types created in the Administration module will be also available for selection in this field. In the Workflow module, the attribute will only be available in events of the types selected here.
Keep in mind that in changing the type of an event, the attributes associated with the previous type will be removed and substituted by the attributes of the new type. |
|
*Formula Output |
Select the format of the value to be generated by the formula (Date/Time, Number, or Text). This field cannot be edited once the attribute is saved. |
|
Variables |
This field lists the variables available for the properties and attributes that were associated with the event type selected in the Associate with Event Types field. When selecting a variable, it will then be displayed in the Formula field, where it can be combined with the operators and functions available to create the formula. Variables representing custom attributes will be preceded by "@". |
|
*Formula |
Enter the formula to be used by selecting the variables and writing the mathematical functions available. |
|
Validate Formula |
Click this button to validate the formula entered in the Formula field. |
•Link: used to include a link related to the event (see figure below).
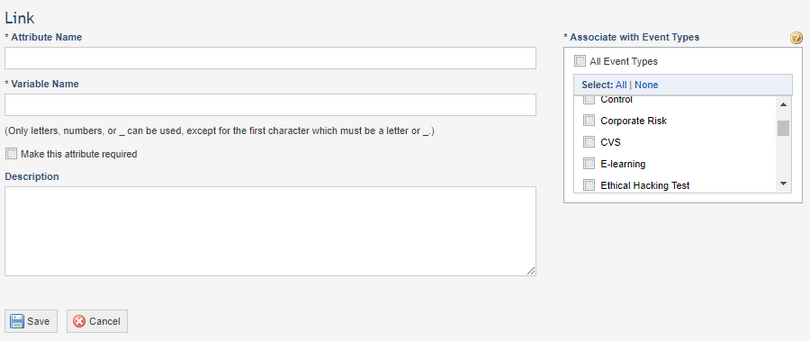
Listed below are explanations for each field to create a Link attribute:
|
Field Name |
Description |
|
*Attribute Name |
Enter the name of the attribute, as it will appear throughout the system. This field accepts a maximum of 50 characters and the name provided does not need to be unique. |
|
*Variable Name |
This variable will be suggested automatically, based on the name of the attribute. It cannot be modified once saved; neither can it be the same as any other registered variable. It accepts letters, numbers, or an underscore, except for the first character, which must be a letter or an underscore. This field accepts a maximum of 28 characters. |
|
Make this attribute required |
Mark this checkbox if you want the attribute to be a required field in the event when it is completed through forms, spreadsheets, or the API. Note that workflow rules and integration tasks to import events from XML files will not respect this configuration. |
|
Description |
Enter a description to help identify the attribute. This description will only appear in the Objects and Attributes section of the Administration module. This field accepts a maximum of 400 characters. |
|
*Associate with Event Types |
Mark the checkboxes next to the event types you want to associate with the attribute, or select the option to apply the attribute to all types of events. Any custom types created in the Administration module will be also available for selection in this field. In the Workflow module, the attribute will only be available in events of the types selected here.
Keep in mind that in changing the type of an event, the attributes associated with the previous type will be removed and substituted by the attributes of the new type. |
•List of Options: used to include a list of information related to the event (see figure below).
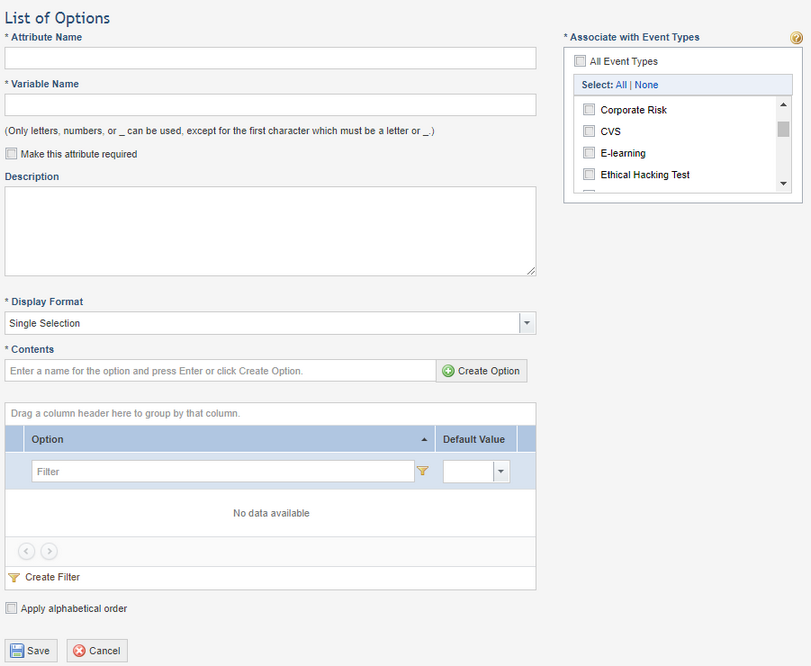
Listed below are explanations for each field to create a List of Options attribute:
|
Field Name |
Description |
|
*Attribute Name |
Enter the name of the attribute, as it will appear throughout the system. This field accepts a maximum of 50 characters and the name provided does not need to be unique. |
|
*Variable Name |
This variable will be suggested automatically, based on the name of the attribute. It cannot be modified once saved; neither can it be the same as any other registered variable. It accepts letters, numbers, or an underscore, except for the first character, which must be a letter or an underscore. This field accepts a maximum of 28 characters. |
|
Make this attribute required |
Mark this checkbox if you want the attribute to be a required field in the event when it is completed through forms, spreadsheets, or the API. Note that workflow rules and integration tasks to import events from XML files will not respect this configuration. |
|
Description |
Enter a description to help identify the attribute. This description will only appear in the Objects and Attributes section of the Administration module. This field accepts a maximum of 400 characters. |
|
*Associate with Event Types |
Mark the checkboxes next to the event types you want to associate with the attribute, or select the option to apply the attribute to all types of events. Any custom types created in the Administration module will be also available for selection in this field. In the Workflow module, the attribute will only be available in events of the types selected here.
Keep in mind that in changing the type of an event, the attributes associated with the previous type will be removed and substituted by the attributes of the new type. |
|
*Display Format |
Specify if you want to allow only one or more than one option to be selected as a value for the attribute. |
|
*Contents |
Enter the options that will be available for selection when choosing the value of the attribute. After entering an option, click Create Option to save it. Note that you can change the order in which the options appear by dragging and dropping them into place. To delete an option, click Delete. |
|
Default Value |
Mark this checkbox to indicate the default value for the attribute. In the Workflow module, the attribute will be automatically completed with this value, which can be edited as needed. The default value is also used if the attribute is left blank when importing events through a spreadsheet. For single selection attributes, only one option can be selected, and for multiple selection attributes, one or more options can be selected. |
|
Apply alphabetical order |
Mark this checkbox if you want the options created to be displayed in alphabetical order in the Attributes tab for events. |
•Number: used to register numeric information on the event (see figure below).
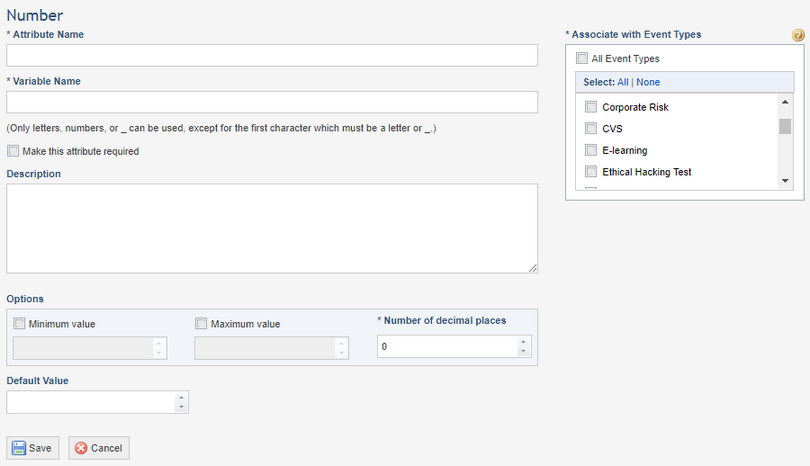
Listed below are explanations for each field to create a Number attribute:
|
Field Name |
Description |
|
*Attribute Name |
Enter the name of the attribute, as it will appear throughout the system. This field accepts a maximum of 50 characters and the name provided does not need to be unique. |
|
*Variable Name |
This variable will be suggested automatically, based on the name of the attribute. It cannot be modified once saved; neither can it be the same as any other registered variable. It accepts letters, numbers, or an underscore, except for the first character, which must be a letter or an underscore. This field accepts a maximum of 28 characters. |
|
Make this attribute required |
Mark this checkbox if you want the attribute to be a required field in the event when it is completed through forms, spreadsheets, or the API. Note that workflow rules and integration tasks to import events from XML files will not respect this configuration. |
|
Description |
Enter a description to help identify the attribute. This description will only appear in the Objects and Attributes section of the Administration module. This field accepts a maximum of 400 characters. |
|
*Associate with Event Types |
Mark the checkboxes next to the event types you want to associate with the attribute, or select the option to apply the attribute to all types of events. Any custom types created in the Administration module will be also available for selection in this field. In the Workflow module, the attribute will only be available in events of the types selected here.
Keep in mind that in changing the type of an event, the attributes associated with the previous type will be removed and substituted by the attributes of the new type. |
|
Minimum value |
Mark the checkbox if you want to require that a minimum numerical value be entered in the attribute, and then enter the value in the field. This will require that at least a certain value be entered before the system accepts the value entered for the attribute. |
|
Maximum value |
Mark the checkbox if you want to require that a maximum numerical value be entered in the attribute, and then enter the value in the field. This will require the value provided to respect the maximum value which, if exceeded, will cause the system to reject the value provided for the attribute. |
|
*Number of decimal places |
Enter the number of decimal places that the system will accept as values entered for this type of attribute. |
|
Default Value |
Specify a default value for the attribute, respecting any limits set in the previous fields. In the Workflow module, the attribute will be automatically completed with this value, which can be edited as needed. The default value is also used if the attribute is left blank when importing events through a spreadsheet. |
•Paragraph: used to register general information on the event in the form of a paragraph (see figure below).
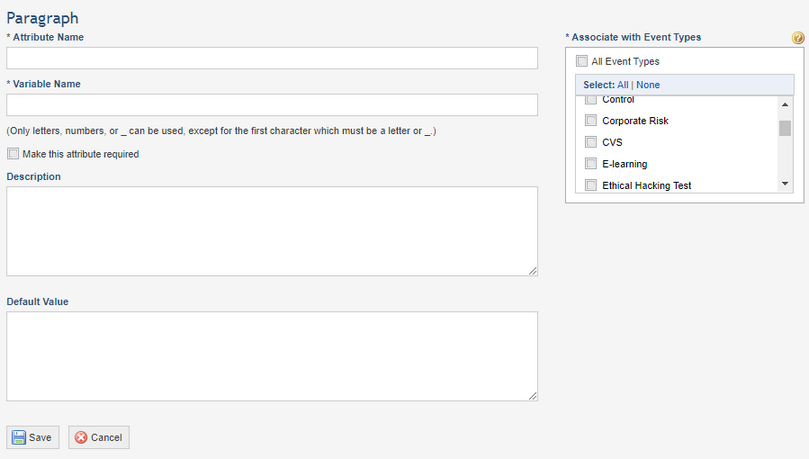
Listed below are explanations for each field to create a Paragraph attribute:
|
Field Name |
Description |
|
*Attribute Name |
Enter the name of the attribute, as it will appear throughout the system. This field accepts a maximum of 50 characters and the name provided does not need to be unique. |
|
*Variable Name |
This variable will be suggested automatically, based on the name of the attribute. It cannot be modified once saved; neither can it be the same as any other registered variable. It accepts letters, numbers, or an underscore, except for the first character, which must be a letter or an underscore. This field accepts a maximum of 28 characters. |
|
Make this attribute required |
Mark this checkbox if you want the attribute to be a required field in the event when it is completed through forms, spreadsheets, or the API. Note that workflow rules and integration tasks to import events from XML files will not respect this configuration. |
|
Description |
Enter a description to help identify the attribute. This description will only appear in the Objects and Attributes section of the Administration module. This field accepts a maximum of 400 characters. |
|
*Associate with Event Types |
Mark the checkboxes next to the event types you want to associate with the attribute, or select the option to apply the attribute to all types of events. Any custom types created in the Administration module will be also available for selection in this field. In the Workflow module, the attribute will only be available in events of the types selected here.
Keep in mind that in changing the type of an event, the attributes associated with the previous type will be removed and substituted by the attributes of the new type. |
|
Default Value |
Enter a text that will be used as the default value for the attribute. In the Workflow module, the attribute will be automatically completed with this value, which can be edited as needed. The default value is also used if the attribute is left blank when importing events through a spreadsheet. |
•Text: used to register information on the event in text format (see figure below). You can include a regular expression mask, which indicates how the field should be completed and prevents users from entering invalid information in it. For example, a field can be created for a code used internally by your organization configured only to accept the default format for this value.
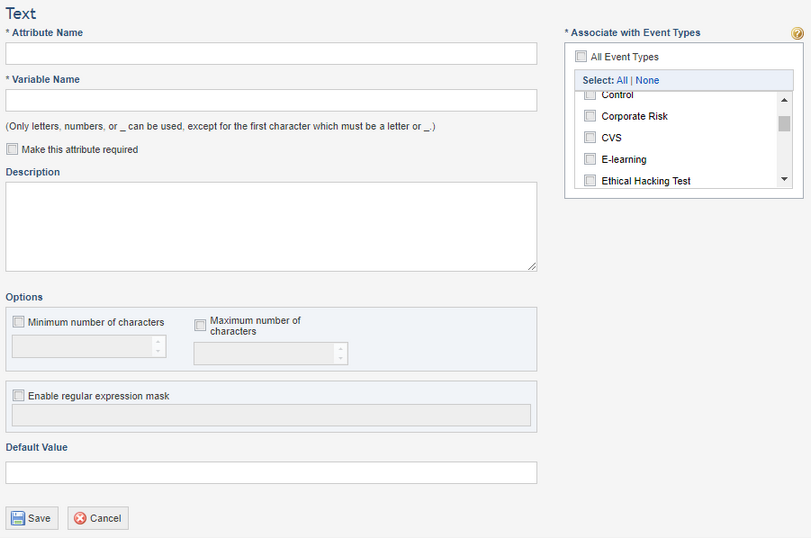
Listed below are explanations for each field to create a Text attribute:
|
Field Name |
Description |
|
*Attribute Name |
Enter the name of the attribute, as it will appear throughout the system. This field accepts a maximum of 50 characters and the name provided does not need to be unique. |
|
*Variable Name |
This variable will be suggested automatically, based on the name of the attribute. It cannot be modified once saved; neither can it be the same as any other registered variable. It accepts letters, numbers, or an underscore, except for the first character, which must be a letter or an underscore. This field accepts a maximum of 28 characters. |
|
Make this attribute required |
Mark this checkbox if you want the attribute to be a required field in the event when it is completed through forms, spreadsheets, or the API. Note that workflow rules and integration tasks to import events from XML files will not respect this configuration. |
|
Description |
Enter a description to help identify the attribute. This description will only appear in the Objects and Attributes section of the Administration module. This field accepts a maximum of 400 characters. |
|
*Associate with Event Types |
Mark the checkboxes next to the event types you want to associate with the attribute, or select the option to apply the attribute to all types of events. Any custom types created in the Administration module will be also available for selection in this field. In the Workflow module, the attribute will only be available in events of the types selected here.
Keep in mind that in changing the type of an event, the attributes associated with the previous type will be removed and substituted by the attributes of the new type. |
|
Minimum number of characters |
Mark the checkbox to require that a minimum number of characters be entered in the value of the attribute, and then specify the number in the field that is enabled. The system will then only accept values for attributes of this type with this minimum value entered. |
|
Maximum number of characters |
Mark the checkbox to require that a maximum number of characters be entered in the value of the attribute, and then specify the number in the field that is enabled. The system will not accept values for this type of attribute that exceed the maximum size specified here. |
|
Enable regular expression mask |
Mark the checkbox to enable a regular expression mask for this type of attribute, and then enter the mask in the field below that is enabled. For details on creating masks, see Appendix -> Masks -> Regular Expression Masks in Attributes. |
|
Default Value |
Enter a text that will be used as the default value for the attribute. This text must be within the character limits allowed for the attribute and respect the regular expression mask, if configured. In the Workflow module, the attribute will be automatically completed with this value, which can be edited as needed. The default value is also used if the attribute is left blank when importing events through a spreadsheet. |
5. When finished, click Save. If you want to quit the operation, click Cancel.
The system displays a success message. The attribute is now available in the Workflow module, under the Attributes tab for the types of events it was associated with.