This topic explains how to create and edit events through a specially formatted Excel spreadsheet provided by Modulo. Through this spreadsheet, you can create and edit events offline, and then import them to the system to save the changes.
Note that only generic and custom events can be created through the spreadsheet and that only open events can be exported for editing. However, all types of events can be edited through the spreadsheet.
Child events and those generated outside of the Workflow module can only be registered directly in the system. In addition, events cannot be deleted or have their types changed through the spreadsheet.
It is important to note that the e-mail notification feature only applies to events created or edited through the interface, and is not applicable to events created or edited through the spreadsheet. This means that e-mail notifications will not be sent when the spreadsheet is imported, regardless of whether the "Send e-mail notifications" option is enabled.
For details on importing the spreadsheet, see Chapter 10 -> Workflow -> Events -> Importing Events -> How to Import Events through a Spreadsheet.
1. Access the Workflow module.
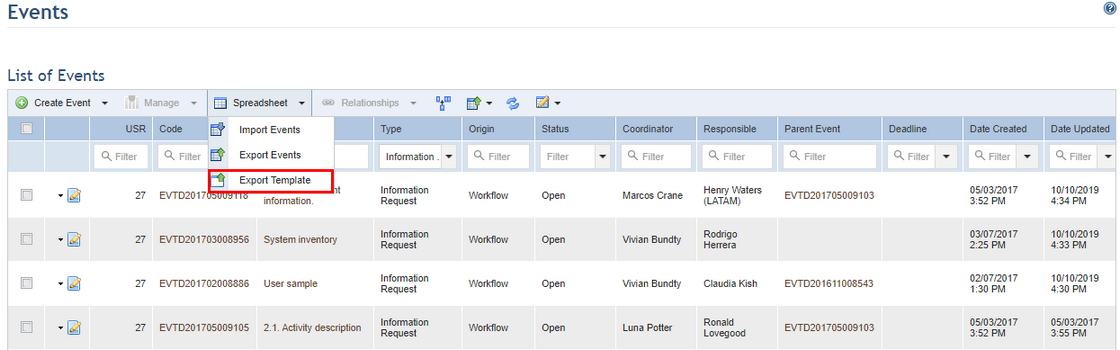
2. In the List of Events section, click Spreadsheet.
3. To export the blank template of the spreadsheet used to create events, select the Export Template option (see figure below). If you want to export open events for editing, mark the checkboxes next to their names and select the Export Events option. If no events are selected, all open events will be exported.
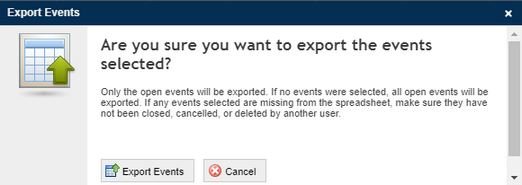
4. If you selected the Export Events option, click Export Events in the pop-up window that appears to export the events. If you want to quit the operation, click Cancel (see figure below).
5. In the dialog box that appears, save the file to your computer and open it.
When the file opens, the spreadsheet is displayed in Microsoft Excel, where you can begin creating and editing events in the Events worksheet (see figure below).

The table below explains how the fields under each column should be filled out:
|
Field |
Instructions |
|
Code |
This column is disabled for editing because the code of each event is automatically created by the system when the spreadsheet is imported. |
|
*Title |
Enter a title that allows the event to be easily identified. This field accepts a maximum of 2,500 characters. |
|
*Description |
Enter a description of what the event is about, its purpose, and the tasks related to it. This field accepts a maximum of 5,500 characters. |
|
*Urgency |
Specify the urgency with which the event should take place by selecting a value from the drop-down list according to the criteria below:
1 – Very Low 2 – Low 3 – Medium 4 – High 5 – Very High
Note that the urgency entered here becomes the U in the USR, the metric used to prioritize events. |
|
*Severity |
Specify the severity of the event by selecting a value from the drop-down list according to the criteria below:
1 – Very Low 2 – Low 3 – Medium 4 – High 5 – Very High
Note that the severity entered here becomes the S in the USR, the metric used to prioritize events. |
|
*Relevance |
Specify the relevance of the event by selecting a value from the drop-down list according to the criteria below:
1 – Very Low 2 – Low 3 – Medium 4 – High 5 – Very High
Note that the relevance entered here becomes the R in the USR, the metric used to prioritize events. |
|
Deadline |
Enter a deadline for the event in MM/DD/YYYY format. |
|
Expected Start Date |
Enter the estimated start date for the event to take place in the MM/DD/YYYY format. |
|
Expected End Date |
Enter the estimated end date for the event to take place in the MM/DD/YYYY format. This date must be equal to or greater than the expected start date. |
|
Start Date |
Enter the start date for the event in the MM/DD/YYYY format. |
|
End Date |
Enter the end date for the event in the MM/DD/YYYY format. This date must be equal to or greater than the start date. |
|
Date Created |
Enter the date the event was created in MM/DD/YYYY format. If left blank, the system will use the date on which the spreadsheet was imported. |
|
Value |
Enter a numeric value associated with the event, which may represent the expected loss, the initial budget, the estimated earnings, or any other value of relevance. This value must be entered in whole or decimal numbers without using any monetary symbols. For example 125.46. |
|
*Responsible |
Enter the name and e-mail address of the person or the name of the group of people to be assigned as responsible for the event. E-mail addresses should be entered in parentheses and group names should be preceded by an asterisk (*). For example John Smith (jsmith@abc.com) or *FinanceDept.
Note that the person or group must be included in the Workflow Module Users access profile in order to gain access to the module. |
|
*Coordinator |
Enter the name and e-mail address of the person or the name of the group of people to be assigned as event coordinator. E-mail addresses should be entered in parentheses and group names should be preceded by an asterisk (*). For example John Smith (jsmith@abc.com) or *FinanceDept.
Note that the person or group must be included in the Workflow Module Users access profile in order to gain access to the module. |
|
Associated Assets |
Associate assets with the event by entering the paths where they can be found in the organizational structure. Asset paths show the perimeters and sub-perimeters they belong to, separated by a backslash (\). More than one asset may be included here by separating each by a semicolon (;).
For example perimeter\assetname;perimeter2\subperimeter1\assetname2. |
|
Involved |
Enter the name and e-mail address of the person or the name of the group of people to be included as involved in the event. E-mail addresses should be entered in parentheses and group names should be preceded by an asterisk (*). More than one person or group may be included by separating each with a semicolon (;). For example John Smith (jsmith@abc.com);Anne Wright (awright@abc.com);*FinanceDept;*HRDept.
Note that the people or groups must be included in the Workflow Module Users access profile in order to gain access to the module. |
|
Location Description |
Enter any relevant information on the location of the event. |
|
Latitude |
Enter the latitude for the event’s location using up to six decimal places (for example, 34.060055). This value must be between -90 and 90. This field is not required, but, if filled out, the Longitude field must also be completed. |
|
Longitude |
Enter the longitude for the location where the event is taking place using up to six decimal places (-118.243446). This value must be between -180 and 180. This field is not required, but, if filled out, the Latitude field must also be completed. |
|
Progress |
Select a number from 0 to 100 from the drop-down list to indicate the event’s percentage of progress. |
|
*Event Type |
Select an event type from the drop-down list in this field. Event types created in the Object Types section of the Administration module will be listed in the Instructions worksheet for quick reference.
Keep in mind that for events previously registered in the system, any changes to this field will be ignored when the spreadsheet is imported. Also note that deleted event types may appear in the drop-down list of an event if the deleted type still exists. However, new events of the deleted type cannot be created. |
|
First Reviewer |
Enter the name of the person plus their e-mail address in parentheses or the name of the group that will be assigned as first reviewer. Group names should be preceded with an asterisk. For example Jane Dawson (j.dawson@email.com) or *groupname. |
|
Second Reviewer |
Enter the name of the person plus their e-mail address in parentheses or the name of the group that will be assigned as second reviewer. Group names should be preceded with an asterisk. For example Jane Dawson (j.dawson@email.com) or *groupname. |
|
Third Reviewer |
Enter the name of the person plus their e-mail address in parentheses or the name of the group that will be assigned as third reviewer. Group names should be preceded with an asterisk. For example Jane Dawson (j.dawson@email.com) or *groupname. |
|
Send e-mail notifications |
Select "Yes" from the drop-down list if you want the system to send e-mail notifications when the event is later edited through the interface. Otherwise, select "No". Keep in mind that the system does not send e-mail notifications when the spreadsheet is imported. |
|
Event Attributes |
A column will be displayed for each event attribute created in the Objects and Attributes section of the Administration module, as well as an indication of which event types the attribute applies to. Invalid values or values entered for attributes not applicable to the type of event being created will be disregarded and will not prevent the spreadsheet from being imported. If the content of a field exceeds the limit of 32,767 characters, the field will be locked for editing in the worksheet. Note that attributes marked as required in the system must be completed for the spreadsheet to be imported.
These fields should be completed according to the type of attribute, as follows: •Attachment: Files cannot be uploaded or deleted through the spreadsheet, although any files attached through the system will be listed. These will be displayed within brackets separated by semicolons. For example: [file name.pdf];[file name 2.doc].
When creating an event through the spreadsheet, this field will be imported blank, even if it is marked as required. •Date/Time: The date format should be the same as that configured for the attribute in the system. If the attribute is registered as "Date", the field should contain only the date; if "Time", the field should contain only the time; and if "Date/time", it may contain either one. If only the date will be included, the time will be 0:00; if only the time will be included, the date will be the import date. The date may be in two formats: MM/dd/yyyy or yyyy-MM-dd. The time should be in 24-hour format: HH:mm. •E-mail: E-mails should be entered using a maximum of 100 characters in the following format: username@domain.com. •Formula: This is a read-only field, so it is not possible to insert or edit values. These values will be re-calculated once the spreadsheet is imported. •Link: Links should be entered as http://www.domain.com or \\server\path. •List of Options: Attributes of this type should be completed with the options available for the attribute, separated by semicolons if more than one value is accepted. •Number: This type of attribute uses the decimal separator (“.”) and optionally the comma separator (“,”) to separate thousands. For example, the number 1200 should be filled in as 1,200.00. •Paragraph: This type of attribute should be completed with normal text. •Text: This type of attribute should be completed with normal text within any maximum or minimum limits set for it and according to the mask of regular expression if one was set for the field. |
6. When finished creating events in the spreadsheet, save the file to your computer.