This topic provides instructions on how to export and import policies through the Manage Policies section of this module.
A specially formatted Excel spreadsheet is provided with the system to allow policies to be created and edited offline. You can choose to download the blank template of this spreadsheet, or export previously registered policies for editing. Once completed, the spreadsheet must be imported for the changes to be saved in the system.
Keep in mind that you will only be able to export the policies to which you have permission. To access policies, you must have the View Policies privilege. It is also necessary that you have permission to create and edit policies so your changes can be saved in the system when importing the spreadsheet. Note that policies cannot be deleted through the spreadsheet.
1. Access the Policy module.
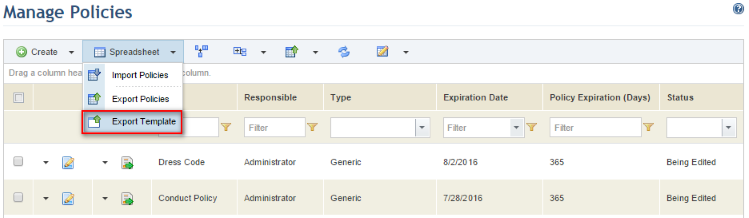
2. In the Manage Policies section, click Spreadsheet.
3. To export the blank template of the spreadsheet, select Export Template (see figure below). To export existing policies for editing, mark the checkboxes next to their names and select Export Policies. If no policies are selected, all of them will be exported. However, although all policies are exported, only those with the status "Being Edited" in the system can be edited.
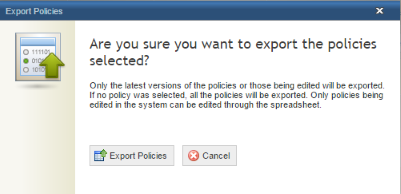
4. If the Export Policies option was selected, click Export Policies in the window displayed to confirm. If you want to quit the operation, click Cancel (see figure below).
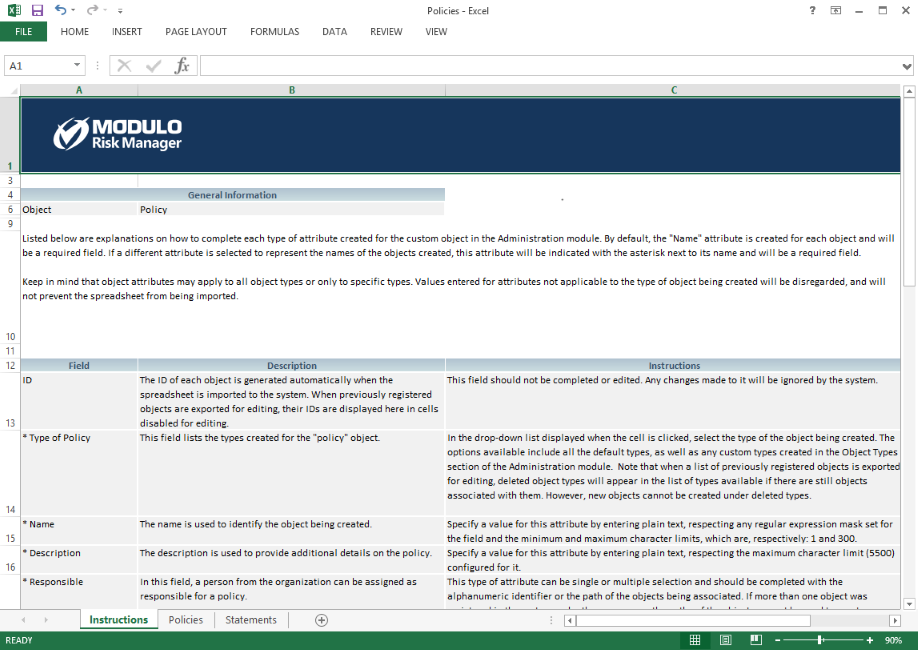
5. Open the file in Excel and make the necessary changes.
The file contains three tabs: Instructions, which contains information on how the spreadsheet must be completed, Policies, which contains the properties of each policy (type, name, description, responsible, etc.), and Statements, where the policy' statements can be created or edited (see figure below).
The tables below explain how each field in the Policies and Statements tabs must be completed. Fields preceded by an asterisk are required.
•Policies
|
Field |
Description |
|
ID |
The ID of each policy is automatically generated when the spreadsheet is imported to the system. The IDs of any exported policies will be displayed here. However, this field is disabled for editing. |
|
* Type of Policy |
Select the type of policy being created from the drop-down menu. All default and custom types of policies created in the Object Types section of the Administration module will be available here. Note that previously registered policies cannot have their types edited. If a policy type is deleted, any policies registered with this type will remain available for editing, but you will not be able to create new policies with the deleted type. |
|
* Name |
Enter a name to identify the policy using up to 300 characters. |
|
* Policy Code |
Specify a code for the policy using up to 30 characters. The code must be unique for each policy. |
|
* Description |
Enter a description for the policy using up to 5,500 characters, including any additional information that may be relevant. |
|
* Responsible |
Enter the name of the person who will be responsible for the policy. Note that this person must be previously registered in the Organization module. |
|
* Policy Expiration (Days) |
Enter the number of days in which the policy will expire using a value between 0 and 3,650. |
|
Reviewers |
Enter the name of each person who will be responsible for reviewing the policy. To assign more than one person, the names must be separated by a semicolon (";"), without spaces. The policy will be sent to each reviewer in the order indicated. |
|
Approvers |
Enter the name of each person who will be responsible for approving the policy. To assign more than one person, the names must be separated by a semicolon (";"), without spaces. The policy will be sent to each approver in the order indicated. |
|
* Status |
Indicate the status of the policy by selecting the corresponding option from the drop-down menu. Only policies with the "Being Edited" status can be imported. Previously registered policies cannot have their status changed through the spreadsheet. |
|
Policy Attributes |
Any policy attributes displayed in the spreadsheet were previously created and published in the Objects and Attributes section of the Administration module. If the attributes are marked as required in the system, they must be completed for the spreadsheet to be imported.
These fields should be completed according to the type of attribute, as follows: •Attachment: Files cannot be uploaded or deleted through the spreadsheet, although any files attached through the system will be listed. These will be displayed within brackets separated by semicolons. For example: [file name.pdf];[file name 2.doc].
When creating a policy through the spreadsheet, this field will be imported blank, even if it is marked as required. •Date/Time: The date format should be the same as that configured for the attribute in the system. If the attribute is registered as "Date", the field should contain only the date; if "Time", the field should contain only the time; and if "Date/time", it may contain either one. If only the date will be included, the time will be 0:00; if only the time will be included, the date will be the import date. The date may be in two formats: MM/dd/yyyy or yyyy-MM-dd. The time should be in 24-hour format: HH:mm. •E-mail: E-mails should be entered using a maximum of 100 characters in the following format: username@domain.com. •Formula: This is a read-only field, so it is not possible to insert or edit values. These values will be re-calculated once the spreadsheet is imported. •Georeference: Specify a value for this attribute by providing the coordinates in the following format: To define a point: {"type":"Point","coordinates":[-0.09046,51.51095]} To define a set of points: {"type":"LineString","coordinates":[[-0.09046,51.51095],[0,07446,44.51095]]} The coordinates for the points must be entered between brackets, in the "Longitude,Latitude" order. •Image: Image files are attached through the system and cannot be added through the spreadsheet. The files attached through the system will be displayed in brackets and separated by a semicolon, for example: "[image.jpeg];[image2.jpeg]".
When creating a policy through the spreadsheet, this field will be imported blank, even if it is marked as required. •Link: Links should be entered as: http://www.domain.com or \\server\path. •List of Options: Attributes of this type should be completed with the options available for the attribute, separated by semicolons if more than one value is accepted. •Number: This type of attribute uses the decimal separator (“.”) and optionally the comma separator (“,”) to separate thousands. For example, the number 1200 should be filled in as 1,200.00. •Outline: This type of attribute should be completed with the entries using a maximum of 100 characters with each separated by semicolons. For example: Entry 1;Entry 2. •Paragraph: This type of attribute should be completed with normal text. •Relationship: This type of attribute can be single or multiple selection and should be completed with the alphanumeric identifier or the path of the objects being associated. If more than one object with the same name has been registered in the system, the paths of the objects cannot be used to create relationships and the system will not allow the spreadsheet to be imported. Note that for multiple selection attributes, the paths or identifiers of the objects must be separated by semicolons (";") and no spaces when completing the cells. The identifier of each object should be preceded by "id:" with no spaces after the tag. The identifier is available through the API and can also be found by inserting the name of the object in the general search field and clicking on the corresponding entry, which will then display the identifier at the end of the URL. For business components, the path is specified as follows: business component level > business component type > business component name. For perimeters, the path is specified as follows: parent perimeter name > perimeter name. For assets, the path is specified as follows: parent perimeter name > subperimeter name > asset name. For other objects, simply enter their names. When the spreadsheet is exported, the list of related objects might be truncated if the maximum number of characters allowed in the cell is exceeded. If the cell is not edited, the spreadsheet will be imported and all existing relationships will be kept. To edit the relationships, the ellipses and brackets must first be removed. Note that, in this case, the new relationships will be imported and any previous ones will be deleted. •Text: This type of attribute should be completed with normal text within any maximum or minimum limits set for it and according to the mask of regular expression if one was set for the field.
For details on creating attributes, see Chapter 17: Administration -> Customizations -> Objects and Attributes. |
|
Version |
This field is disabled for editing and will be automatically completed with the current version of the policy. |
|
Author |
This field is disabled for editing and will be automatically completed with the name of the user who registered the policy. |
|
Date Created |
This field is disabled for editing and will be automatically completed with the date on which the policy was registered. For new policies, the value of this field will be the date on which the spreadsheet was imported. |
|
Updated By |
This field is disabled for editing and will be automatically completed with the name of the person who last updated the policy. |
|
Date Updated |
This field is disabled for editing and will be automatically completed with the date on which the policy was last updated. For policies being edited through the spreadsheet, the value of this field will be the date on which it was imported. |
•Statements
|
Field |
Description |
|
ID |
The ID of each statement is automatically generated when the spreadsheet is imported to the system. The IDs of any exported statements will be displayed here. However, this field is disabled for editing. |
|
* Policy Code |
Enter the code of the policy to which the statement belongs. The code of each policy can be found in the Policies tab of the spreadsheet or in the Manage Policies section in the system. Note that only policies listed in the spreadsheet can be associated. |
|
Code of Parent Statement |
Enter the code of the parent statement. The code of each statement can be found in the Statements tab of the spreadsheet or in the Statements tab of a policy in the system. Note that only statements listed in the spreadsheet can be associated and that the child and parent statements must belong to the same policy. Leave this field blank if you want to register the statement directly under a policy, without a parent statement. |
|
* Statement |
Enter or edit the statement using plain text. There is no character limit for this field. |
|
* Statement Code |
Specify a code for the statement using up to 30 characters. The code must be unique for each statement. |
|
Author |
This field is disabled for editing and will be automatically completed with the name of the person who created the statement. |
|
Date Created |
This field is disabled for editing and will be automatically completed with the date on which the statement was created. For new statements, the value of this field will be the date on which the spreadsheet was imported. |
|
Updated By |
This field is disabled for editing and will be automatically completed with the name of the person who last updated the statement. |
|
Date Updated |
This field is disabled for editing and will be automatically completed with the date on which the statement was last updated. For statements being edited through the spreadsheet, the value of this field will be the date on which the spreadsheet was imported. |
6. When finished, save the file on your computer.