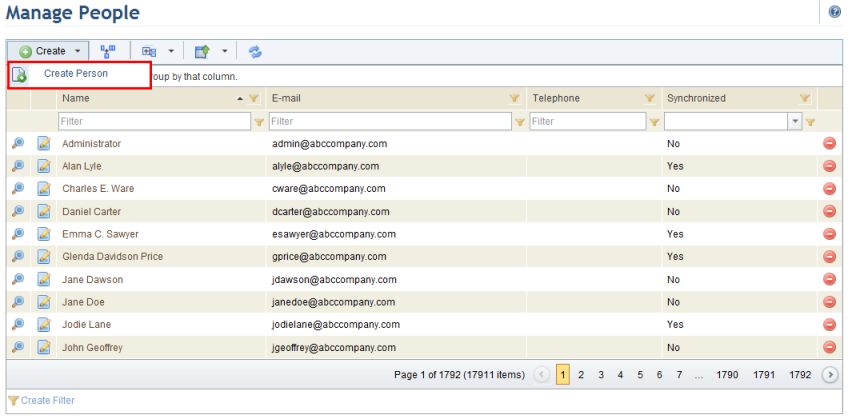
1. Access the Organization module.
2. Select Manage People from the People option on the menu.
The system displays the list of people registered.
3. In the Manage People section, click Create and select the Create Person option (see figure below).
The system displays a screen where information on the new person can be entered (see figure below).
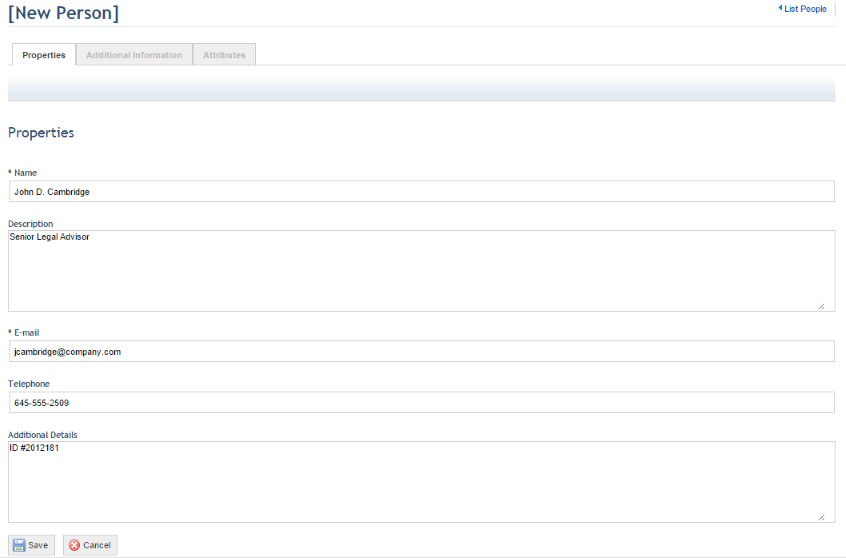
4. In the Name field, enter the first and last name of the person being created. This field accepts a maximum of 400 characters. Note that two people can be created under the same name as long as the e-mail addresses provided for them are different.
5. In the Description field, provide information of relevance on the person and their primary responsibilities in the organization.
6. In the E-mail field, provide a contact e-mail address for the person being created. This field accepts a maximum of 100 characters and is required, as the e-mail address will be used by the system to send notification messages on the person’s activities and responsibilities in the system.
7. In the Telephone field, enter the primary contact number for the person.
8. In the Additional Information field, enter any relevant details on the person that will be helpful to identify or contact the person. This field can also be used to specify which people will be copied on notification e-mails for sent interviews in risk projects. To do so, specify one or more e-mails in the following format:
{CC:username@domain.com;username@domain.com}.
9. When finished, click Save. If you want to quit the operation, click Cancel.
The system displays a success message and enables the Additional Information and Attributes tabs.
10. Click the Additional Information tab to view additional information on the person and add a profile picture.
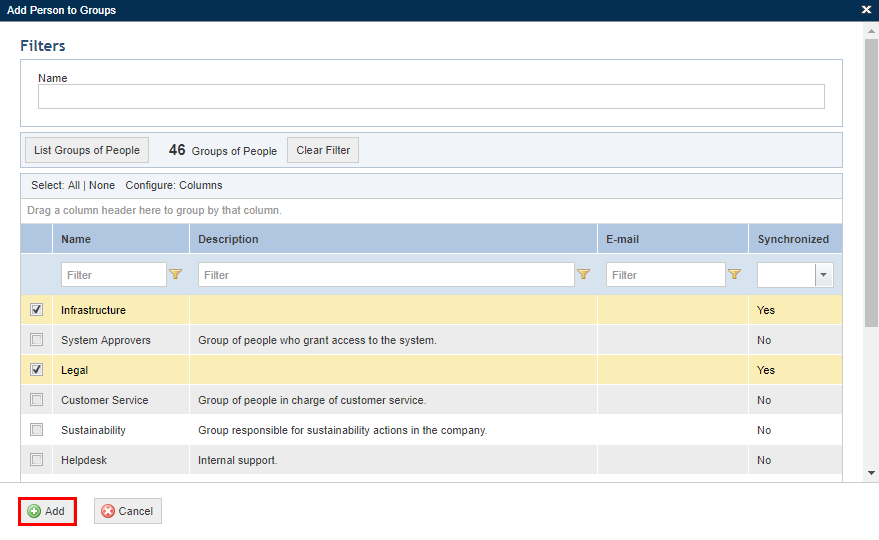
The system displays information on the person, including who registered the person in the system and when, as well as who updated the person's information and when. In the Groups field you can add the person to groups and view the list of groups in which they have been included (see figure below). You can also add and remove people from groups through the Manage Groups of People section of this module.

11. Under the Change Picture field, click Browse to select a photo for the person. This photo will be used for the person's account in the homepage of the Home module, where it can also be changed by the users themselves through the Preferences section.
12. Once the file to be imported is located, click Import File.
13. To remove the picture, click Delete.
14. In the Groups field, click Add Groups to add the person to groups registered in the system.
15. In the pop-up window that appears, mark the checkboxes next to the groups to which you want the person to be added and click Add (see figure below).
The system displays a success message.
16. To remove a
person from a group, click Remove ( )
next to the name of the group from which you want the person to be removed.
)
next to the name of the group from which you want the person to be removed.
17. In the pop-up window that appears, click Remove Member to confirm the removal. If you want to quit the operation, click Cancel.
The system displays a success message.
18. Click the Attributes tab to provide values for any attributes created for people in the Administration module (see figure below). For details on managing attributes, see Chapter 17: Administration -> Customizations -> Objects and Attributes.
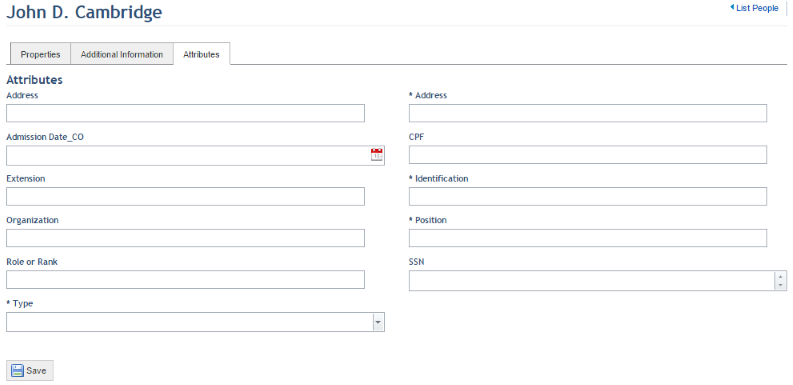
19. To enter or edit the value of an attribute, click the field for it. The information that can be entered for each depends on the type of attribute (Attachment, Date/Time, E-mail, etc.) and any configurations set for it (regular expression mask, maximum or minimum number of characters, etc. Note that some attributes may be required.
20. When finished, click Save at the end of the page.
The system displays a success message.
21. Click the List People link in the upper right corner to return to the main list of people.
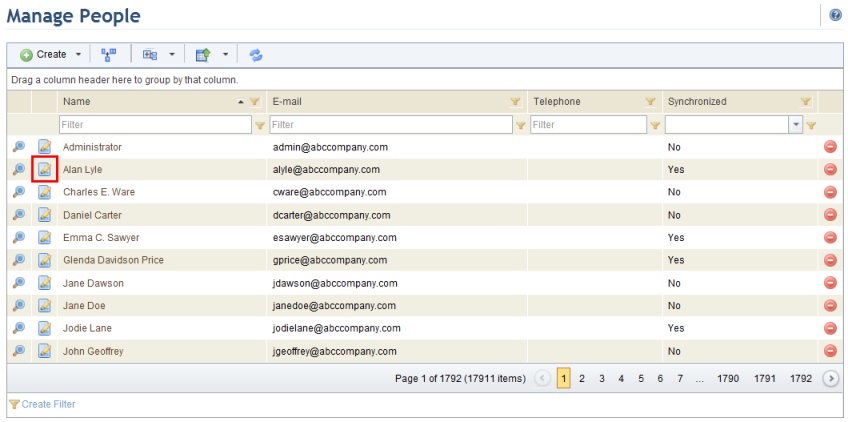
22. If you want to edit information on a person, click Edit next to the name of the person whose information you want to edit (see figure below).
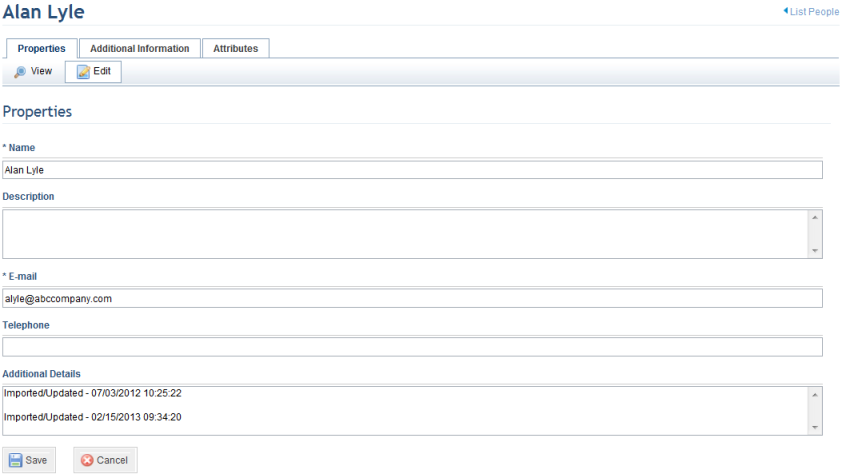
The system displays a screen where the properties of the person can be edited (see figure below).
Note: When users are imported through an LDAP integration task, it may be that some fields are blank. This happens because they may not be required fields in the external directory. In this case, remember to complete them either in the directory or in the system, as this information is used by the system (for example, the e-mail address is used to send notifications). This information will only be imported the first time the person is imported. Information updated after this in the directory will not be updated through future integration tasks.
23. Make the necessary changes and click Save. If you want to quit the operation, click Cancel.
The system displays a success message.