This topic explains how to create custom objects, which are only available for use through the API. Once created, these objects must be published so that they will be available in the API and so that attributes can be created for them. For details on how to publish custom objects, see Chapter 17: Administration -> Customizations -> Objects and Attributes -> How to Publish and Delete Objects and Attributes.
1. Access the Administration module.
2. Select Objects and Attributes from the Customizations option on the menu.
3. In the Objects and Attributes section, click Create Object.
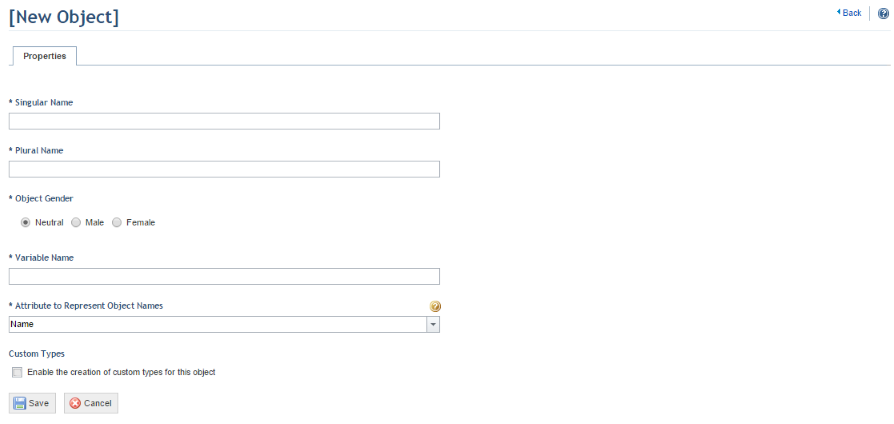
The system displays a page where the new object can be registered (see figure below).
4. In the Singular Name field, enter the singular name of the object being created.
5. In the Plural Name field, enter the plural name of the object being created.
6. In the Object Gender field, select between Neutral, Male, and Female. This is used to allow the messages and alerts used throughout the system to agree with the gender of the object.
7. In the Variable Name field, the single name of the object is automatically entered, by default. This field is later used to identify the object, and cannot be edited after the object is published.
8. In the Attribute to Represent Object Names field, you can select an attribute to identify the object. When creating an object, two attributes are created automatically for it: ID and Name. After creating the object, any Text, Number, Date/Time, E-mail, Link, and Paragraph attributes you create on the Attributes tab will be available for selection in this field by refreshing the page. Note that an attribute selected to represent the names of the objects cannot be deleted until another attribute is selected. This field cannot be edited after the object is published.
9. Mark the Enable the creation of custom types for this object checkbox to allow custom types of objects to be created in this module in the Object Types section. This will allow attributes to be applied to one or more types of objects, instead of all of them. This field cannot be edited after the object is published.
10. When finished, click Save. If you want to quit the operation, click Cancel.
The system displays a success message.
11. Click Back in the upper right corner to return to the list of objects.