This topic explains how to create a custom module in the system, including how to create its sections and configure the way they are displayed on the module homepage.
Each module registered must be enabled for it to be available for use. For details, see Chapter 17: Administration -> Customizations -> Module Editor -> How to Edit, Enable, and Disable a Custom Module.
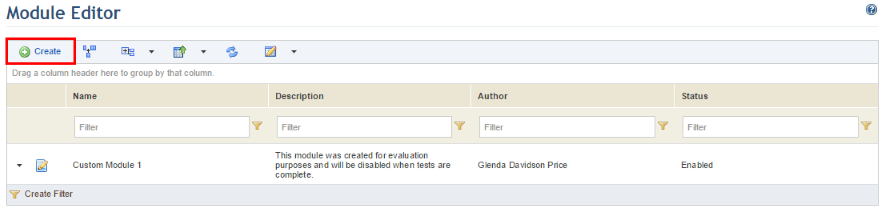
1. Access the Administration module.
2. Under Customizations, select the Module Editor option.
The system displays the list of previously registered custom modules.
3. Click Create to create a new module (see figure below).
Note: By default, up to five custom modules can be created per system installation. To enable the creation of additional custom modules, get in touch with the Support team.
The system displays a page where the properties of the module must be provided (see figure below).
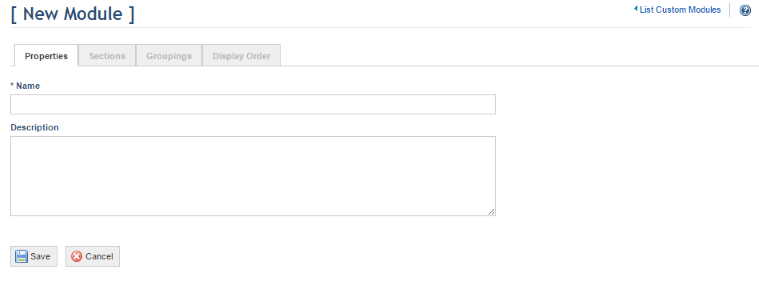
4. In the Name field, enter the name of the module as it will appear in the main system menu, using up to 20 characters.
5. In the Description field, provide additional details on the module using up to 1,000 characters. This description will appear in the Properties tab of the module and in the Description column in the list of custom modules.
6. Click Save. If you want to quit the operation, click Cancel.
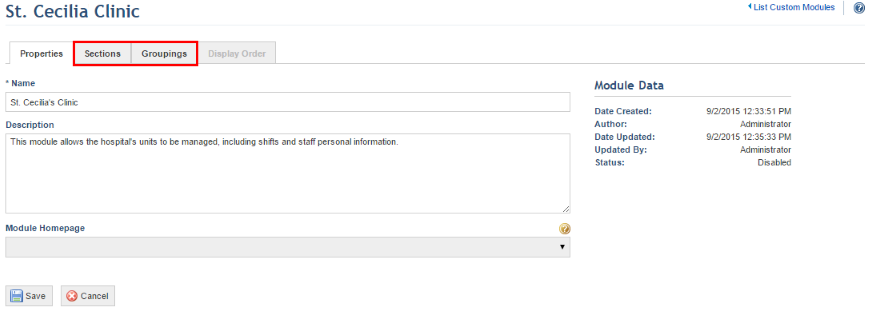
The system displays a success message and enables the Sections and Groupings tabs (see figure below). The Module Homepage field is also displayed, which can be completed after one or more sections have been created.
7. To create a new section, access the Sections tab, click Create, and select the type of section from the drop-down list that appears (see figure below).
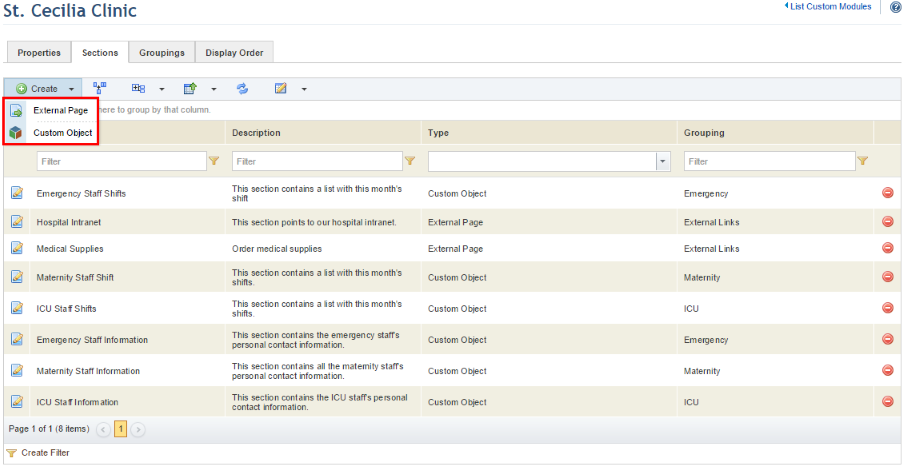
8. To create a section containing an external page, select External Page.
The system displays an area where you can enter information on the site that will be accessed through the section (see figure below). The area on the right contains an example of how the data entered in each field will appear on the main page of the module.
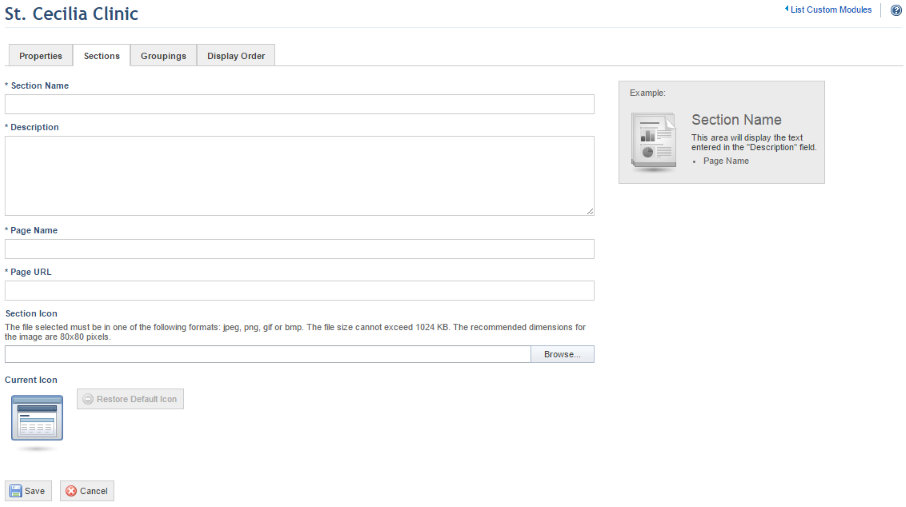
9. In the Section Name field, enter the name of the section as it will appear throughout the module, using up to 30 characters.
10. In the Description field, enter a brief description of the section using up to 250 characters. This description will appear below the section name.
11. In the Page Name field, enter the name of the web page that will be displayed in the section, using up to 30 characters. This name will appear as a link below the section description.
12. In the Page URL section, enter the link to the external page using up to 2,000 characters. This link must be in the following format: https://site.com.
Note: The site used must allow access via IFrame. If restrictions on the site's server prevent this type of access, the site will not be displayed in the module. In addition, because Modulo Risk Manager environments use HTTPS, we recommend only adding sites that also use HTTPS to avoid security conflicts in certain browsers. It is also important to ensure that the site is not blocked by proxy or browser settings.
13. In the Section Icon field, select the image that will appear next to the section throughout the module. If no image is selected, a default icon will be used.
14. In the Current Icon field, click Restore Default Icon if you want to remove the icon you selected and use the default icon.
15. Click Save. If you want to quit the operation, click Cancel.
The system displays a success message.
16. To create a section to manage the instances of a custom object, click Create in the Sections tab and select the Custom Object option.
The system displays an area where information on the section can be provided (see figure below). The area on the right contains an example of how each field appears on the default homepage for the module.
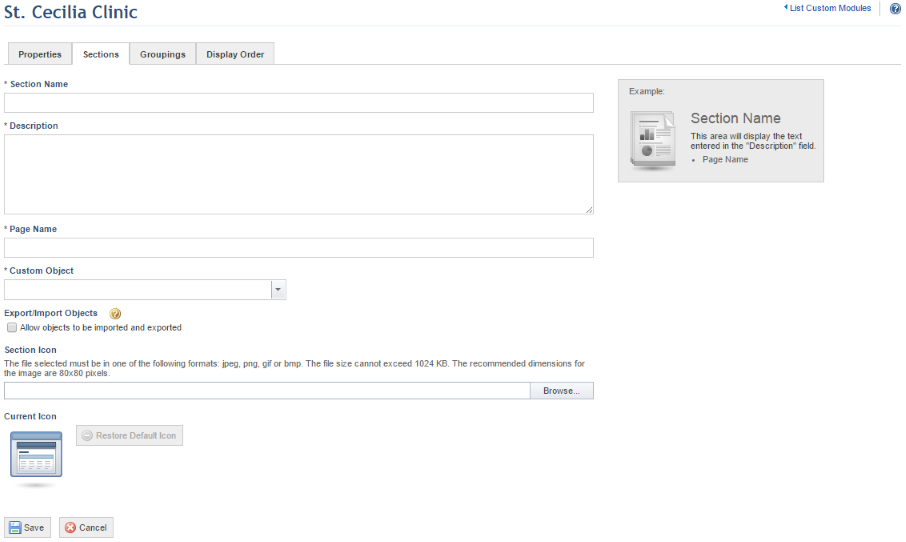
17. In the Section Name field, enter a name for the section using up to 30 characters.
18. In the Description field, enter a brief description of this section using up to 250 characters. This description will appear below the section's name.
19. In the Page Name field, enter a title for the link that will point to the section using up to 30 characters. This link will appear below the description of the section.
20. In the Custom Object field, select the custom object whose instances will be managed in this section. All custom objects registered and published in the Objects and Attributes section of the Administration module will be listed. Note that after selecting a custom object for a section, it can no longer be selected for other sections.
21. In the Export/Import Objects field, mark the Allow objects to be imported and exported checkbox to create a new subsection where instances can be exported, edited through an Excel spreadsheet, and imported back into the system.
22. In the Section Icon field, select an image to illustrate the section throughout the module. If none is selected, a default image will be used.
23. In the Current Icon field, click Restore Default Icon to remove the icon you selected and use the default icon.
24. Click Save. If you want to quit the operation, click Cancel.
The system displays a success message.
25. If you want to group certain sections so that they appear together on the main page of the module, access the Groupings tab and click Create.
The system displays an area where you can provide information on the grouping being created (see figure below). The area on the right displays an example of how the information provided in each field will appear on the main page of the module.
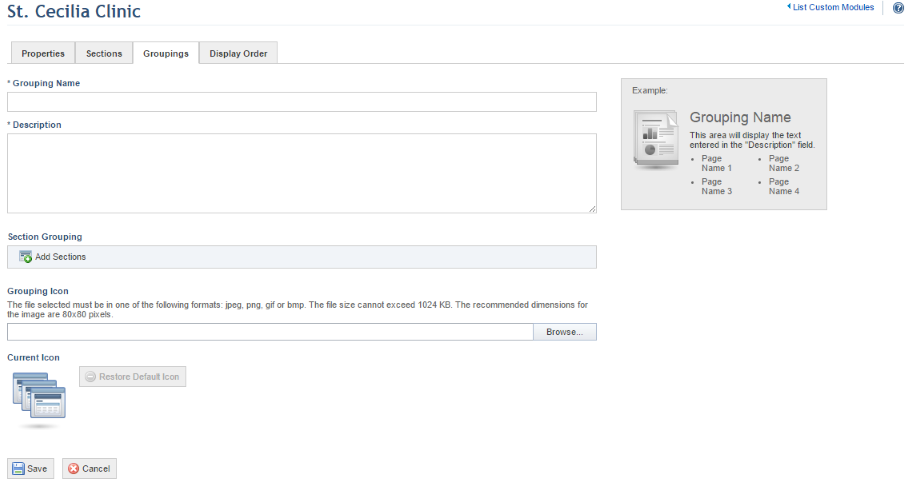
26. In the Grouping Name field, enter a name for the grouping using up to 30 characters.
27. In the Description field, enter a brief description for the grouping using up to 250 characters. This description will appear below the grouping's name.
28. In the Section Grouping field, click Add Sections to include sections in the grouping.
29. In the window displayed, click List Sections to display the sections that can be added to the grouping. If needed, use the filters available.
30. Select the sections to be grouped and click Add Sections (see figure below). If you want to quit the operation, click Cancel. As each section can only belong to one grouping at a time, sections included in other groupings will not be available for selection here.

The system displays a success message.
31. In the Grouping Icon field, select the image that will appear next to the grouping. If none is selected, a default image will be used.
32. In the Current Icon field, click Restore Current Icon to remove the icon selected and use the default icon.
33. Click Save. If you want to quit the operation, click Cancel.
The system displays a success message.
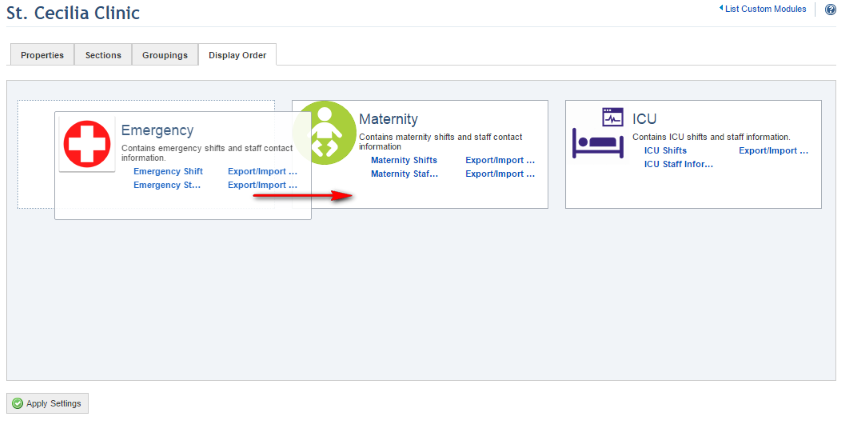
34. Click the Display Order tab to configure the order in which the sections and groupings will be displayed on the module's homepage. This tab is only enabled once two or more sections have been registered for the module.
35. Drag the sections and groupings to their respective places and click Apply Settings to save the changes (see figure below).
The system displays a success message.
Note: Once the display order is defined, any changes that affect the content of the module will automatically restore the default display settings. This occurs when a section or grouping is created or deleted, or when a section is added to or removed from a grouping. In this case, the display settings must be reapplied.
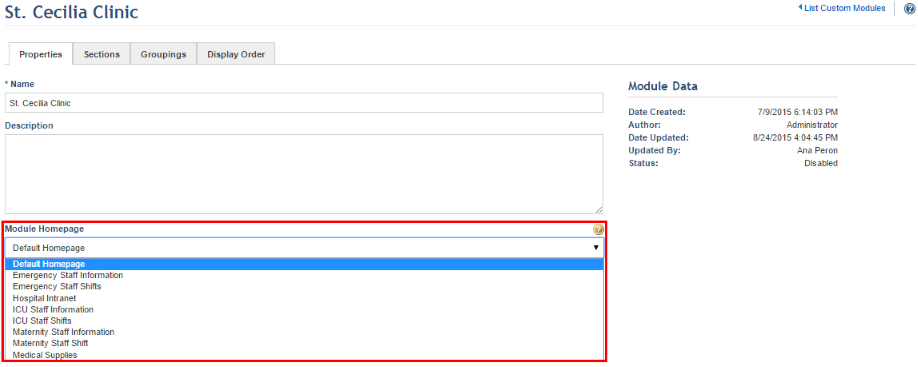
36. To define the homepage of the module, return to the Properties tab and, in the Module Homepage field, select an option from the dropdown list (see figure below). All sections registered in the module will be available for selection. If this field is not edited, the default homepage will be used, which displays all of the module's sections and groupings according to the settings defined in the Display Order tab. If the section selected in this field is deleted, the system will use the default page.
37. Click Save. If you want to quit the operation, click Cancel.
The system displays a success message.