 )
(see figure below).
)
(see figure below). This topic explains how to change the map type displayed.
The maps available for selection must be previously configured in the system installation folder. Maps can be configured to be displayed, as long as they support WMS or tile servers. For details on how to include additional base maps, see Appendix -> Base Maps. Note that maps can only be displayed on devices with internet access.
1. Access the Integration module, the Events solution, or the Dispatch solution.
2. Click Integration Map, View Event and Activity Map, Manage Calls, Manage Dispatches, or Monitoring.
3.
In the side menu to the right, click Maps ( )
(see figure below).
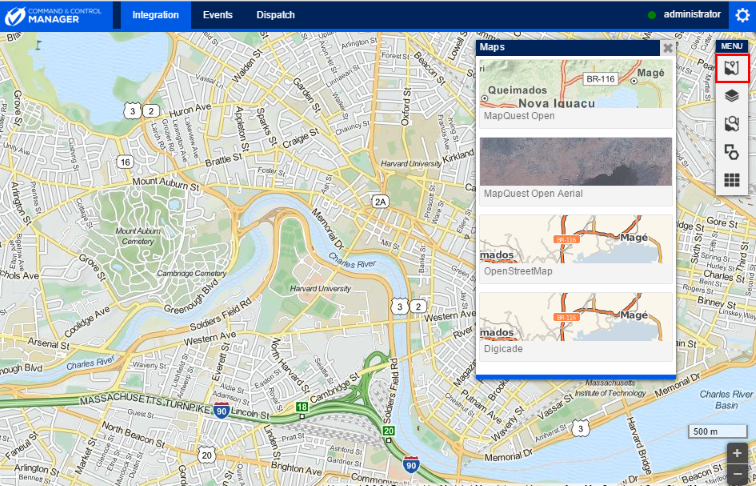
4. In the window that appears, click the map you want to use.
The system displays the map selected.
Note 1: The default map location and zoom level can be customized in the MapQueriesConfig.xml file, which is, by default, in the installation folder for the CCM application. To do so, open the CCM/APP_DATA/ folder, locate the lines below in the document, and enter the new parameters between the quotation marks. For example:
<add key="InitLatitude" value="-21.931312" />
<add key="InitLongitude" value="-40.215849" />
<add key="InitZoom" value="8" />
Keep in mind that, as the path to the XML file can be changed, the file may be located in another folder. The path is defined in the ConfigurationPath parameter in the web.config file for the application. For example:
<add key="ConfigurationPath" value="tfn.mss.example.com/Public" />
Note 2: The latitude and longitude accept up to six decimal degrees and should range from -90 to +90, and from -180 to +180, respectively. If the parameters are not configured correctly, the system will display the default location that comes with the installation of the solution.