The decision to accept risks may occur due to the high costs of implementation, the ease with which the asset can be replaced, the fact that only a small number of business components are supported, or the inconvenience involved in treating it. Any default justifications available when accepting a non-implemented control or vulnerability can be disabled if necessary, and custom justifications can be created. For more information, see Chapter 17: Administration -> Customizations -> Projects -> How to Customize Justifications for Accepting Risks and Non-Compliances.
1. Access the Risk module.
2. In the Projects section, click the List Projects option.
3. In the Projects section, click Edit next to the risk project containing risks you want to accept.
4. Click the Evaluation tab.
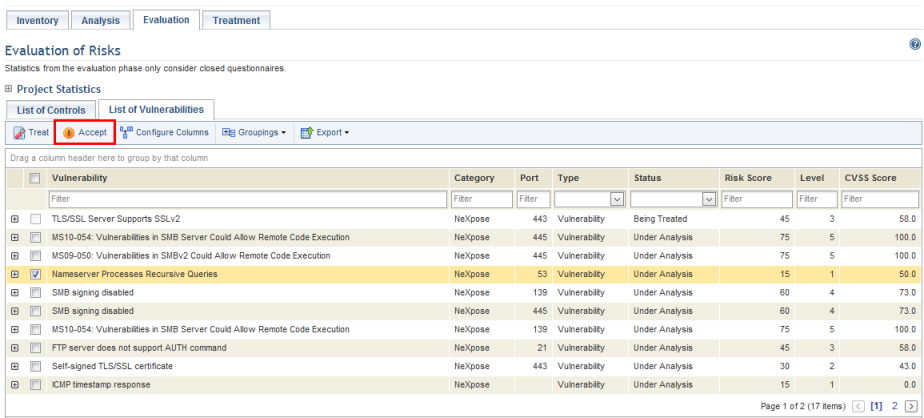
5. Mark the checkboxes next to the non-implemented controls or vulnerabilities you want to accept and click Accept (see figure below).
The system requests confirmation of the decision to accept the risks (see figure below).
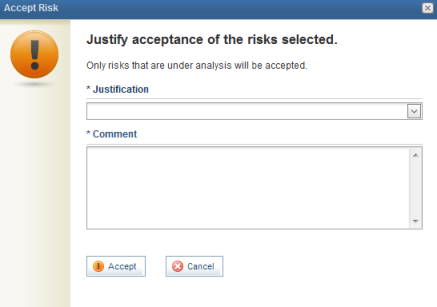
6. In the Justification field, select a justification for the decision to accept the risk.
7. In the Comment field, enter additional information explaining why the risks will be accepted. This field accepts a maximum of 10,000 characters.
8. Click Accept to confirm. If you want to quit the operation, click Cancel.
The system displays a success message.