This topic explains how to accept non-compliances in a compliance project. The decision to accept non-compliances may take place due to high treatment costs, the inconvenience caused by treating it, or other factors. Any default justifications available when accepting a non-compliance can be disabled if necessary, and custom justifications can be created. For more information, see Chapter 17: Administration -> Customizations -> Projects -> How to Customize Justifications for Accepting Risks and Non-Compliances.
1. Access the Compliance module.
2. In the Projects section, click the List Projects option.
3. In the List of Projects section, click Edit next to the project containing non-compliances you want to accept.
4. Click the Evaluation tab.
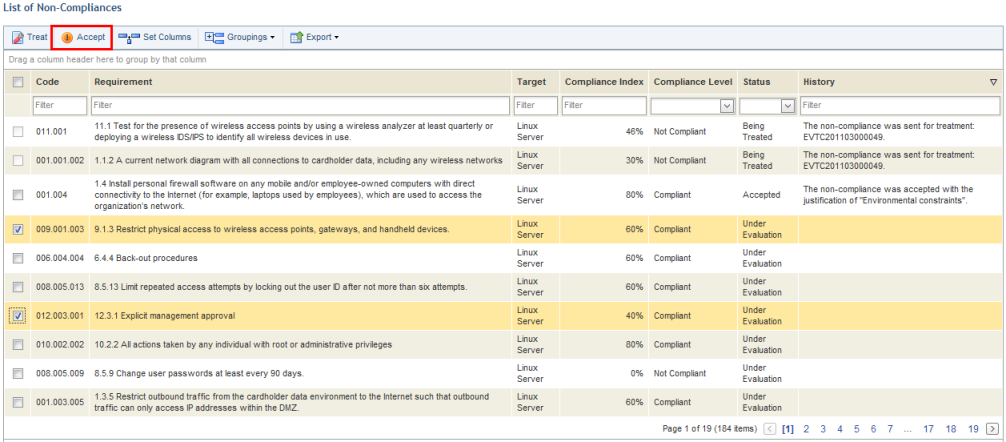
5. Mark the checkboxes next to the controls for which you want to accept non-compliances and click Accept (see figure below).
The system requests confirmation to accept the non-compliant requirements selected (see figure below).
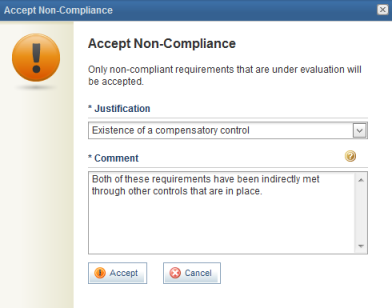
6. In the Justification field, select a justification for the decision to accept the non-compliance. The main list of non-compliances can be filtered according to justification selected for accepting them.
7. In the Comment field, enter additional information explaining why the risks will be accepted. This field accepts a maximum of 10,000 characters.
8. Click Accept to confirm. If you want to quit the operation, click Cancel.
The system displays a success message. The status and history of the non-compliant requirement is updated in the list.