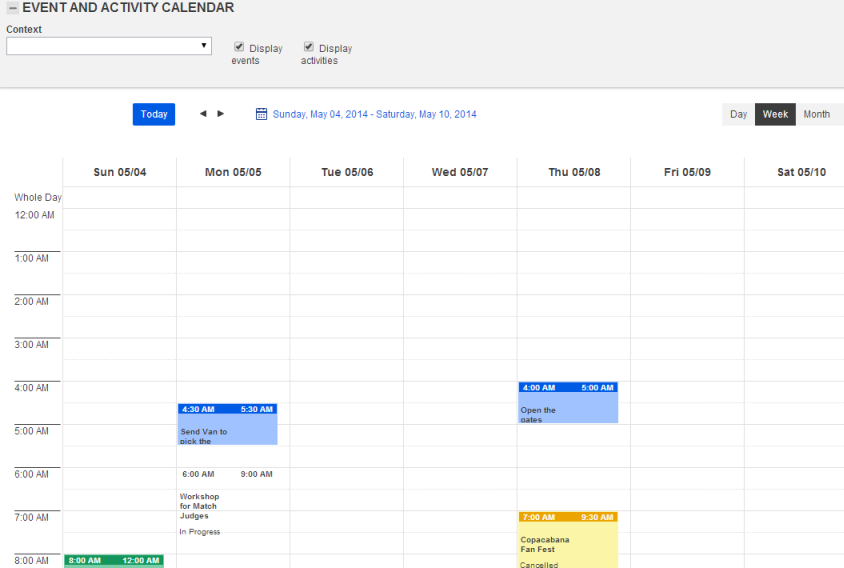
1. Access the Events solution.
2. In the Calendars section, select View Scheduled Events.
The system displays the calendar in a new window, by default listing all the scheduled events and activities registered in the system for the current week (see figure below). The colors displayed for each event and activity indicate their current status.

3. Click Context and select an option from the drop-down list to filter the calendar by a context. Keep in mind that contexts are registered in the Manage Contexts section of this solution
4. Mark the Display events and Display activities checkboxes to display events and activities on the calendar.
5.
Select the format in which the events and activities will be displayed on the
calendar. The options are: Day, Week, and Month. Use the
arrow buttons to navigate to the next or past time intervals. You can also click
Calendar (  ) and select the date you would like to
view.
6. To view the details of a scheduled event, click its name.
A pop-up window is displayed listing the properties of the event selected (see figure below).
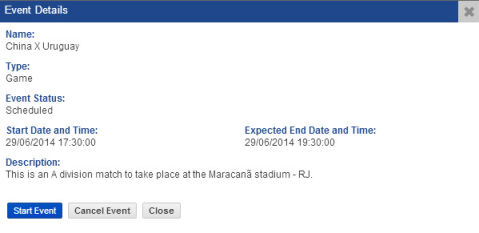
7. Click Start Event, Finalize Event, or Cancel Event to change its status. If you want to quit the operation, click Close.
The system requests confirmation of the status update (see figure below).

8. Click Yes to confirm. If you want to quit the operation, click No.
The status of the event is updated. Once an event is cancelled or finalized, its status will be locked for editing in the calendar and can only be updated through the Scheduled Events section.
9. To view the details of an activity, click its name.
A pop-up window is displayed listing the properties of the activity selected (see figure below).
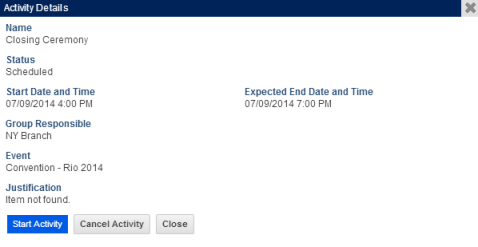
10. Click Start Activity, Finalize Activity, or Cancel Activity to change its status.
The system requests confirmation to update the status (see figure below).

11. Click Change Status to confirm. If you want to quit the operation, click Cancel.
If the Finalize Activity option was selected, a pop-up window is displayed (see figure below).
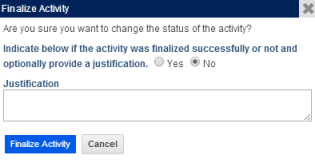
12. Select Yes or No to define whether or not the activity was finalized successfully.
13. In the Justification field, provide an explanation for the finalization of the activity.
14. Click Finalize Activity to confirm. If you want to quit the operation, click Cancel.
If the Cancel Activity option was selected, a pop-up window is displayed (see figure below).
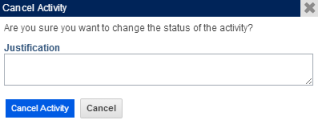
15. In the Justification field, provide an explanation for the cancellation of the activity.
16. Click Cancel Activity to confirm. If you want to quit the operation, click Cancel.
The system displays a success message. Note that once an activity is finalized or cancelled, its status cannot be edited through the calendar, only through the Scheduled Events section.