 ) next to the report you want to
schedule (see figure below).
) next to the report you want to
schedule (see figure below).1. Access the Risk module.
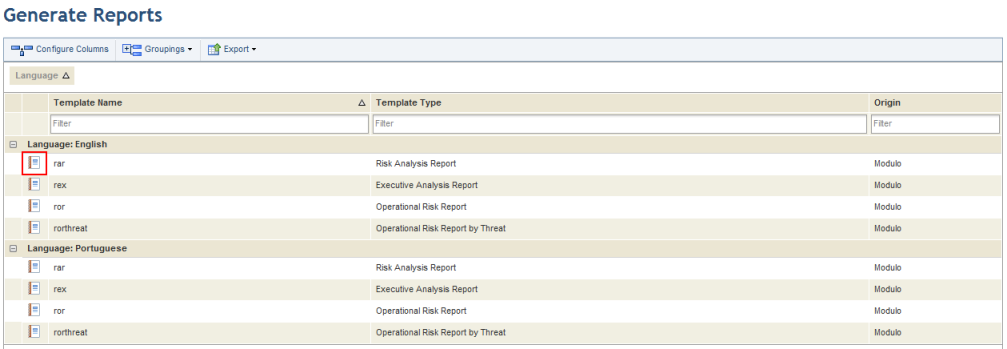
2. Select Generate Reports from the Reports option on the menu.
The system displays the list of report templates available in the system grouped by language.
3.
Click Generate Report () next to the report you want to
schedule (see figure below).
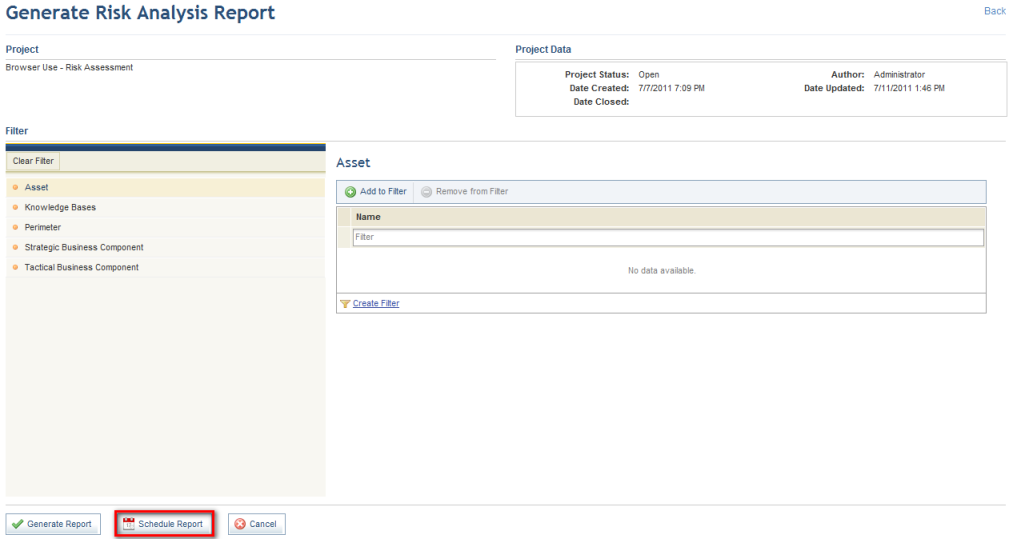
The system displays a screen where you can select one or more projects for which you want to schedule a report and set filters.
Note: These filters will only apply to default data sources. In other words, they will not work in SQL queries included as data sources in the report.
4. To generate the report even if there is not at least one closed questionnaire with one or more applicable controls related to the filter criteria, mark the checkbox Generate report even if scope is empty checkbox.
Note: If the Generate report even if scope is empty checkbox is not marked and there is not at least one closed questionnaire with one or more applicable controls related to the criteria defined in the filters, the report will not be sent. In this case, the recipients will receive an e-mail notification indicating that the report was not sent and why. This notification can be customized or disabled in the Message Templates section of the Administration module.
5. To continue, click Schedule Report (see figure below). If you want to quit the operation, click Cancel.
The system displays a screen where the schedule can be set.
6. In the Schedule Name field, enter a name that will help you identify the report schedule.
7. In the E-mails field, enter the e-mail addresses of the recipients or select people or groups registered in the system by clicking To. The system allows up to 30 e-mails to be sent at a time.
8. Once finished specifying recipients, enter the start date for when the report should begin to be sent in the Start Date field.
9. Select the frequency with which the report will be sent in the Mail Frequency field, which may be daily, weekly, monthly, or yearly.
10. In the Number of Mailings field, enter a number to indicate how many times you want the report to be sent.
11. When finished, click Schedule Report (see figure below). If you want to quit the operation, click Cancel.
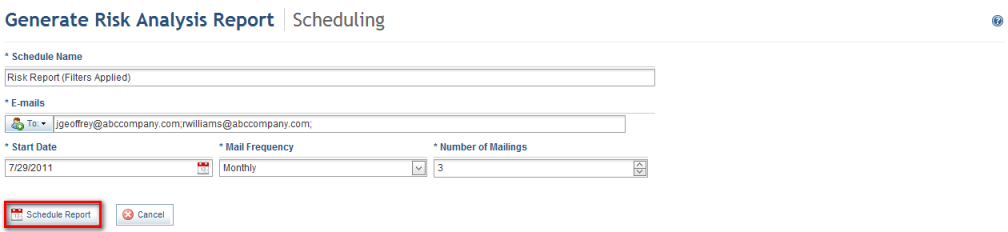
The system displays a success message.