1. Access the Administration module.
2. Select Workflow Rules from the Customizations option on the menu.
The system displays the list of workflow rules.
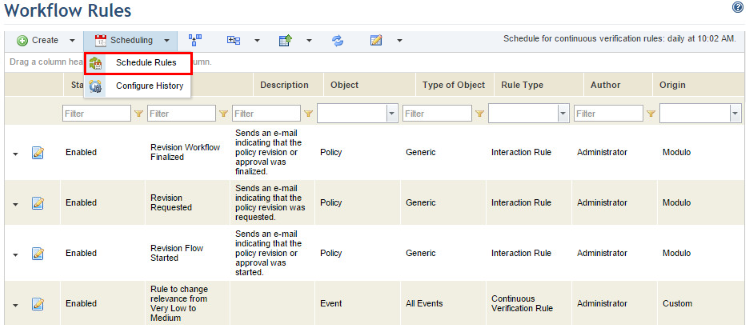
3. To schedule the time when the continuous verification rules will be executed, click Scheduling and select the Schedule Rules option in the main list of workflow rules (see figure below).
A pop-up window is displayed where you can set the time for continuous verification rules to be executed (see figure below).
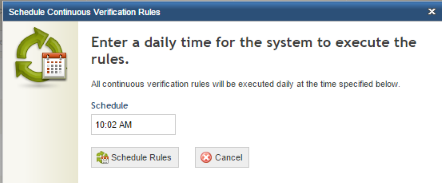
4. In the Schedule field, enter the time when the continuous verification rules will be executed. The time must be in the 24 hours: hh:mm tt format.
5. Click Schedule Rules to confirm. If you want to quit the operation, click Cancel.
The system displays a success message.
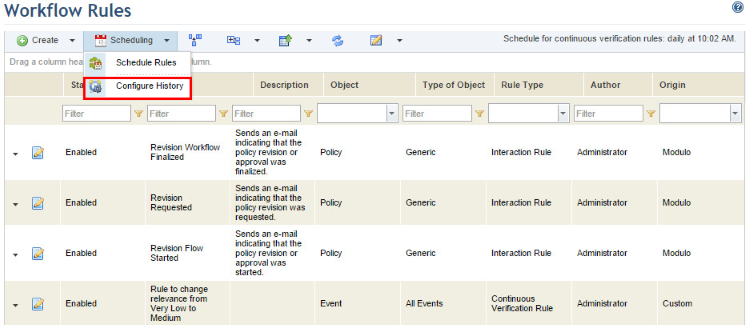
6. When an HTTP call is executed by a workflow rule, a record of this activity is listed in the history for the rule. A deadline can be set for these entries to be automatically deleted. To do so, click Schedule and select Configure History (see figure below).
7. In the pop-up that appears, enter the number of days for which the entries will remain available and click Configure History to confirm (see figure below). If you want to quit the operation, click Cancel.

The system displays a success message.
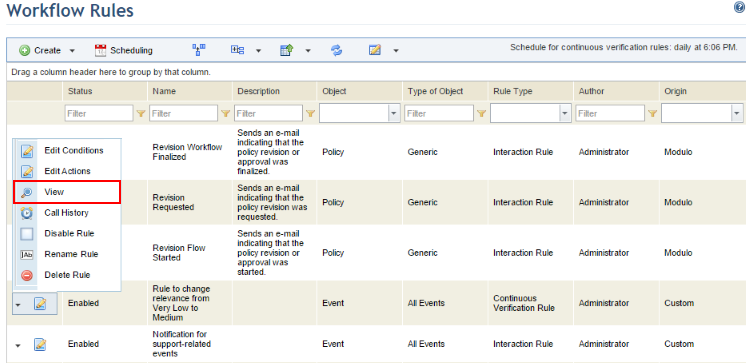
8. Both custom rules and those provided by Modulo can be copied. To copy a workflow rule, click Edit and select View next to the rule you want to copy (see figure below).
The system displays the Finish step in the assistant for creating workflow rules.
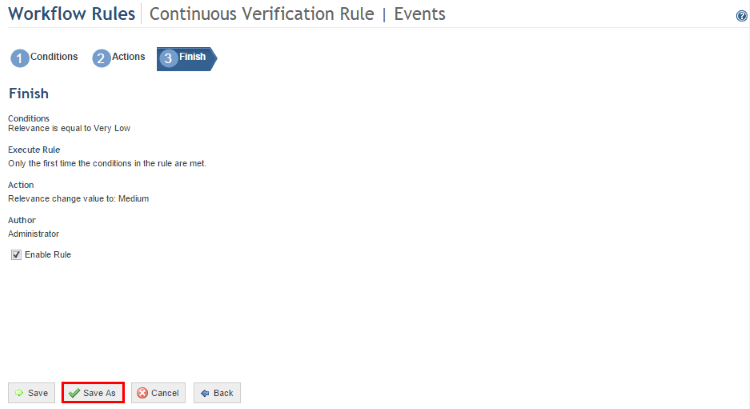
9. Click Save As (see figure below).
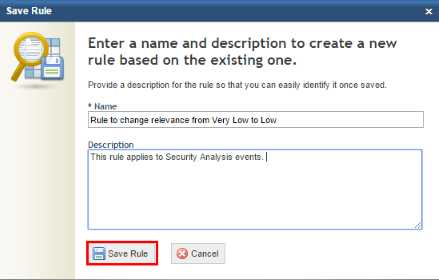
10. In the Name field of the pop-up that appears, enter a name for the rule that is being created using a maximum of 150 characters.
11. In the Description field, enter additional information on the rule using up to 1,000 characters.
12. Click Save Rule to create a new rule (see figure below). If you want to quit the operation, click Cancel.
The system displays a success message.
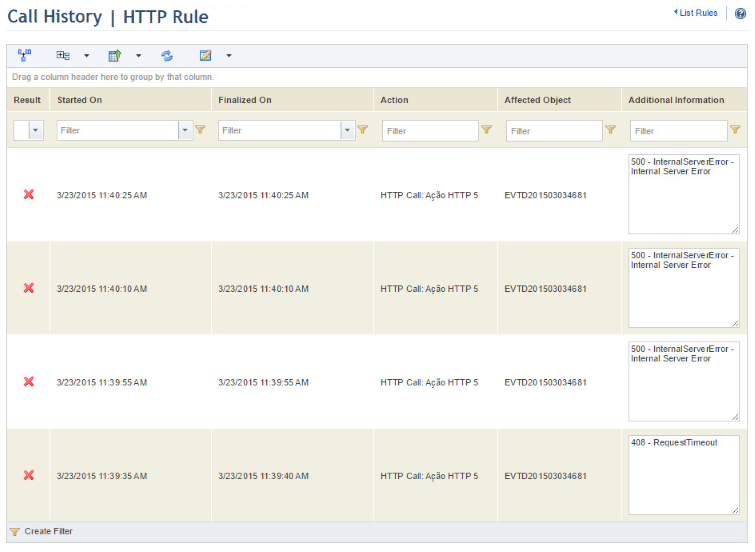
13. To view the
call history of a rule, click Edit ( )
next to it and select Call History (see figure below).
)
next to it and select Call History (see figure below).

The system displays the call history for the rule (see figure below).
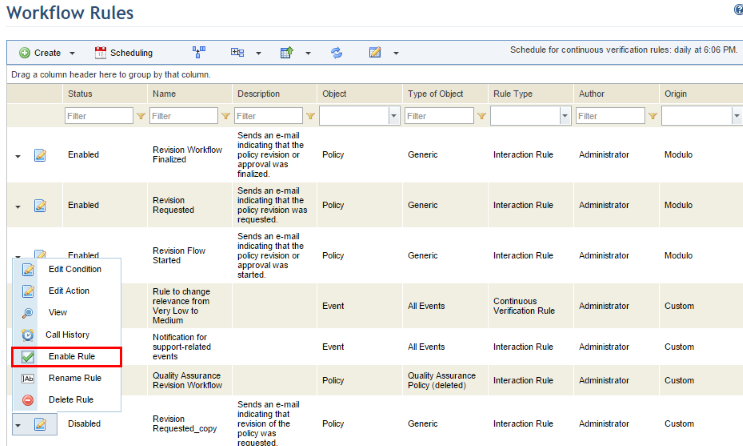
14. Rules can also be enabled or disabled for use. To enable a workflow rule, click Edit in the main list and select Enable Rule (see figure below). To disable the rule, select Disable Rule.
The system enables or disables the rule, depending on the option selected.
Note: Rules with actions that are no longer valid are disabled and highlighted in the main list of rules so that these actions can be corrected. For example, if an action specified that an event coordinator must be replaced by a group that has been deleted from the system, the rule will be disabled until this action has been removed or substituted. When a workflow rule is disabled manually or automatically for containing invalid actions, its author will be notified in the Notifications section of the Home module. However, if the rule author is deleted from the system, this notification will be displayed to users assigned to the Global Administrators profile.
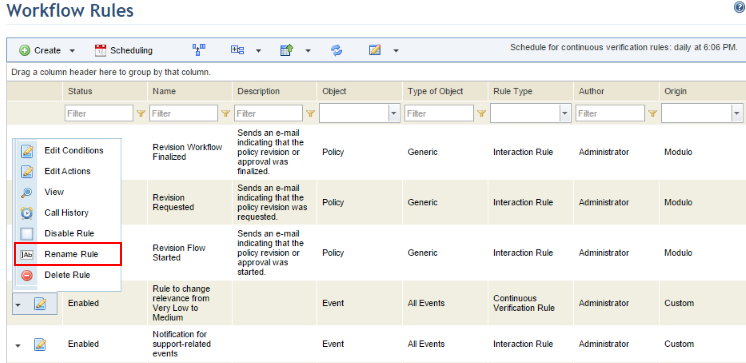
15. To rename a workflow rule, click Edit next to it and select Rename Rule (see figure below).
The system displays a pop-up where you can enter a new name for the rule (see figure below).

16. In the Name field, enter a new name for the rule using a maximum of 150 characters.
17. In the Description field, enter the main features of the rule using a maximum of 1,000 characters.
18. Click Rename Rule to confirm. If you want to quit the operation, click Cancel.
The system displays a success message.