1. Access the Events solution.
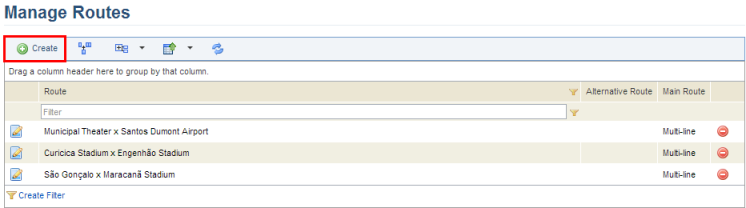
2. In the Scheduled Events section, select Manage Routes.
The system displays the list of routes.
3. To create a route, click Create (see figure below).
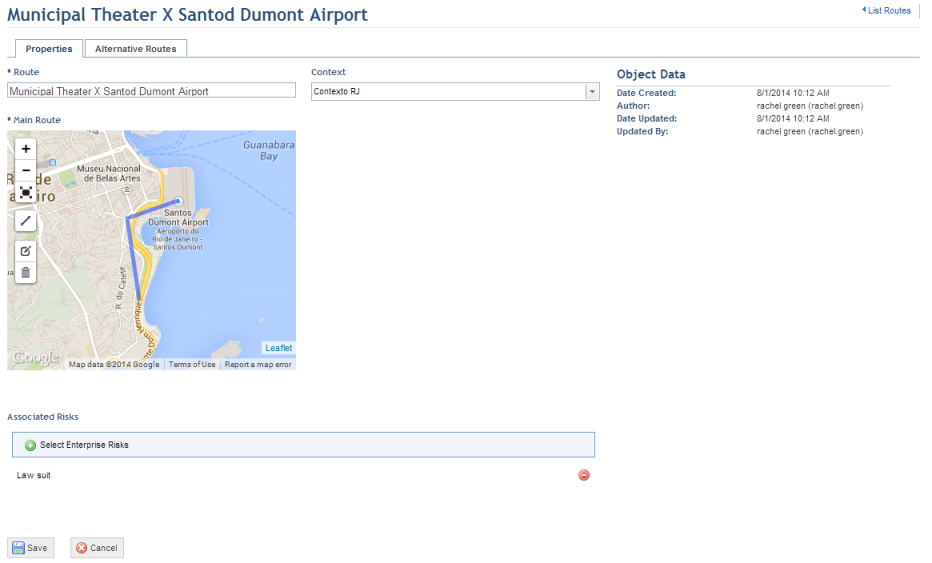
The system displays a page where the route can be registered. Any attributes created for routes in the Objects and Attributes section of the Administration module will be displayed here.
4. In the Route field, enter a name to identify the route using a maximum of 400 characters.
5. In the Context field, select a context to which the route belongs. Contexts are registered in the Manage Contexts section of this solution.
6. In the Main Route field, specify the main route to be used in the event by drawing a line along the main points. The same standard features provided for Georeference attributes are available here. The options include: zoom in, zoom out, full screen, draw line, place a point, edit, and delete.
7. In the Associated Risks section, click Select Enterprise Risks to associate enterprise risks with the main route. By default, any type of enterprise risk can be associated and all enterprise risks registered in the ERM solution are available for association.
8. In the pop-up window that appears, select the enterprise risks you want to associate with the route and click Select Enterprise Risks.
9. When finished, click Save. If you want to quit the operation, click Cancel.
The system displays a success message and enables the Properties and Alternative Routes tabs, where the properties of the routes can be edited and alternative routes can be associated. Additional information on the route will appear on the top right corner of the page (see figure below), which will also be available as column options in the main list.
10. To create and associate alternative routes with the main route, click the Alternative Routes tab.
11. In the Alternative Routes section, click Create (see figure below).
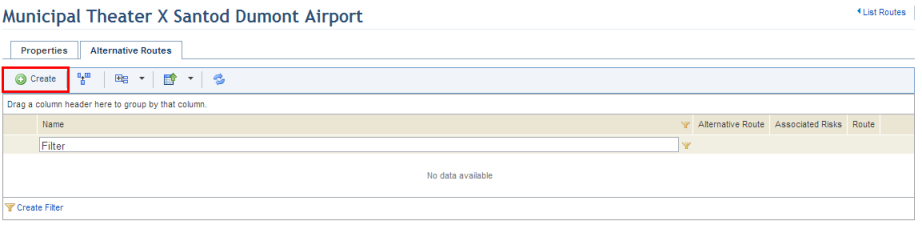
The system displays a page where the alternative route can be registered (see figure below).
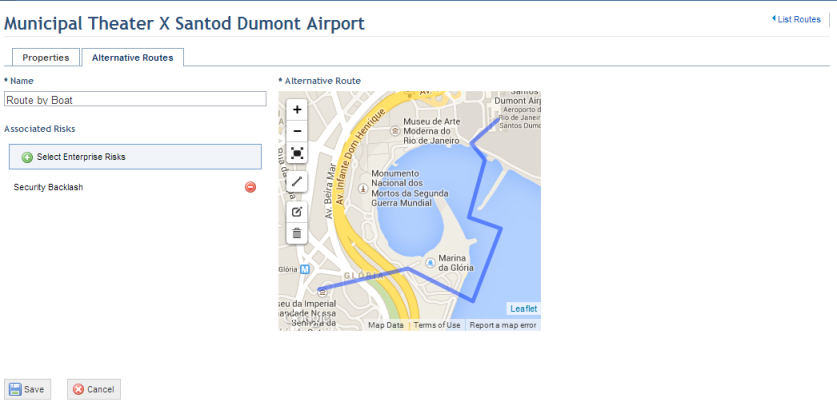
12. In the Name field, enter a name to identify the alternative route using a maximum of 400 characters.
13. In the Alternative Route field, specify the alternative route to be used in the event by drawing a line along the main points. The same standard features provided for Georeference attributes are available here. The options include: zoom in, zoom out, full screen, draw line, place a point, edit, and delete.
14. In the Associated Risks section, click Select Enterprise Risks to associate enterprise risks with the alternative route. By default, any type of enterprise risk can be associated and all enterprise risks registered in the ERM solution are available for association.
15. In the pop-up window that appears, select the enterprise risks you want to associate with the alternative route and click Select Enterprise Risks.
16. When finished, click Save. If you want to quit the operation, click Cancel.
The system displays a success message and returns to the main list of alternative routes.
17. To delete an alternative route, click Delete next to the route you want to be deleted (see figure below).
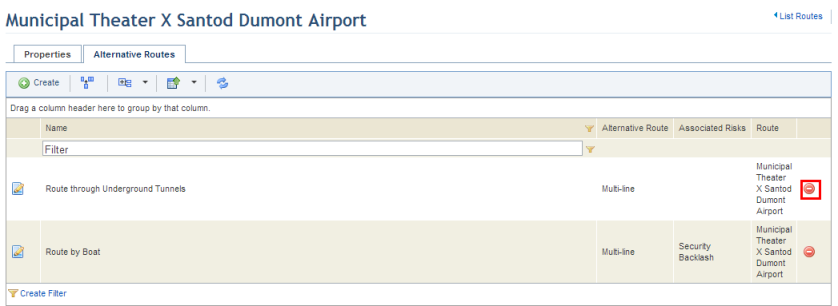
The system requests confirmation of the deletion (see figure below).
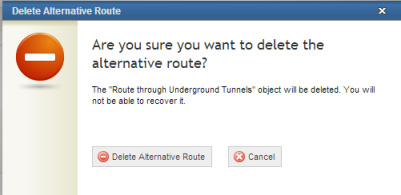
18. To confirm deletion, click Delete Alternative Route. If you want to quit the operation, click Cancel.
The system displays a success message.