This topic explains how to export the template used to register and import vulnerabilities to the catalogue of vulnerabilities, available in the Knowledge module. Also discussed are the procedures for completing the spreadsheet correctly so that it can be imported successfully.
This import template includes three worksheets, of which two require completion:
•Info: where information on the template itself is displayed such as its version, language, as well as where the source of the vulnerabilities should be specified.
•Instructions: where instructions on how to complete each of the fields are provided.
•Vulnerabilities: where vulnerabilities and their properties can be registered.
Once completed correctly, the file can be imported and the vulnerabilities will be available in the catalogue.
1. Access the Knowledge module.
2. Select Catalogue of Vulnerabilities from the Risk Knowledge option on the menu.
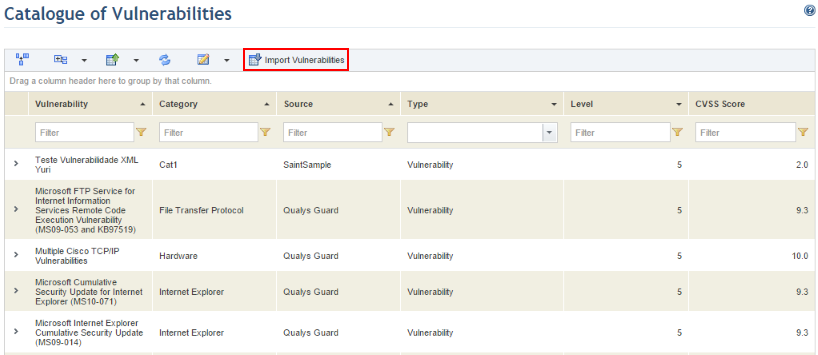
3. In the Catalogue of Vulnerabilities section, click Import Vulnerabilities (see figure below).
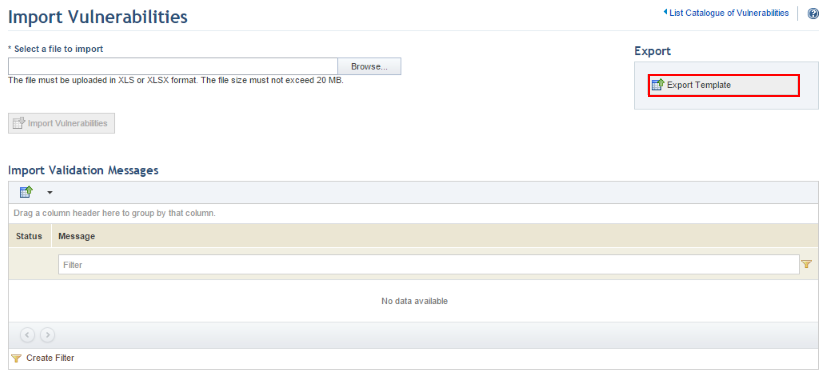
4. In the Import Vulnerabilities section, click the Export Template link in the upper right corner to obtain a specially formatted Excel spreadsheet that will allow vulnerabilities to be imported to the system (see figure below).
5. In the dialog box that appears, save the file to your computer and open it.
When the file opens, the template is displayed in Microsoft Excel (see figure below).
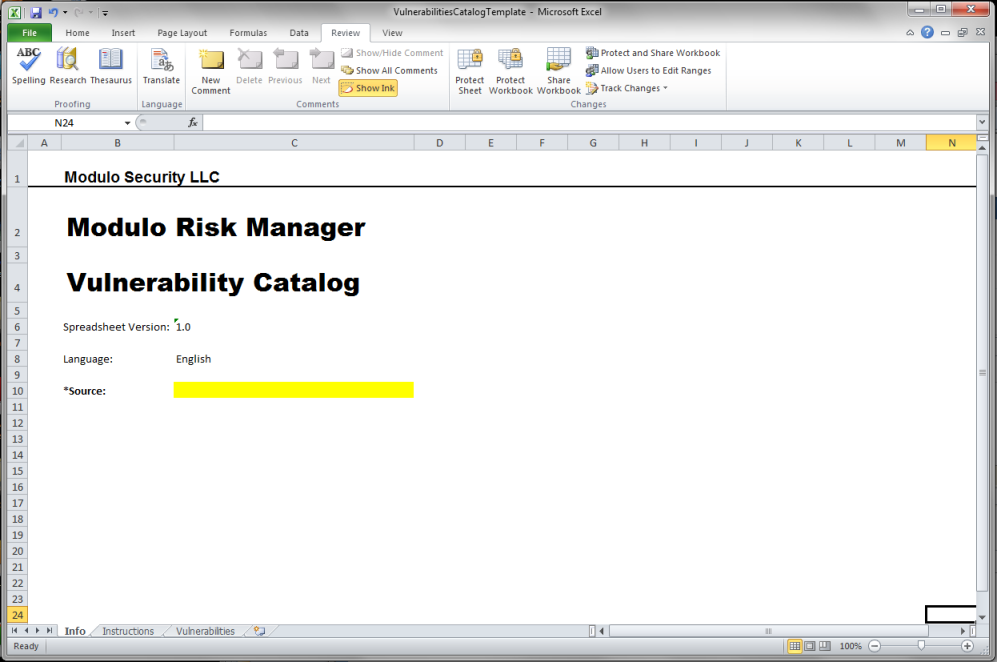
6. In the Info worksheet, specify the source of the vulnerabilities being imported in the Source field to help identify them in the system. Note that only vulnerabilities from a single source can be imported at a time. Separate spreadsheets must be used to map vulnerabilities from more than one source. Vulnerabilities identified by scanners that can be integrated with the system (Qualys and NeXpose) can only be imported automatically through integration tasks.
7. Click the Vulnerabilities worksheet to begin registering vulnerabilities and their properties (see figure below).
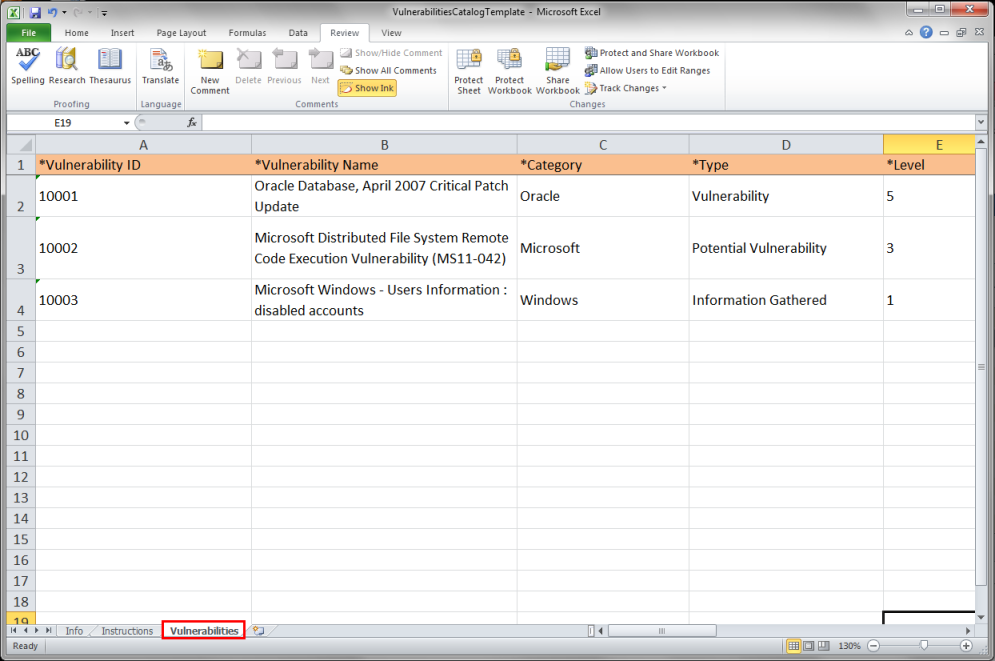
The table below explains how the fields under each column should be filled out:
|
Field |
Instructions |
|
*Vulnerability ID |
Enter a unique ID for the vulnerability, which will be used to identify it in the system. This field accepts alphanumeric and special characters. For example: SF1648.02. |
|
*Vulnerability Name |
Enter a name to identify the vulnerability. |
|
*Category |
Enter the category in which the vulnerability is classified (for example: Windows, Password, Web Server, etc.). |
|
*Type |
Select the type of vulnerability from the drop-down list according to the criteria below: •Information Gathered: additional information collected on the technology asset where the vulnerability was identified. •Potential Vulnerability: possible, unconfirmed vulnerability. •Vulnerability: confirmed vulnerability. |
|
*Level |
Specify the severity level of the vulnerability by entering a value from 1 to 5 according to the criteria below:
1 – Very Low 2 – Low 3 – Medium 4 – High 5 – Very High |
|
Description |
Enter a description of the vulnerability. |
|
Impact |
Enter the impact the vulnerability may have on the organization if confirmed. |
|
Solution |
Enter the possible solutions for the vulnerability. |
|
CVSS Score |
Enter a value between 0 and 10 for the CVSS (Common Vulnerability Scoring System), the metric used to determine the urgency, priority, and severity of a vulnerability. |
|
Bugtraq IDs |
Enter the Bugtraq IDs associated with the vulnerability. This field is optional and accepts only numbers. Bugtraq IDs should be separated by semicolons. |
|
CVE IDs |
Enter the CVE IDs associated with the vulnerability. This field is optional and accepts free text. CVE IDs should be separated by semicolons. For example: CVE-2011-2685;CVE-2011-3192. |
|
Other References |
Indicate where further information on the vulnerability can be found. This field is optional and accepts free text. References should be entered one per line in the cell.
For example: Firefox homepage Thunderbird homepage |
|
Last Updated |
Enter the date on which information on the vulnerability was last updated in the YYYY-MM-DD format. For example: 2012-12-05. |
8. When finished, save the file to your computer.
9. Access the Knowledge module.
10. Select Catalogue of Vulnerabilities from the Risk Knowledge option on the menu.
11. In the Catalogue of Vulnerabilities section, click Import Vulnerabilities.
12. In the Import Vulnerabilities section, click Browse and select the file to be imported (see figure below).
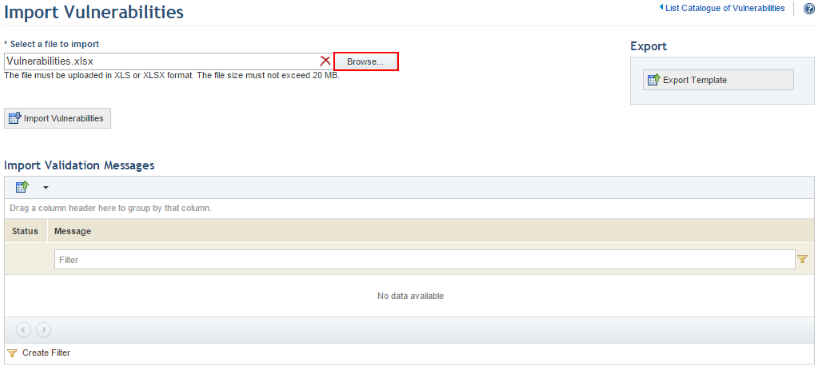
13. Click Import Vulnerabilities.
Any errors identified will be listed in the Import Validation Messages section, in which case you must return to the spreadsheet and correct each of them. If no errors are found, the system displays a success message.
14. Click the List Vulnerabilities link to return to main list and view the vulnerabilities that were imported.
Note: If the information on the spreadsheet is edited and imported again to the system, the vulnerabilities will be updated as long as the name of the spreadsheet remains the same. Otherwise, the vulnerabilities will be duplicated.