How to Manage Continuity Report Templates
This topic explains
how to manage continuity report templates.
Some report templates
for plans and procedures are provided by Modulo with the system installation,
and cannot be directly edited or deleted. To fit them to the needs of your
organization, you must first create a copy to edit a template. Copies can be
exported, edited through Report Designer (where you can include your company
logo, create charts, tables, and more) and imported back to the system. Keep in
mind that you must have specific permission in the Manage Continuity Report
Templates privilege to be able to manage templates.
1.
Access the Continuity module.
2.
Select Manage Templates from the Reports section.
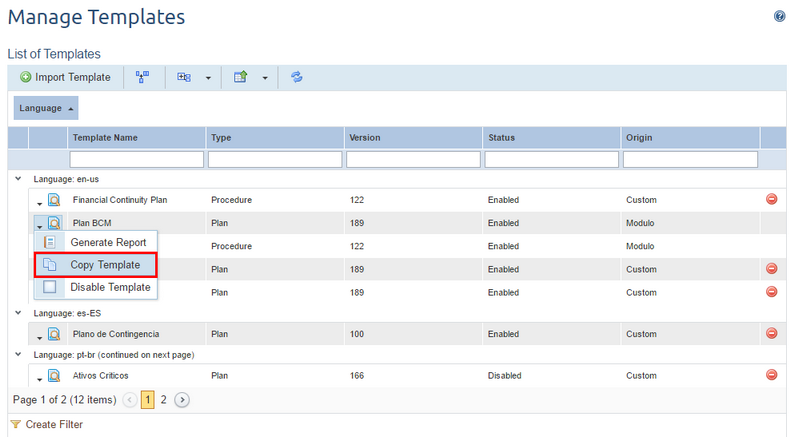
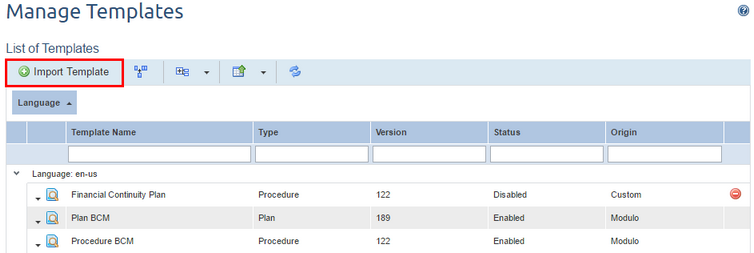
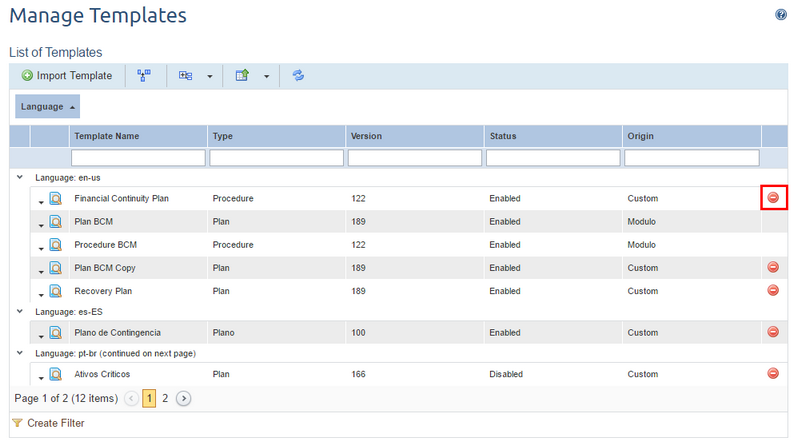
The system displays the list of report templates available in
the system grouped by language. The Type column indicates the type of
report (Plan or Procedure), the Status column indicates whether the
template is available for use or not, while the Origin column indicates
if the template was customized or if it was provided by Modulo.
3.
In the Generate Reports section, click Edit ( ) next to the report template you
want to edit and select the Copy Template option from the
drop-down list displayed (see figure below). Note that this is necessary to edit
templates provided by Modulo, while other reports can be directly exported for
editing.
) next to the report template you
want to edit and select the Copy Template option from the
drop-down list displayed (see figure below). Note that this is necessary to edit
templates provided by Modulo, while other reports can be directly exported for
editing.
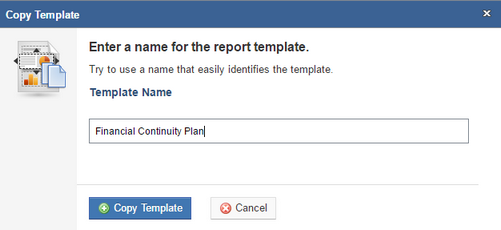
The system displays a window where
you can provide a name to identify the new template to be copied (see figure
below).
4.
Enter a name for the new template using up to 300 characters, then click Copy
Template to save the new version. If you want to quit the operation, click
Cancel.
The system displays a success
message.
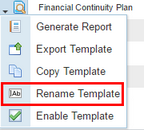
5.
If you want, you can rename a template by clicking Edit () next to it and selecting the
Rename Template option from the drop-down list displayed (see figure
below). Note that only custom reports can be renamed.
6.
Enter a new name for the report using up to 300 characters and click Save
( ). If you want to quit the
operation, click Cancel (
). If you want to quit the
operation, click Cancel ( ) (see figure below).

The system displays a success
message.
7.
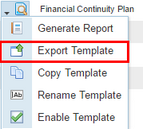
To export a template so that it can be edited, click Edit () next to the report template you
want to edit and select the Export Template option from the drop-down
list displayed (see figure below). Note that only custom reports can be exported
for editing.
8.
Access Report Designer and then open the report template. Make the necessary
changes and save the file to your computer. For more details about how to
obtain, install, and use Report Designer features, see Report Designer User
Manual -> Report Designer
– Quick Guide.
9.
To import the edited template back to the system so that it can be used, click
Import Template (see figure below).
The system displays the section
where you can import the edited template.
10. Click
Select to locate the edited template.
11. In the
window that appears, select the template to be imported and click
Open.
12. Once
selected, click Validate Template so the system can check the file (see
figure below).
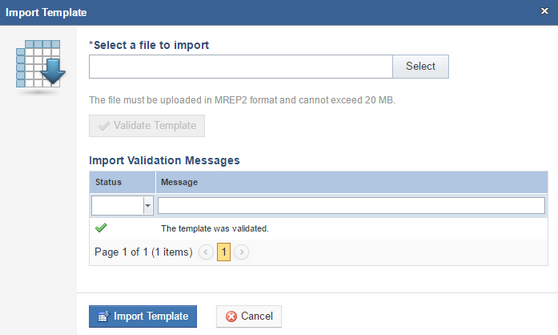
After the file validation, the
system displays a success message if no errors are found. If an error occurs,
correct the template and try again.
13. To confirm
that you want to import the edited template and overwrite the older version,
click Import Template. The original template will always be overwritten
by the imported template, even if the file name is changed. However, the system
will ignore the new template name and import it with the original name. If you
want to quit the operation, click Cancel.
If no errors are found with the
file selected, the system imports the template and displays a success
message.
14. To enable a
template, click Edit () next to it and select Enable
Template in the drop-down list that appears (see figure below).
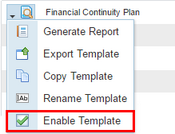
The system displays a success
message.
15. To disable
it, click Edit () and select the Disable Template
option in the drop-down list (see figure below). If all the report templates
are disabled, other users will not be able to generate any reports until at
least one template is enabled again.
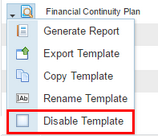
The system displays a success
message.
Note: reports can be
generated using enabled templates or not, by simply clicking Edit () next to them and selecting the
Generate Report option from the drop-down list. If you want to see if the
changes you have made to a particular template are being displayed correctly,
you can generate a report based on a disabled template, check the report, and
then enable it for use.
16. To delete a
report template, click Delete ( ) next to it (see figure below).
Only custom report templates can be deleted.
) next to it (see figure below).
Only custom report templates can be deleted.
The system requests confirmation to
delete the template (see figure below).
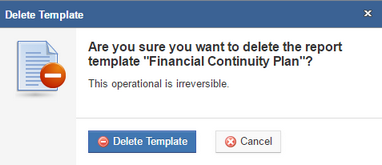
17. Click
Delete Template to confirm. If you want to quit the operation, click
Cancel.
The system displays a success
message.