How to Generate a Generic or Organizational Risk Report
1.
Access the Organization module.
2.
Select Generate Reports from the Reports option on the menu.
The system displays the list of
report templates, grouped by language. All enabled generic templates created in
this module of which you are author or an audience member, and all enabled risk
templates from the Risk module will be available. Copies of default risk
templates provided by Modulo will only be available here to their authors and
audience members. The Template Type column indicates the type of report
(Generic Report, Risk Analysis Report, Detailed Risk Report, Detailed Risk
Report by Threat, or Executive Analysis Report), while the Origin column
indicates if the template was customized or was provided by Modulo. Only
templates that have been enabled will appear in this section.
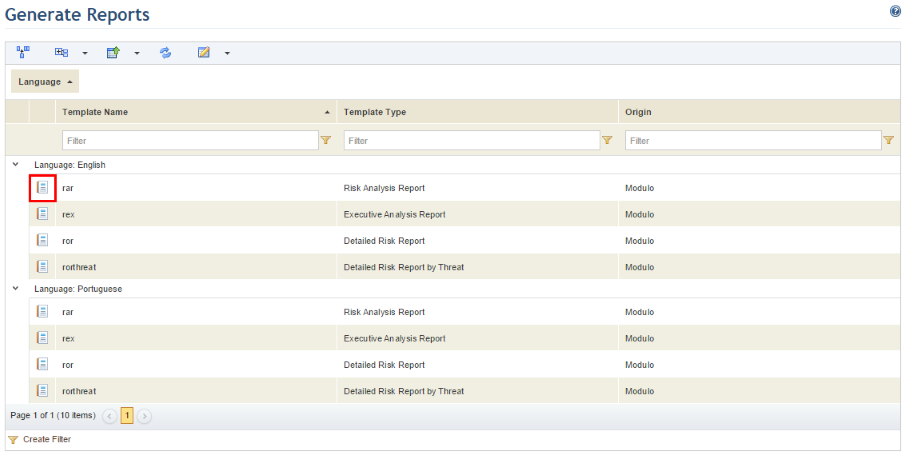
3.
Click Generate Report ( ) next to the report you want to
generate (see figure below). Note that in this section you will only be able to
generate generic reports of which you are the author or part of the audience.
However, authors and editors of report templates can also generate generic
reports through the Report Templates section of this module.
) next to the report you want to
generate (see figure below). Note that in this section you will only be able to
generate generic reports of which you are the author or part of the audience.
However, authors and editors of report templates can also generate generic
reports through the Report Templates section of this module.
The system displays a screen where
you can set filters to decide what will be displayed in the report. In the
Filters for Queries tab, you can set filters for the default data sources
used in organizational risk reports as well as filters for any queries included
as data sources in generic reports. Note that when generating generic reports,
the filters set for both system queries and reports will apply if the Combine
Filters option was enabled when including system queries as data sources in
the template. Otherwise, filters set for reports will be disregarded and only
the filters set for queries used in the template will apply. The Filters for
SQL Queries tab allows you to filter any SQL queries included as data
sources in generic reports by the columns selected as filter options. The
columns that will be set as filters in the report can be selected after the SQL
query is included in the report template.
4.
Select a type of filter from the list on the left and click Add to Filter
to select the objects that will be used to filter the report (see figure below).

Note: These filters will
only apply to default data sources. In other words, they will not work in SQL
queries included as data sources in the report.
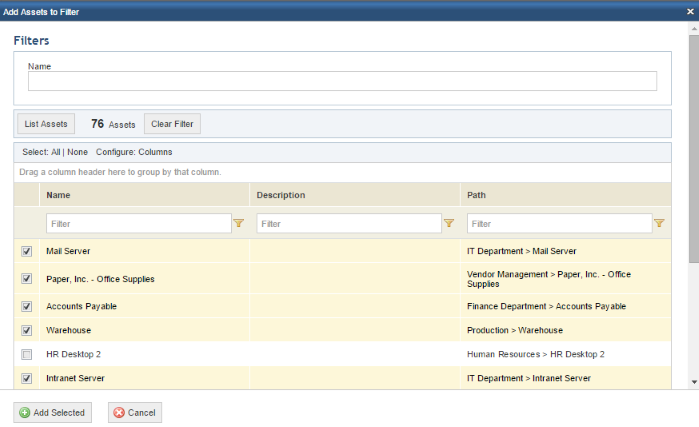
5.
Select the objects to be added to the filter in the window that appears and
click Add Selected (see figure below). If you want to quit the operation,
click Cancel.
The system displays the objects
selected in the list of applied filters. The options with filters set can be
identified by the funnel icon ( ) next to them.
6.
To remove objects from the filter, mark the checkboxes next to those you want to
remove and click Remove from Filter.
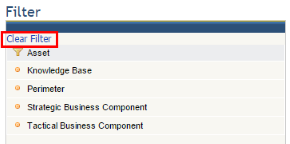
7.
To remove all filters, click Clear Filter (see figure below).
8.
If there is not at least one closed questionnaire with one or more applicable
controls related to the filter criteria in an organizational risk report, the
system displays an alert and the report cannot be generated. To generate the
report anyway, mark the checkbox Generate report even if scope is empty
checkbox.
9.
To set filters for any SQL queries included as data sources in a generic report,
click the Filters for SQL Queries tab (see figure below). Any
columns selected as filter options for each SQL query included as a data source
will be displayed. Note that columns can be set as filter options after the SQL
query is included in the report template.
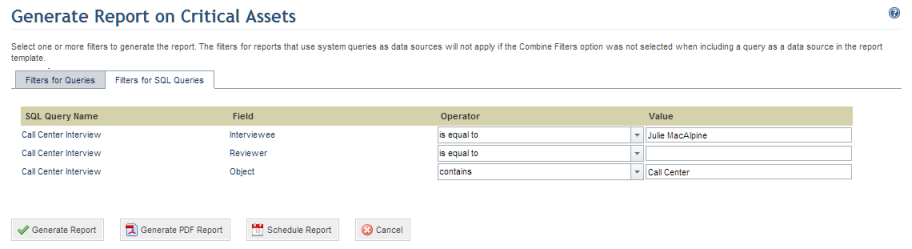
10. Select the
operator in the Operator field next to each column from each query you
want to filter, and enter the values in the Value field.
11. When
finished setting the filters, click Generate Report. If you want to quit
the operation, click Cancel.
The system displays the report in a new window (see figure
below).
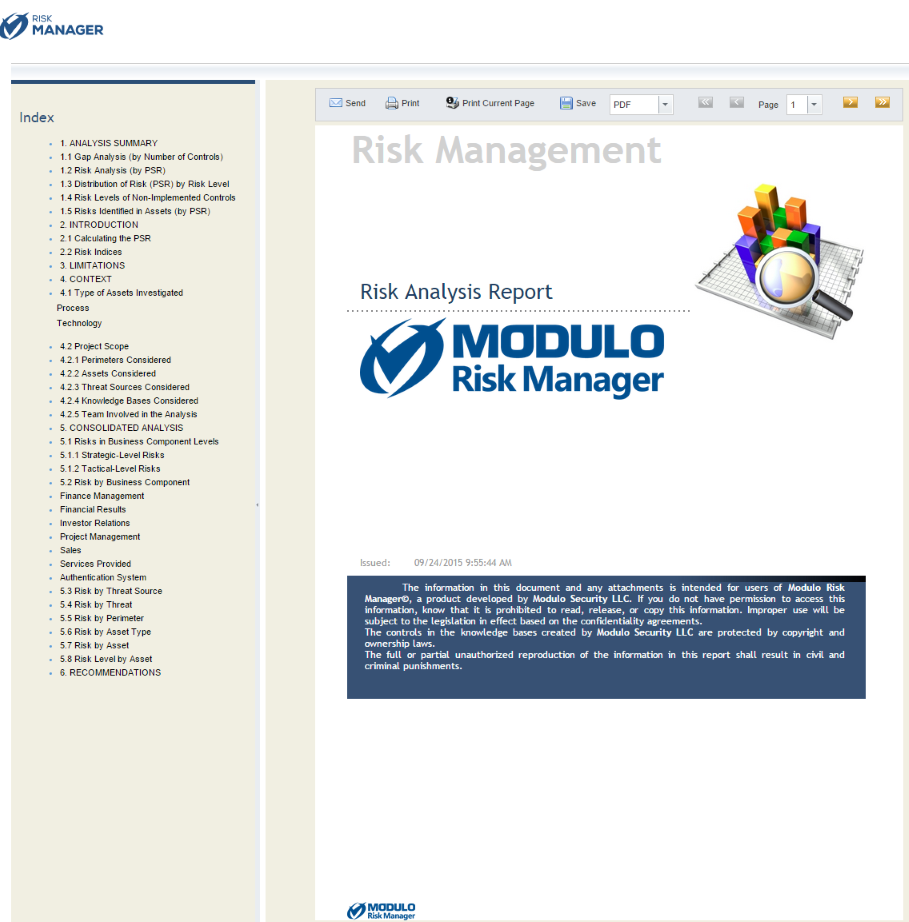
12. All reports
provided by the system include a menu on top to facilitate navigation. If you
want to send the report via e-mail, click Send. The message template for
sending reports and the message service must have been configured correctly in
the Administration module.
The system displays an area where
you can specify recipients for the e-mail. You can insert e-mail addresses by
clicking To (see figure below) or manually, separating each address by a
semicolon. The system accepts a maximum of 30 e-mail addresses at a time.
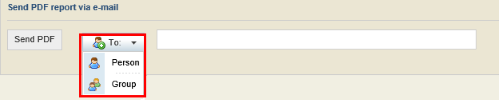
If, for example, you selected
Person, the system displays a window where you can select the people to
which you want to send the report (see figure below).
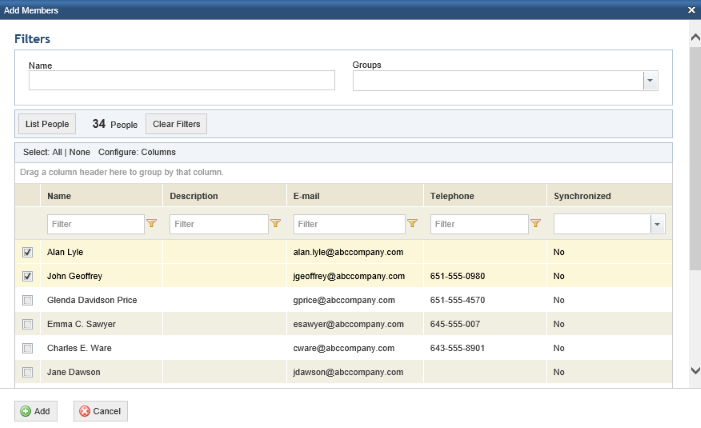
13. Once
finished specifying recipients, click Send PDF (see figure below).

The system displays a success
message.
14. To print a
full report, click Print, or select Print Current Page to print
only the page you are viewing.

15. To save a
report, select either PDF or RTF as the format from the drop-down list and click
Save.
16. In the
dialog box that appears, click Open to open the report in the format
selected on your computer, or click Save. If you want to quit the
operation, click Cancel.
17. The
navigation buttons from this menu can be used to browse through the report’s
pages. Click First Page ( ) to go to the beginning of the report;
click Previous Page (
) to go to the beginning of the report;
click Previous Page ( ) to go to the previous page; click
Next Page (
) to go to the previous page; click
Next Page ( ) to go to the next page in the report;
and click Last Page (
) to go to the next page in the report;
and click Last Page ( ) to skip to the end.
18. To navigate
the report pages, you can also select the page from the drop-down list from the
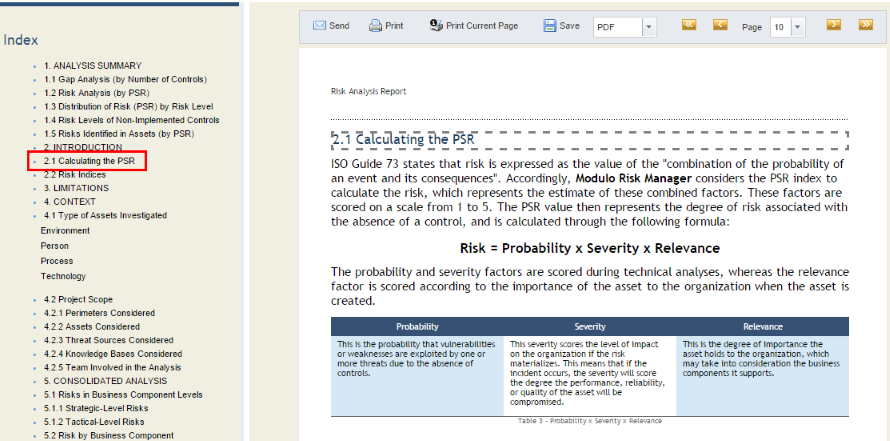
Page field.
19. You can
also browse the report by clicking the name of a topic from the table of
contents on the left (see figure below).
20. When
finished viewing the report, click Close in the upper right corner of the
screen. Reports can be generated again at any time to view updated results.