1. Access the system module containing the list you want to filter, for example, the Home module.
2. Access the section containing the list you want to filter, for example, the Notifications section.
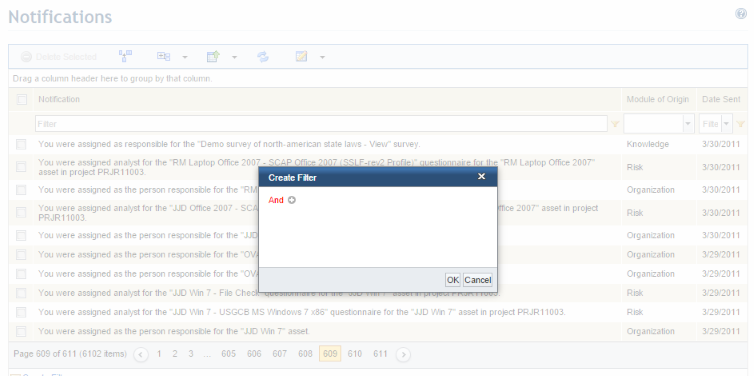
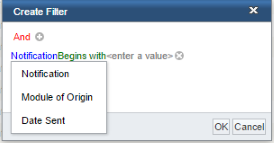
3. Click Create Filter (see figure below).
The system displays the advanced filter, where the criteria the list will be filtered by can be set (see figure below).
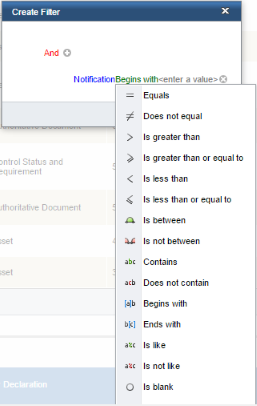
4. Select the logical operator you want to use for the condition that will be created for the filter by clicking the And operator, which is displayed by default.
The system displays the list of available logical operators as well as some additional filter functions at the end of the list (see figure below).
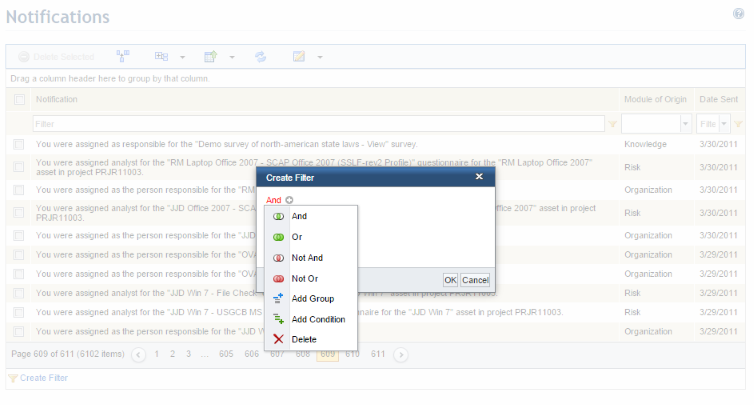
The table below describes the available logical operators and filter functions:
|
Logical Operators and Functions |
Description |
|
And |
Checks for two or more pieces of information. All must be present for the condition to be considered true. (Conjunction) |
|
Or |
Checks for two or more pieces of information. At least one must be present for the condition to be considered true. (Inclusive or Exclusive Disjunction) |
|
Not And |
Checks for two or more pieces of information. If all are present the condition is considered false. (Exclusive Conjunction) |
|
Not Or |
Checks for two or more pieces of information. If at least one is present the condition is considered false. (Exclusive Disjunction) |
|
Add Group |
Adds a new group to the filter’s conditions. |
|
Add Condition |
Adds a new condition to the filter. |
|
Delete |
Deletes a group from the filter. |
5. To add conditions to the filter, click Add Condition.
The system displays the new condition to be edited (see figure below).
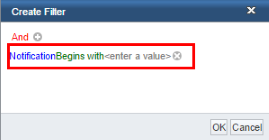
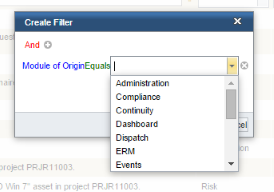
6. Click the first expression to view the available columns the list can be filtered by. By default, the first column in the list is shown (see figure below).
7. Click the second expression to select the applicable criteria operator. By default, the Begins with criteria operator is displayed (see figure below).
8. Click the <enter a value> field to enter the text you want included in the condition (see figure below). This field will display as a textbox or a combo box depending on whether the column selected uses a textbox or a combo box filter.
9.
Click Add Condition ( ) to add a new condition to the
filter. If you want to delete an existing condition, click Delete (
) to add a new condition to the
filter. If you want to delete an existing condition, click Delete ( )
next to it (see figure below).
)
next to it (see figure below).
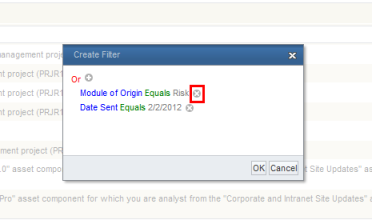
10. When finished creating all the conditions for the filter, click OK to apply the filter to the list. If you want to quit the operation, click Cancel.
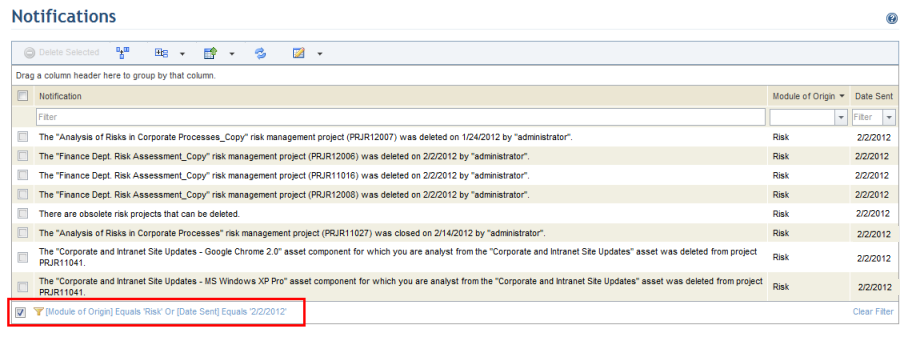
The system displays the list filtered according to the conditions set.
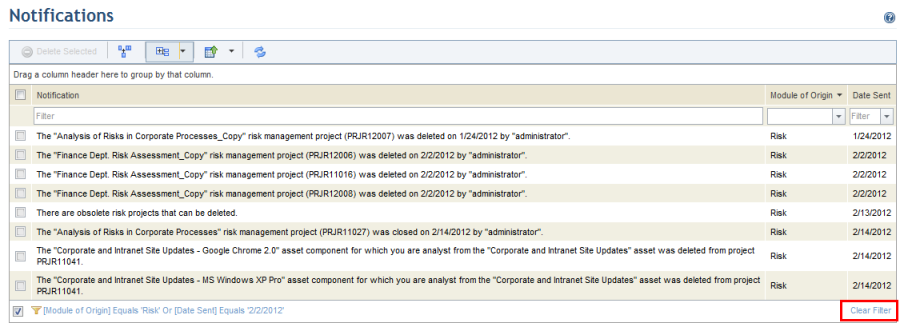
11. To edit the filter, click the filter created shown in the bottom left corner of the list (see figure below).
12. Unmark the checkbox next to the filter if you no longer want the filter to be applied.
Note: Filters will only be stored as long as you are on the same page. However, the filter settings can be saved so that they are displayed by default whenever each list is accessed. For details, see Chapter 19: Other Functions -> List Functions -> Saving List Settings.
13. To delete a filter, click Clear Filter (see figure below).