1. Access the Risk module.
2. In Risk Management Projects section, click the New Project option.
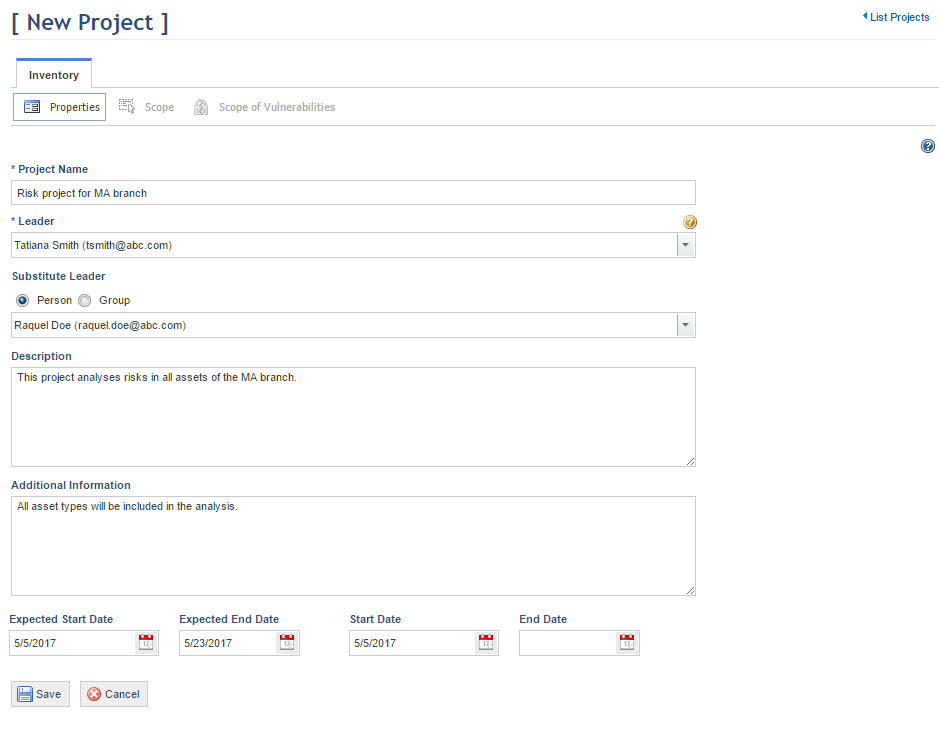
The system displays a screen where the properties for the new project can be entered (see figure below).
3. In the Project Name field, enter a meaningful name that identifies the purpose and reach of the analysis.
4. In the Leader field, click the combo box to select the user responsible for planning, developing, and monitoring the project. By default, this role receives permission to manage the project, generate reports, and run queries for the projects to which they were assigned. Note that this person must be included in the list of restrictions for this role in the Role Restrictions section of the Administration module, and must also be included in the Risk Module Users profile to gain access to the module.
5. In the Substitute Leader field, click the combo box to select the substitute leader for the project. By default, this role receives the same permissions as the leader. Note that this person or group must be included in the list of restrictions for this role in the Role Restrictions section of the Administration module, and must also be included in the Risk Module Users profile to gain access to the module. Also note that the substitute leader cannot be the same person as the project leader.
6. In the Description field, enter a description for the project.
7. In the Additional Information field, enter other relevant information on the project.
8.
In the Expected Start Date and Expected End Date fields, enter the
expected start and end dates of the project in mm/dd/ yyyy format or click
Calendar ( ) and select the desired dates. The
expected end date must be equal to or greater than the expected start date.
) and select the desired dates. The
expected end date must be equal to or greater than the expected start date.
9.
In the Start Date and End Date fields, enter the real start and
end dates of the project in mm/dd/ yyyy format or click Calendar ()
and select the desired dates. The end date must be equal to or greater than the
start date.
10. When finished, click Save. If you want to quit the operation, click Cancel.
The system displays the project information and displays additional new tabs (see figure below). Their functions will be explained later in this chapter.
