
1. Access the Continuity module.
2. Select Procedure Repository from the Plans option on the menu.
3. In the List of Procedures section, click Create Procedure (see figure below).
The system displays an area where the new procedure can be created (see figure below).
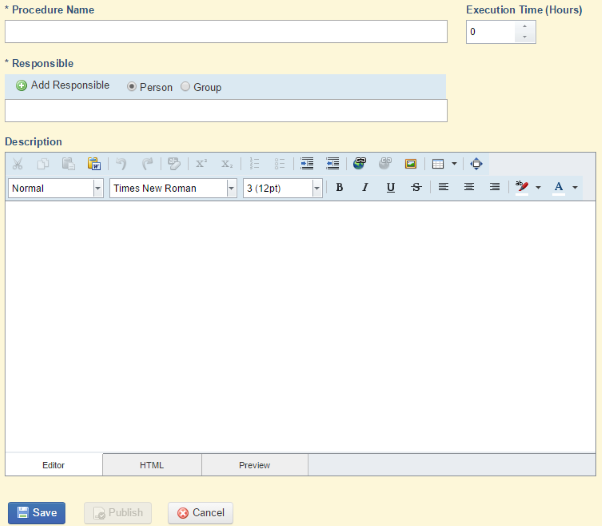
4. In the Procedure Name field, enter a name to identify the procedure. This field accepts a maximum of 100 characters.
5. In the Execution Time (Hours) field, specify the estimated amount of time required to execute the procedure in terms of hours. This field accepts decimal places.
6. In the Responsible field, select the Person or Group options and click Add Responsible. By default, people assigned to this role receive permission to edit and publish procedures.
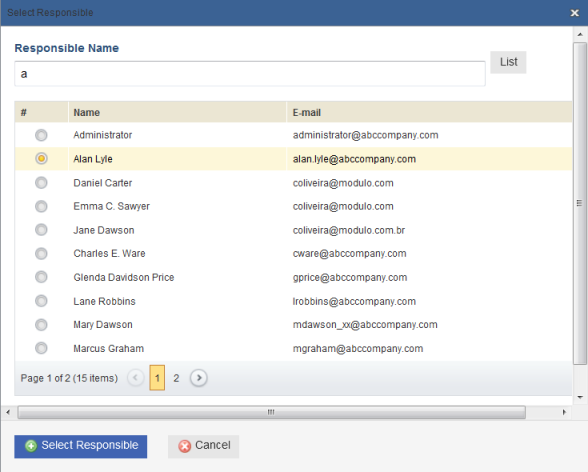
7. In the pop-up window that appears, enter at least one character to filter the list in the Responsible Name field and click List.
8. Select the person or group you want to assign as responsible for executing the procedure and click Select Responsible (see figure below). If you want to quit the operation, click Cancel.
The system displays a success message.
9. In the Description field, enter information on the steps this procedure requires of those responsible for carrying it out. You can edit the text formatting and insert links, tables, and images (from the internet or your computer) to improve the description of the procedure.
10. To edit the description in HTML, click the HTML tab.
11. To see how the description will be viewed by users, click the Preview tab.
12. Provide values for any attributes created for procedures in the Administration module, which will appear as additional fields below the Description field.
13. When finished, click Save. If you want to quit the operation, click Cancel.
The system displays a success message.