1. Access the Continuity module.
2. Select Manage Plans from the Plans option on the menu.
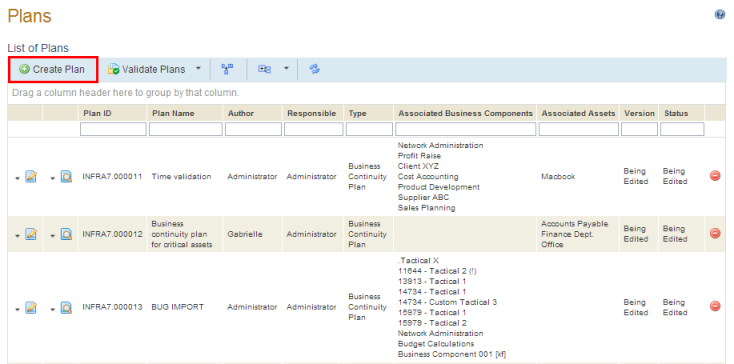
3. Click Create Plan (see figure below).
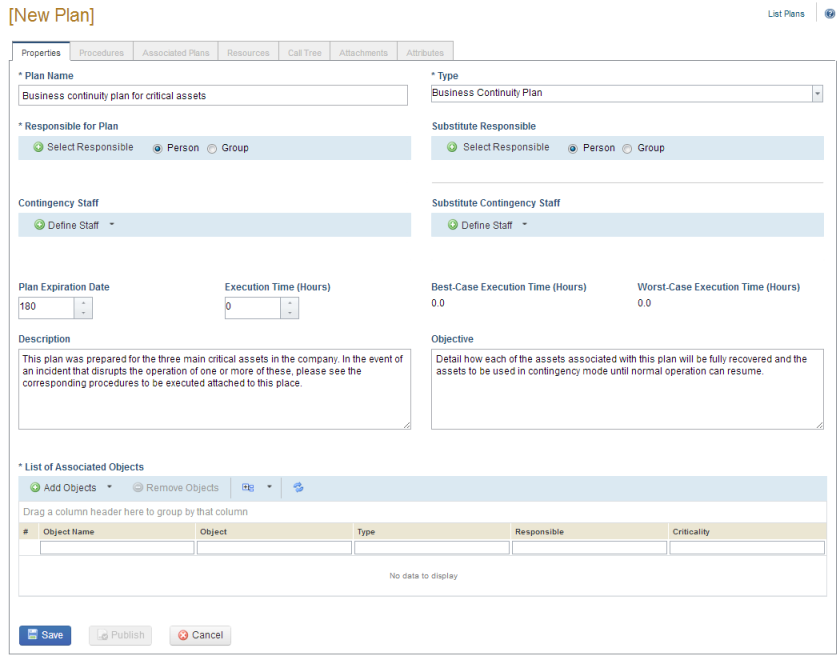
The system displays the Properties tab of the plan being created (see figure below).
4. In the Plan Name field, enter a name to identify the plan. This field accepts a maximum of 100 characters.
5. In the Type field, choose a custom type of plan that has been created in the Object Types section of the Administration module, or one of the three default types of plans available from Modulo. Note that in changing the type of plan in the Properties tab, the attributes applied to the previous type will be removed and substituted by the new attributes.
6. In the Responsible for Plan field, select the Person or Group option and click Select Responsible.
7. In the pop-up window that appears, enter at least one character in the Responsible Name field to filter the list and click List.
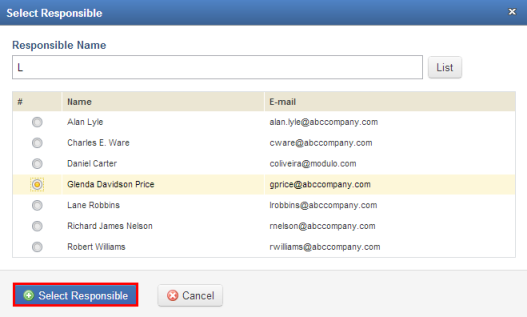
8. Select the person or group you want to assign as responsible for activating and executing the plan and click Select Responsible (see figure below). If you want to quit the operation, click Cancel.
The system displays a success message.
9. In the Substitute Responsible field, select a person or group of people who can replace the main person or group responsible if needed. Select the Person or Group option and click Select Responsible. In the pop-up that appears, enter at least one character in the Substitute Responsible field and click List. Select the person or group you want to assign and click Select Substitute. If you want to quit the operation, click Cancel. Note that by default this role receives the same permissions as the Responsible for Plan role.
10. In the Contingency Staff field, select a person or group of people responsible for executing the plan. Select the Person or Group option and click Select Staff. In the pop-up that appears, enter at least one character in the Contingency Staff field and click List. Select the person or group you want to assign and click Select Staff. If you want to quit the operation, click Cancel.
11. In the Substitute Contingency Staff field, select a person or group of people who can replace the contingency team if needed. Select the Person or Group option and click Select Staff. In the pop-up that appears, enter at least one character in the Substitute Contingency Staff field and click List. Select the person or group you want to assign and click Select Staff. If you want to quit the operation, click Cancel. Note that by default this role receives the same permissions as the Contingency Staff role.
12. In the Plan Expiration Date field, enter the expiration date for the plan in terms of the number of days, which by default will be set to 180 days. Note that expired plans can still be edited and published, and their expiration dates will be displayed in red in the Expiration Date column option for plans.
13. In the Execution Time (Hours) field, enter the estimated time it will take to execute the plan. This estimate should take into account the time required to activate the plan and the time required to execute all the procedures that will be associated with the plan. The time it takes to execute the plan should be less than the highest MTPD and RTO values of the objects the plan is being prepared for.
14. The Best-Case Execution Time (Hours) field considers the highest execution time of all the procedures associated with the plan, thus assuming they will be executed in parallel. This field is merely informative and can be used to estimate the total execution time of the plan.
15. The Worst-Case Execution Time (Hours) field sums all the execution times of each procedure associated with the plan assuming they will be executed sequentially. This field is merely informative and can be used to estimate the total execution time of the plan.
16. In the Description field, enter any relevant information that describes the scope of the plan and activation criteria.
17. In the Objective field, describe the primary purpose of the plan according to the business components and assets it is being prepared for.
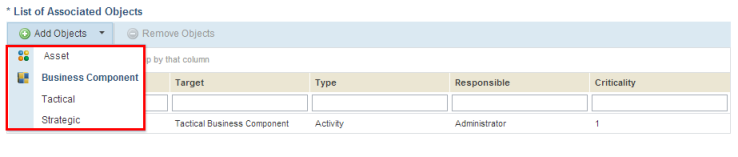
18. In the List of Associated Objects section, click Add Objects and select the type of object for which the plan is being prepared (see figure below).
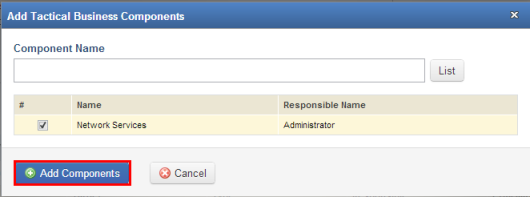
19. In the pop-up window that appears, enter at least one character in the Component Name field to filter the list and click List.
20. Select the objects the plan is intended for and click Add Components (see figure below). If you want to quit the operation, click Cancel.
The system adds the objects selected.
21. To remove objects from the plan, mark the checkboxes next to the ones you want to remove and click Remove Objects.
22. When finished, click Save. If you want to quit the operation, click Cancel.
The system displays a success message and enables the remaining tabs.
23. Click the Procedures tab to associate procedures with the plan.
The system displays the Procedures tab, where one or more published procedures from the repository can be associated with the plan.
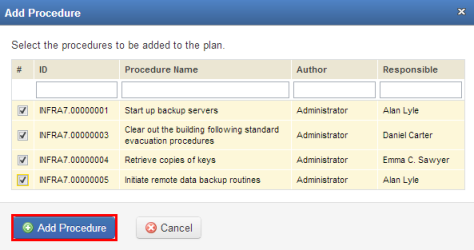
24. To include a procedure, click Add Procedure (see figure below).

25. In the pop-up window that appears, mark the checkboxes next to the procedures you want to associate with the plan and click Add Procedure (see figure below). If you want to quit the operation, click Cancel. Only the latest published versions of each procedure will be available.
The system displays a success message. The order in which the procedures should be executed is automatically defined according to the order in which they were added.
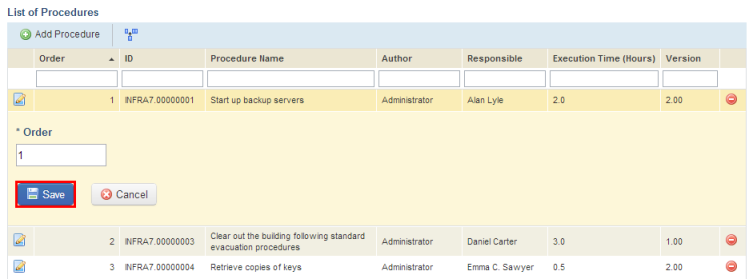
26. To edit this order, click Edit next to the procedure whose order you want to change.
27. In the Order field, enter a positive, whole number and click Save. If you want to quit the operation, click Cancel.
The system displays a success message.
28. To remove a procedure from the plan, click Remove next to it.
The system displays a success message.
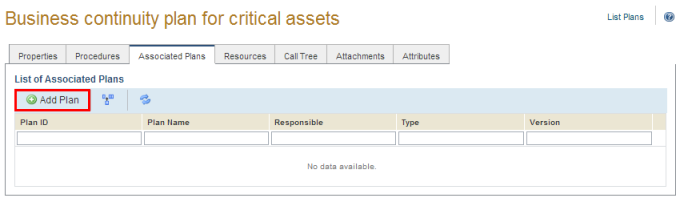
29. Click the Associated Plans tab to associate other published plans with the plan being edited.
The system displays the Associated Plans tab, where one or more published plans can be associated with the plan. Note that all published plans will be listed and can be associated with the plan being edited, regardless of whether or not the plans selected are already associated with other plans and regardless of your permissions to them. Access control will only be verified when attempting to view a plan.
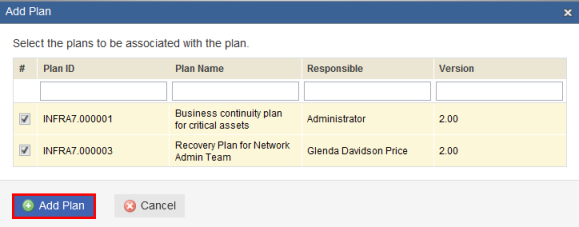
30. To associate a plan, click Add Plan (see figure below).
31. In the pop-up window that appears, mark the checkboxes next to the plans you want to associate with the plan being edited and click Add Plan (see figure below). If you want to quit the operation, click Cancel. Only the latest published versions of each plan will be available.
The system displays a success message.
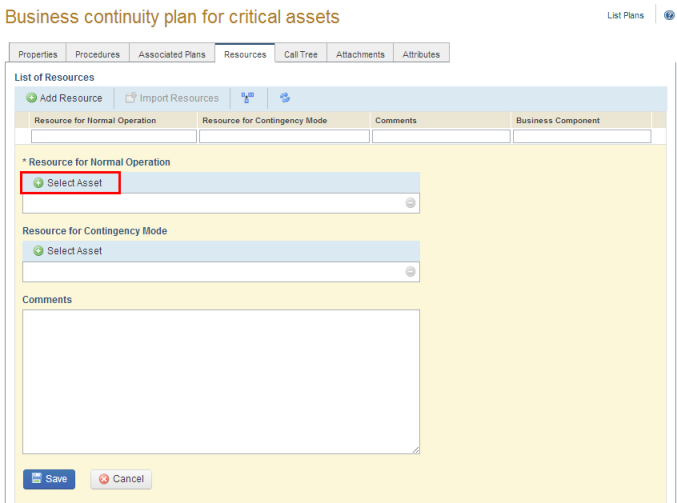
32. Click the Resources tab to specify the resources that are used in normal and contingency mode for each of the objects associated with the plan.
33. Click Add Resource to begin specifying the resources.
34. In the area that appears, click Select Asset in the Resource for Normal Operation field (see figure below).
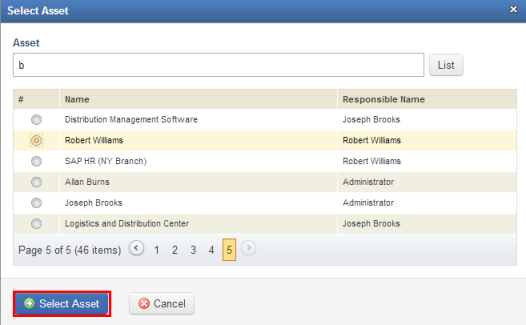
35. In the pop-up window that appears, enter at least one character in the Asset Name field to filter the list and click List.
36. Select the asset you want to add and click Select Asset (see figure below).
37. Click Select Asset in the Resource for Contingency Mode field and repeat the two previous steps. Note that asset in the previous field cannot be selected again in this one. If there is no contingency resource, leave the field blank.
38. In the Comments field, enter any relevant information regarding the resources added.
39. When finished, click Save. If you want to quit the operation, click Cancel.
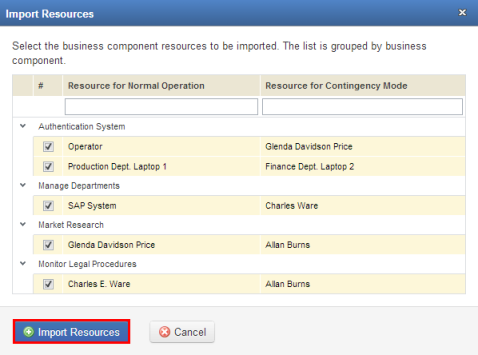
40. Click Import Resources if you want to import resources previously associated with the business components that were added to the list of associated objects on the Properties tab. These resources were associated through the Continuity Requirements tab of each business component in the Organization module.
41. In the pop-up window that appears, select the resources you want to import and click Import Resources (see figure below). The list of resources is grouped by business component.
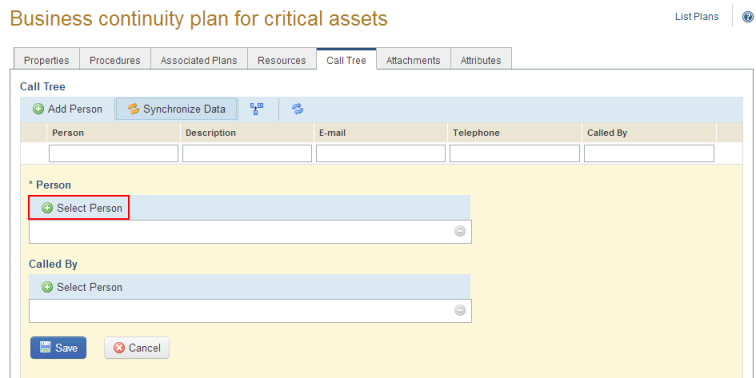
42. Click the Call Tree tab to select the people who must be called when the plan is executed and the people responsible for calling them. Note that any attributes created for people in the Objects and Attributes section of the Administration module can be added as column options in this list, except for Image attributes. For details, see Chapter 11: Continuity -> Customizations -> Call Tree Columns.
43. Click Add Person.
The system displays an area where you can select the person who must be called and the person who must call them.
44. Click Select Person in the Person field to select the person who must be called (see figure below)
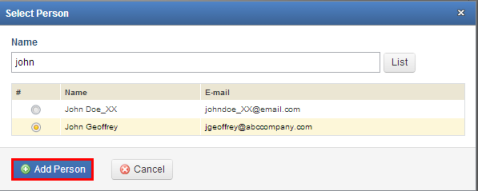
45. In the pop-up window that appears, enter at least one character in the Name field to filter the list and click List.
46. Select the person who must be called and click Add Person (see figure below). If you want to quit the operation, click Cancel.
47. Click Select Person in the Called By field to select the person responsible for calling the person selected in the Person field. Note that the same person cannot be selected for both Person and Called By fields.
48. In the pop-up window that appears, enter at least one character in the Name field to filter the list and click List.
49. Select the person who must be called and click Add Person (see figure below). If you want to quit the operation, click Cancel.
50. When finished, click Save. If you want to quit the operation, click Cancel.
The system displays a success message.
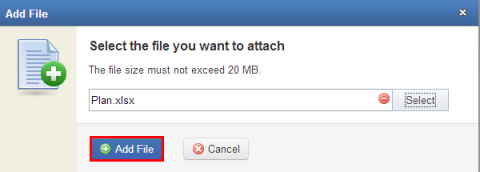
51. Click the Attachments tab to include images and other types of files to the plan.
52. Click Add Files to select a file (see figure below). The file size cannot exceed 20 MB and can be in any known format.

53. In the pop-up window that appears, click Select to locate the file on your computer and click Add File to confirm (see figure below).
The system displays a success message.
54. Click Add Images to select a photo (see figure below). A link to the photo will be available when editing the plan, and when viewing a plan it will be displayed in the Attachments section. The file size cannot exceed 20 MB and must be in .jpeg, .png, .gif, or .bmp format.
55. In the pop-up window that appears, click Select to locate the image on your computer and click Add Image to confirm.
The system displays a success message.
56. To reorder the list of files or images attached to the plan, drag each item to the position you want.
57. To remove an image or file attached to a plan, click Remove next to it.
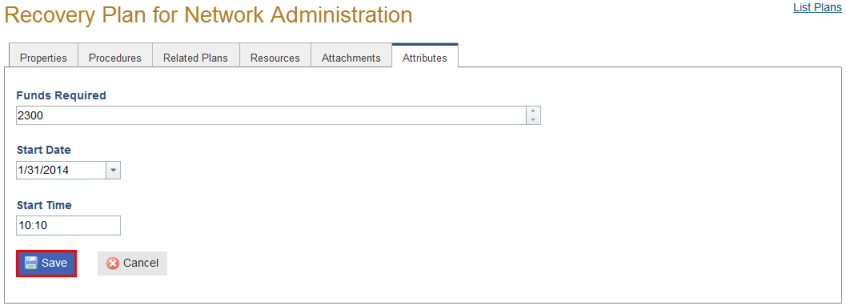
58. Click the Attributes tab to provide values for any attributes created for plans in the Administration module. Keep in mind that all information on each plan is versioned except in the case of attributes. If the attribute's name is changed or the attribute is deleted, it will also be changed or deleted in a published plan. Only the values entered for the attributes will be versioned for each plan. Also note that this tab will be disabled if no attributes have been created or if the plan type has not been linked to any attribute.
59. When finished entering values for the attributes, click Save (see figure below). If you want to quit the operation, click Cancel.
The system displays a success message.
60. To return to the main list of plans, click the List Plans link in the upper right corner.