This topic explains how to associate continuity plans with events so they can be monitored and queried in the Workflow module. These events can be created under the Plan Approval, Plan Activation, and Test Plan types, available with the installation of the Continuity module, or under custom event types created in the Object Types section of the Administration module. However, only custom event types for which the association with continuity plans was enabled will be available. Keep in mind that users must have access to the Workflow module and have the appropriate permissions in order to access the associated event.
1. Access the Continuity module.
2. In the Plans section, select the Manage Plans option.
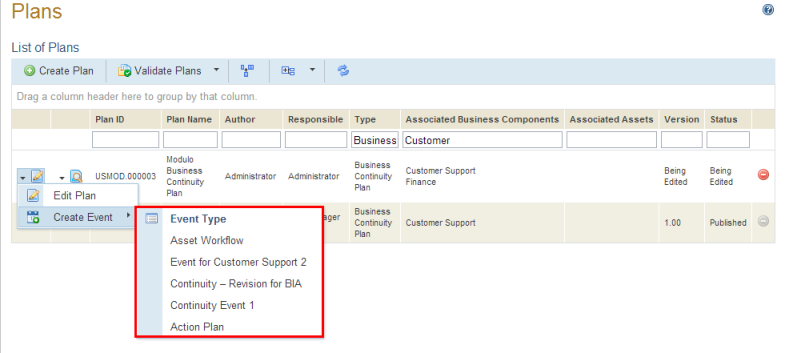
3. In the List of Plans section, click Edit and then Create Event and select a type of event from the Type of Event drop-down list (see figure below). Note that you will only be able to see event types that were previously enabled to be associated with continuity plans in the Object Types section of the Administration module.
The system displays a screen that allows you to define the properties of the event that will be created (see figure below).

4. In the Title field, enter a title for the event using up to 2,500 characters. By default, this field is completed with the ID and title of the original plan, separated by a hyphen. Note that the system does not prevent events from being registered under the same title.
5. In the Description field, enter information describing the event using a maximum of 5,500 characters. By default, this field is completed with the description of the original plan.
6. In the Urgency field, define the urgency (U) with which the event should be treated. This is scored on a five-level scale: 1 - Very Low, 2 - Low, 3 - Medium, 4 - High, and 5 - Very High.
7. In the Severity field, define the severity (S) of the event, which is the impact it will have on the organization if left untreated. This is scored on a five-level scale: 1 - Very Low, 2 - Low, 3 - Medium, 4 - High, and 5 - Very High.
8. In the Relevance field, define the relevance (R) of the event. This is scored on a five-level scale: 1 - Very Low, 2 - Low, 3 - Medium, 4 - High, and 5 - Very High.
9. In the Coordinator field, select the person or group of people who will be assigned as the event coordinator. By default, this role receives permission to view the event, create child events for it, manage its associations with related events, edit all of its properties, update its status, and include it in the scopes of queries. Also by default, the system assigns the person or group responsible for the plan to this role. If no one was assigned as responsible, the substitute responsible for the plan is assigned as the coordinator here.
10. In the Responsible field, select the person or group of people who will be assigned as responsible for the event. By default, this role receives the same permissions as the event coordinator, except for the permission to edit the Coordinator field. Also by default, the system assigns the substitute responsible for the plan to this role.
11. In the Involved field, you can include the people and groups involved in the event by clicking Add Involved. To remove them, click Remove next to each. By default, the people and groups assigned to this role receive permission to view the event, update its progress, and include it in queries. Also by default, the plan author, the people and groups responsible for the associated procedures, and all the people and groups from the contingency and substitute contingency staff are included as involved in the event.
Note: Keep in mind that the people and groups assigned to the event’s roles must be included in the Workflow Module Users profile to gain access to the module.
12. If you want the system to send notifications on the event via e-mail, mark the Send e-mail notifications checkbox.
Note: For notifications to be sent via e-mail, the message service must be configured in the Message Service section of the Administration module; the default workflow rules installed with the Continuity module must be enabled also in the Administration module; and a valid e-mail address must have been provided for the people assigned in the Manage People section of the Organization module. Note that the default workflow rules will only work for the default event types created for continuity plans. If custom types were created, new workflow rules can be created by copying the default ones and customizing as needed. For details on the default workflow rules to send e-mail notifications, see Chapter 11: Continuity -> Continuity Module Configurations.
13. When finished, click Save. If you want to quit the operation, click Cancel.