 ).
).This topic explains how to create events through the app. For events to be sent to the Workflow module, the Manage events from the Workflow module feature must have been selected when the app was registered in the Authorized Applications section of the Administration module. Note that to create an event through the application, the authenticated user must have permission to create events in the system and must be connected to the internet.
1.
In the upper right corner of the main screen, tap Add New Event ().
The app displays a window where you can enter information on the new event (see figure below).
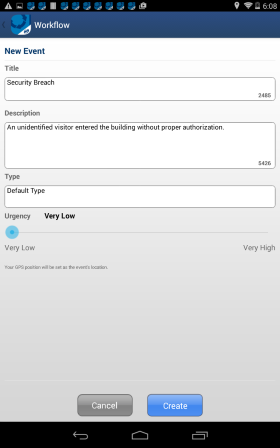
2. Tap the Title field and enter a title for the event. This field accepts a maximum of 2,500 characters. If left blank, a default name will be entered in the field.
3. Tap the Description field and enter a description to help identify the event using a maximum of 5,500 characters. If left blank, a default description will be entered in the field.
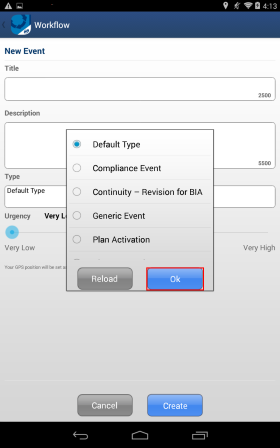
4. When the Type field is tapped, a list will appear with the event types available. Mark the checkbox next to the event type you want to use and tap OK to confirm (see figure below). To display the most recent list of event types, tap Reload. If you want the default event type to be used, tap outside the pop-up or the Back button of your device.
5. In the Urgency field, slide the button across the line to define the urgency of the event, setting it to one of the following values: Very Low, Low, Medium, High, Very High.
6.
When finished, tap Create to create the event. If you want to quit the
operation, tap Cancel, Back ( ),
or the Workflow icon in the upper left corner of the screen.
),
or the Workflow icon in the upper left corner of the screen.
Once created, the new event will be available at the top of the list of events.