1. Access the Organization module.
2. In the Projects section, select the List Projects option.
The system displays a list of previously registered projects.
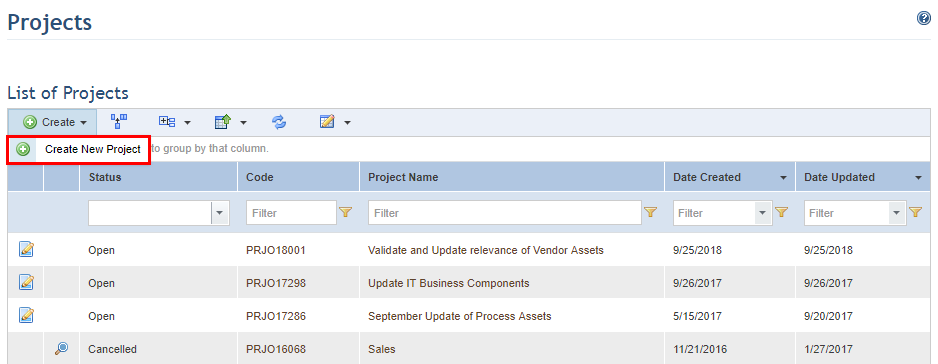
3. In the List Projects section, click Create and select Create New Project (see figure below).
The system displays a screen where the properties of the new project can be registered.
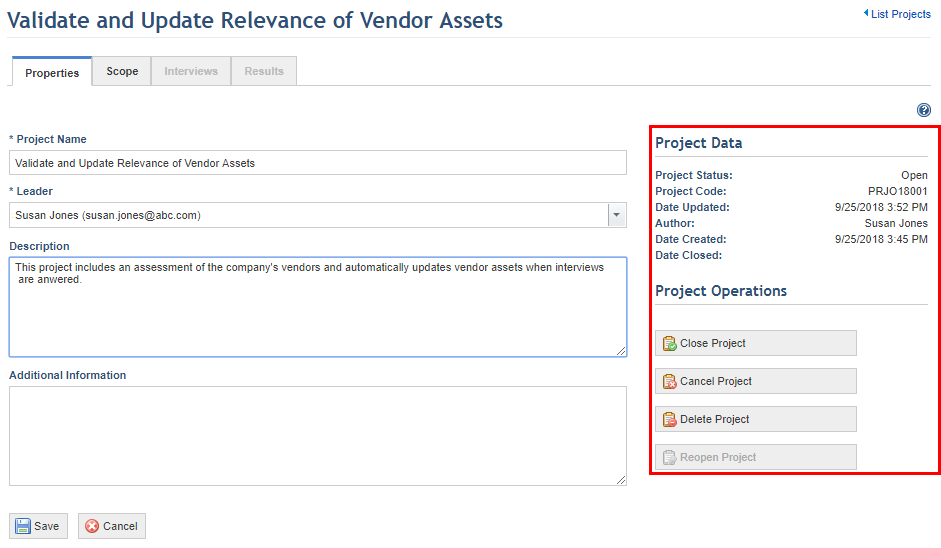
4. In the Project Name field, enter a name for the project.
5. In the Leader field, select the person responsible for planning, executing, and monitoring the project.
6. In the Description field, enter the main characteristics of the project.
7. In the Additional Information field, enter other relevant characteristics of the project.
8. When finished, click Save. If you want to quit the operation, click Cancel.
The system displays the project information and enables the Scope tab (see figure below).
9. Click the Scope tab.
10. In the Scope section, click Add to Scope and then click Business Components or Assets (see figure below).
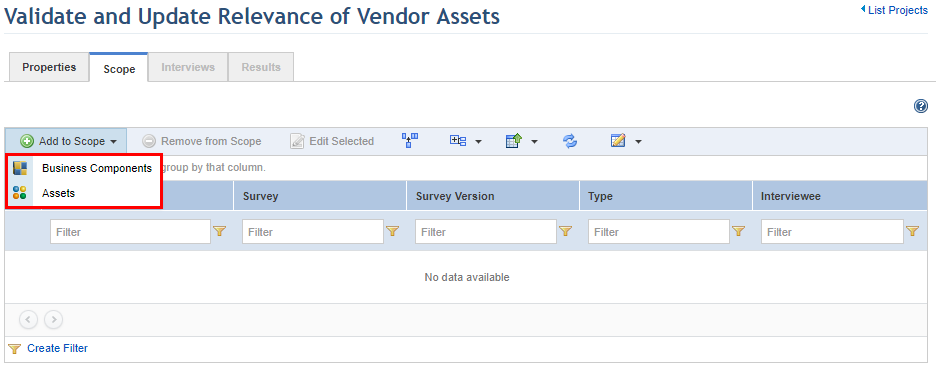
The system displays a screen where the objects can be added.
11. Set the filter criteria and click List Business Components or List Assets to view the list of objects that meet these criteria.
12. Mark the checkboxes next to the objects that you want to add to the project scope.
13. In the Survey field, select the generic survey that you want to use to collect information on the selected objects. Note that only published surveys can be used.
14. In the Interviewee field, select the person that will be interviewed to collect information on the selected objects. If this field is left blank, by default the system assigns the person responsible for the object as the interviewee.
15. To include additional objects using different surveys, click Add and repeat the process from step 11.
16. If you do not want to add any more objects using different surveys, click Add and Close (see figure below).
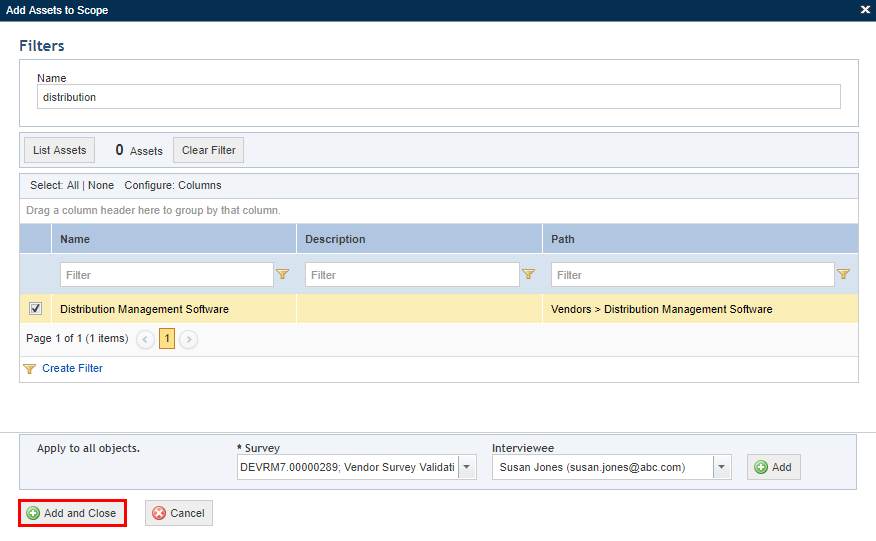
The system displays a success message and enables the Interviews tab.