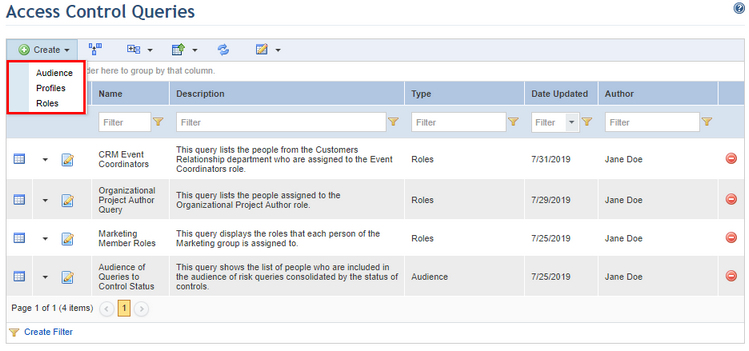
This topic describes how to create a query to view information related to access control. In this section you can create the following types of queries: those that show the people who are assigned to roles, those that list the people included in profiles, and those that display the people included in the audience of system queries, generic reports, as well as SQL queries and dashboards of the Data Analytics module.
The wizard for each access control query follows the same steps, with differences in the filter options available for each query type. It should be noted that users must have specific permissions to each of the queries, generic reports and dashboards included in the results of queries to audience information. This means that when an audience query is created with a risk query listed in its results, for example, all users with access to the audience query will be able to view the name of the risk query in the results, but only the author, editors and audience members of the risk query will be able to open it.
1. Access the Administration module.
2. Select the Queries option from the Access Control section.
3. In the Access Control Queries section, click Create and select the query type you want from the drop-down list that appears (see figure below).
The system displays the Filters step in the wizard for creating the query, where the filters to be used can be selected, which will reduce the number of objects displayed in the results (see figure below).
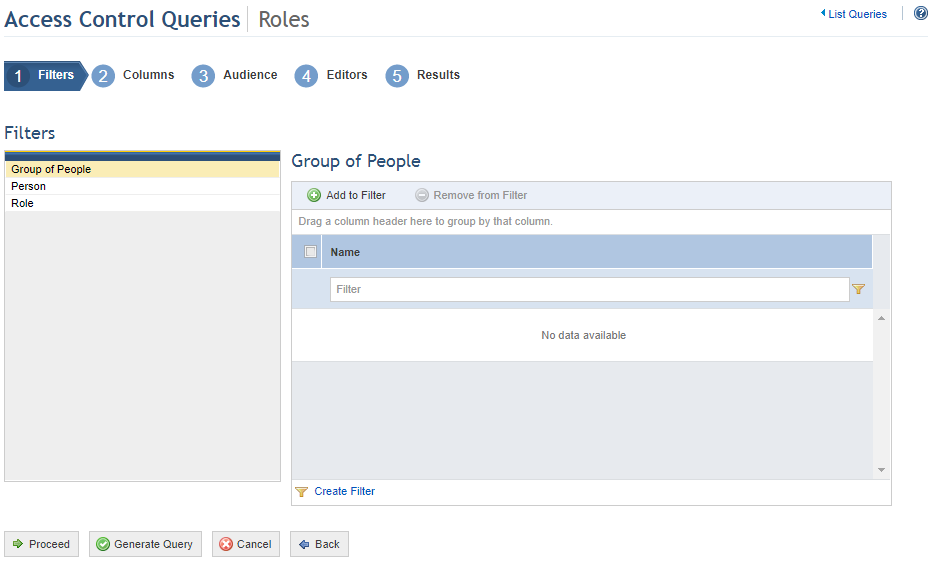
4. Select the filter you want to use by clicking one of the filter options displayed on the left (see figure below). When you select a filter, only objects that match the criteria set in the filters selected will be displayed in the query results. For example, if you filter a query to roles by a certain group of people and by a certain role, only the people from that group who are assigned to the role selected will be included in the results. Note that the filter options are different for each query type.
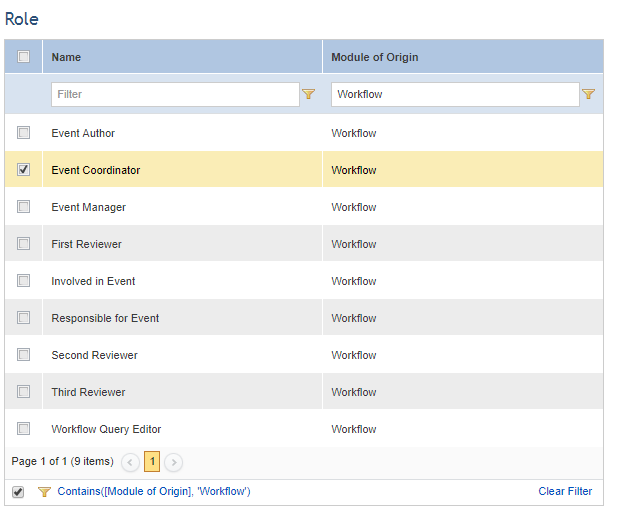
5. Select the criteria to be added to the selected filter (see figure below).
6. To remove criteria added to the filter, mark the checkboxes next to each criteria you want to remove. Some filter options also require you to click Remove from Filter.
7. After selecting the filters, click Proceed to continue creating the query. If you want to generate the query, click Generate Query. If you want to cancel query creation, click Cancel.
When Proceed is clicked, the system displays the Columns step in the wizard for creating the query, where the columns to be displayed in the query results can be selected (see figure below).
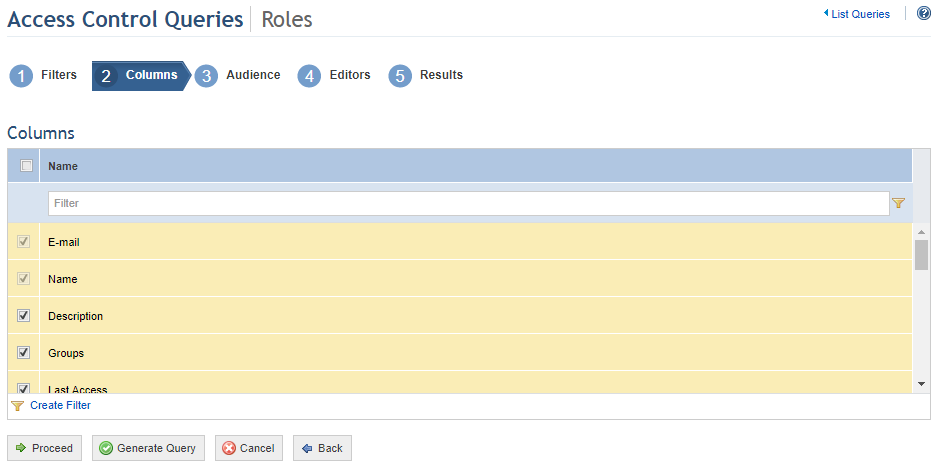
8. Select the columns you want to include in the query results by marking the checkboxes next to each option. By default, the system will show some pre-selected options that can be removed, while others are required columns. Any attributes created for people in the Objects and Attributes section of the Administration module will be listed here as column options, with the exception of Image attributes.
9. After selecting the columns, click Proceed to continue generating the query. If you want to generate the query, click Generate Query. If you want to cancel query creation, click Cancel. To return to the previous step, click Back.
When Proceed is clicked, the system displays the Audience step in the wizard for creating the query, where the people or groups of people who will be able to view the query results in the Queries section of the Home module can be selected.
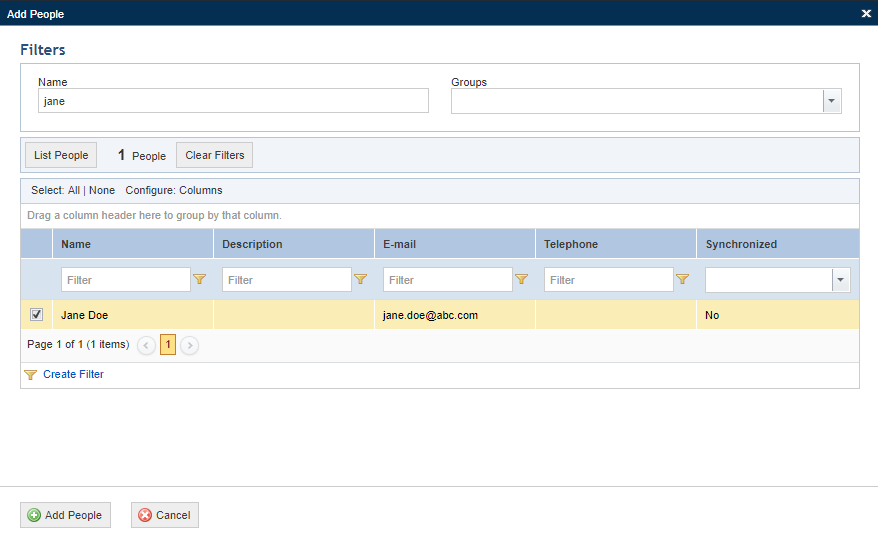
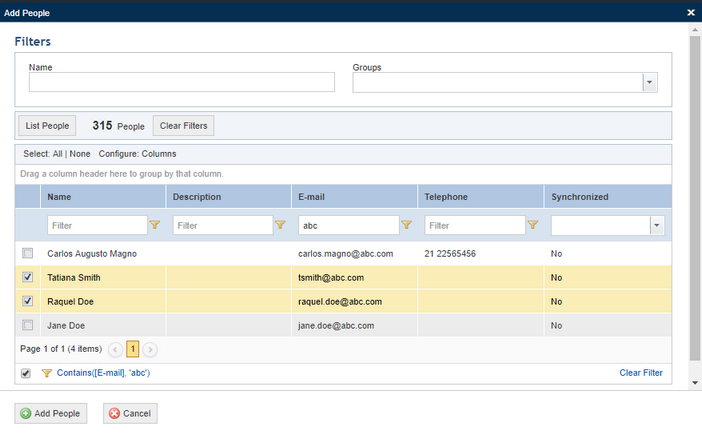
10. Click Add Audience and select People or Groups to add them (see figure below).

11. If, for example, you selected People, select the people to be added and click Add People (see figure below).
12. To remove people from the audience, mark the checkboxes next to their names and click Remove Audience.
The system requests confirmation to remove the people or groups from the audience (see figure below).
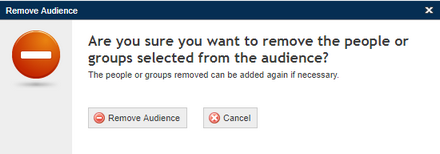
13. Click Remove Audience to confirm. If you want to quit the operation, click Cancel.
The system removes the people selected from the audience.
14. Click Proceed to continue to the next step of the query. If you want to generate the query, click Generate Query. If you want to cancel query creation, click Cancel. To return to the previous step, click Back.
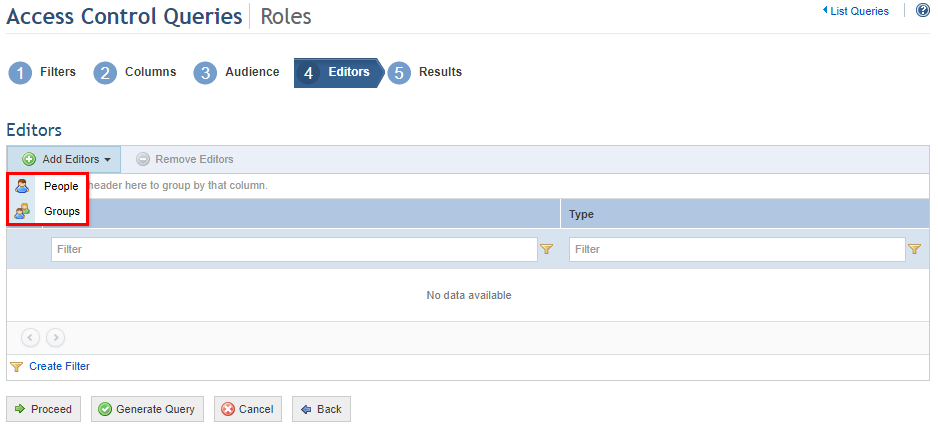
When Proceed is clicked, the system displays the Editors step, where you can select which people and groups will be able to edit the query, receiving the same permissions to it as the author.
15. Click Add Editors and select People or Groups to add them to the list of editors (see figure below).
16. If, for example, you selected People, select the people to be added and click Add People (see figure below).
The system displays the people selected.
17. To remove people or groups from the list of editors, mark the checkboxes next to their names and click Remove Editors.
The system requests confirmation to remove the people or groups from the list of editors (see figure below).

18. Click Remove Editors to confirm. If you want to quit the operation, click Cancel.
The system removes the people selected from the list of editors.
19. Click Proceed or Generate Query to run the query. If you want to cancel query creation, click Cancel. To return to the previous step, click Back.
When Proceed or Generate Query is clicked, the system displays the query results (see figure below).
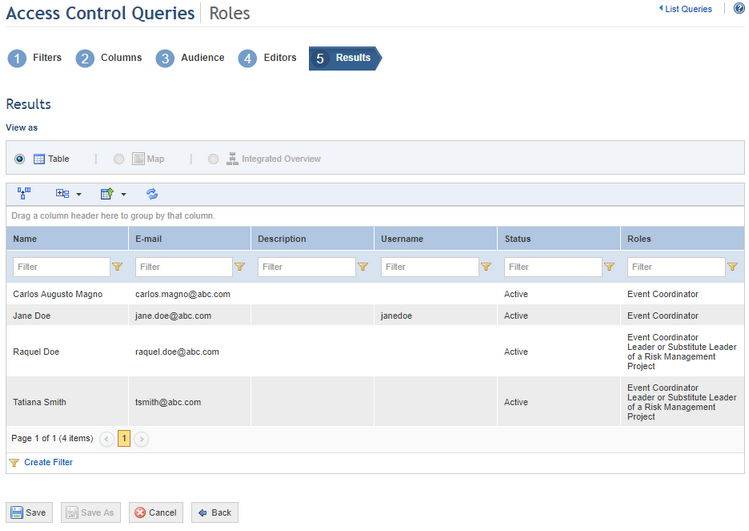
It is important to note that when a group of people is included in the query, its members will be listed individually in the results. For example, if in a query to view audience members you include a filter for a generic report that has only one group of people included in its audience, the results will display an entry for each group member instead of only one entry for the group.
When included in the results, the group will be available as a hidden column that can be enabled through the Configure Columns option in the list. The group name is a clickable link that directs users to the group page in the Manage Groups of People section of the Organization module. Likewise, the queries, generic reports and dashboards displayed in the results of audience queries are also clickable links. When the name of a query is clicked, the system will open the query in the Queries section of the Home module. Clicking the name of a report opens it in the Generate Reports section of the Organization module, while clicking a dashboard opens it in a new window. Keep in mind that you need to have permission to access each of these modules, as well as specific permission to the generic reports, queries and dashboards to view them.
20. Click Save to save the query. If you do not want to save the query, click Cancel. To return to the previous step, click Back.
When Save is clicked, the system displays a window where a name and description for the query can be entered (see figure below).
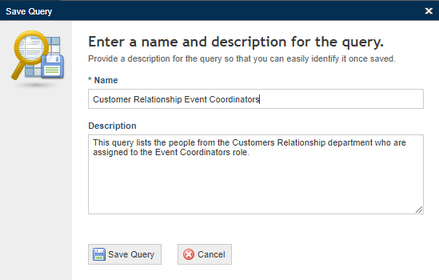
21. In the Name field, enter a name to identify the purpose of the query. This field is required and accepts a maximum of 50 characters.
22. In the Description field, enter the main characteristics of the query. This field accepts a maximum of 4,000 characters.
23. When finished, click Save Query. If you want to quit the operation, click Cancel.
The system displays a success message.