1. Access the ERM solution.
2. In the KRIs section, select Manage KRIs.
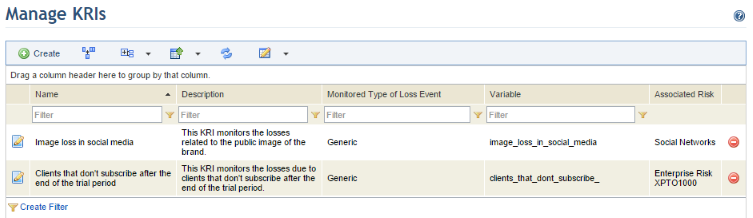
3. In the Manage KRIs section, click Create to create a KRI (see figure below).
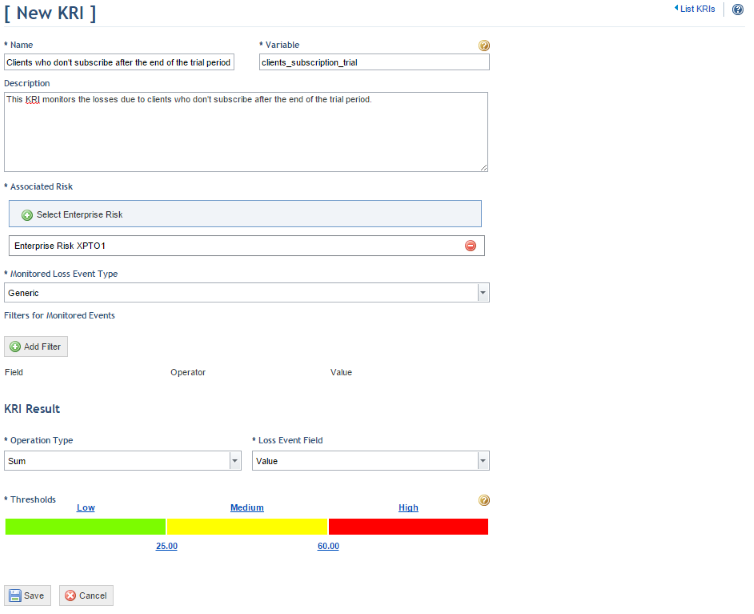
The system displays a screen where details on the KRI can be entered.
4. In the Name field, enter a name to identify the KRI using a maximum of 200 characters.
5. In the Variable field, enter a name for the variable that will be used to identify the KRI, which must be unique and use a maximum of 30 characters. It must contain letters, numbers, and the _ character, and must also begin with a letter or the _ character. Once saved, the variable name cannot be changed.
6. In the Description field, enter additional data on the KRI using a maximum of 1,000 characters.
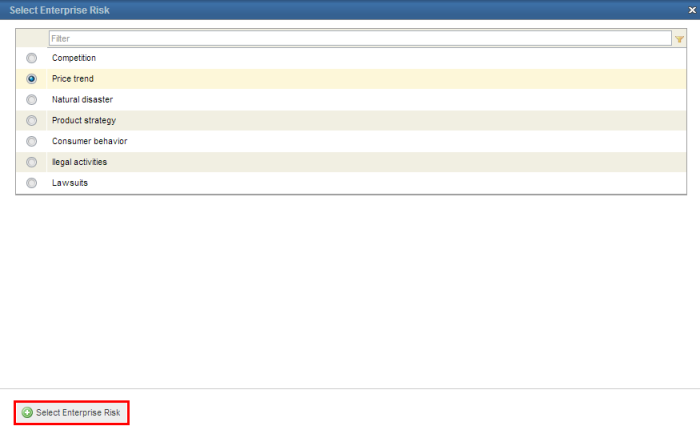
7. In the Associated Risk section, click Select Enterprise Risk to select the enterprise risk that must be associated with the KRI (see figure below). All risks registered in the Manage Enterprise Risks section of this solution will be available for selection. Note that, once the KRI is saved, the risk associated with it cannot be changed.
8. In the pop-up that appears, select the enterprise risk and click Select Enterprise Risk (see figure below).
9. Repeat the previous step to change the associated risk. To remove it, click Remove next to the risk. Once saved, the risk associated with the KRI cannot be changed.
10. In the Monitored Loss Event Type field, select the type of loss event to be monitored by the KRI. Once saved, the event associated with the KRI cannot be changed.
11. In the Filters for Monitored Events section, click Add Filter to filter loss events by one or more values. All default properties and any attributes created for the loss event type will be listed. If an attribute used in the filter is deleted from the system, it will also be deleted from the filter and the KRI will not be calculated.
12. In the KRI Result area, you can define how the KRI calculations will be done and set limits for the results. In the Operation Type field, select the type of operation to be executed with the values from a field of the loss event monitored. The field to be used can be selected under Loss Event Field.
13. To edit the limits, names, and the colors of each band corresponding to the resulting KRI values, click the element you want to edit. The element will become an editable field, where you can enter a value, a name, or a hexadecimal code of a color, according to the selected element. When one of the colors in the scale is clicked, you can select a new color from the list displayed.
14. When finished, click Save. If you want to quit the operation, click Cancel.
The system displays a success message.