1. Access the Administration module.
2. In the Customizations section, click the Event Layouts option.
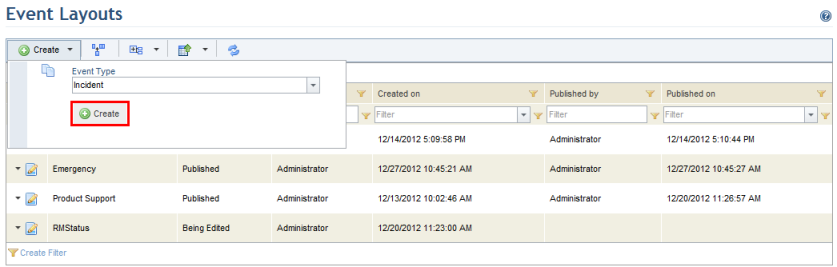
3. In the Event Layouts section, click Create, select the type of event for which you want to edit the layout in the Event Type section, and click Create.
The system displays the event editor, where all default tabs in the event type are displayed. Each change made through the editor is automatically saved, but the layout must be published before the customizations will be available in the Workflow module.
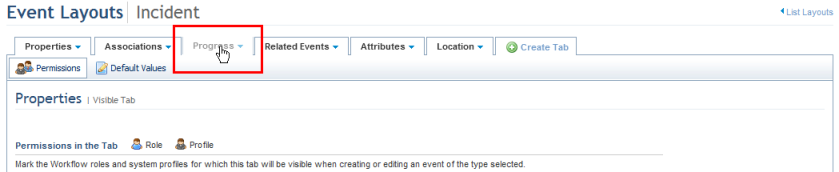
4. To change the position of a tab, drag and drop it into place (see figure below). The first tab in any layout must be the Properties tab (not hidden) or a custom tab.
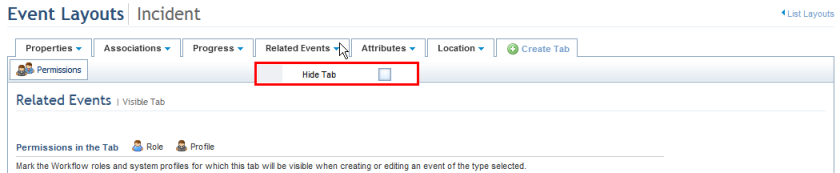
5. To disable a default tab, click the arrow next to its name and select Hide Tab (see figure below). Fields from hidden tabs remain visible in lists and queries and can be edited through the spreadsheet, workflow rules, and the API.
Note: Default tabs cannot be deleted, only disabled.
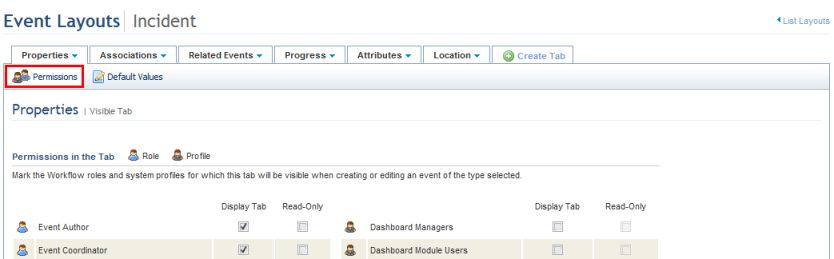
6. For each tab that is not hidden, you can define which Workflow roles and system profiles will have permission to view the tab, as well as whether this viewing permission will be read-only. To do so, click the Permissions section and mark the checkboxes in the Display Tab and Read-Only columns for each role and profile (see figure below). Note that the default access control has precedence, so that a role or profile will not be able to view a tab or edit a property (for example) if they do not already have permission to that event or permission to access the Workflow module.
7. In the Default Values section of the Properties tab, you can define default values for the required fields in the tab (see figure below). If this tab is hidden or repositioned, default values will have to be provided for all of its fields. If a required field was included in a custom tab and that custom tab was placed first in the layout, the default values entered here will serve as suggestions when users are creating events of this type.
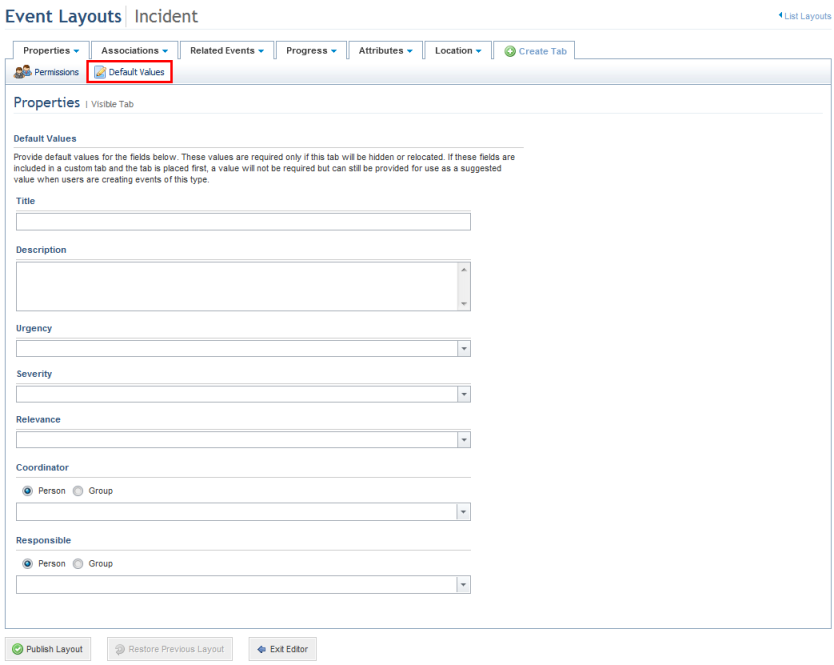
Note: This section will not be available for Risk and Compliance events, as their required properties are entered when creating treatment events through projects, and because the changes made to the layout of these event types are only reflected in the Workflow module.
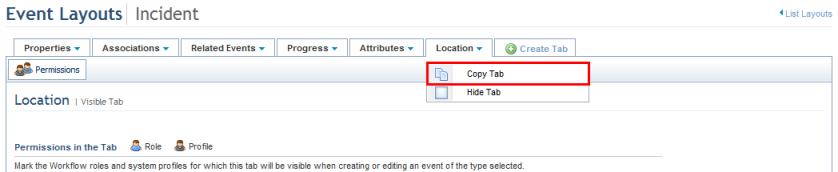
8. To create a new tab from a copy of another tab, click the arrow next to the name of the tab you want to copy and select Copy Tab (see figure below). The Progress, Associations, and Related Events tabs cannot be copied.
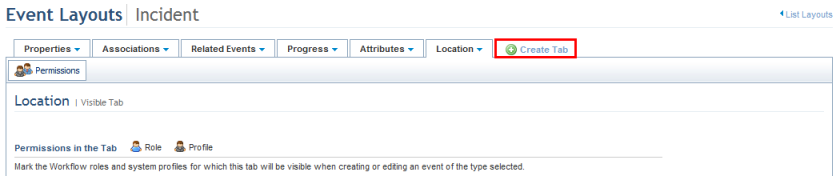
9. To create a tab from scratch, click Create Tab (see figure below).
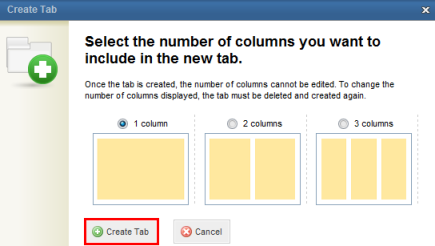
10. In the pop-up that appears, select the number of columns the new tab will contain and click Create Tab (see figure below). Note that, once saved, the number of columns in the tab will not be able to be edited.
The system displays the new tab, where the permissions for it can be configured, as well as its name and the fields to be displayed in it.
11. In the Customize Fields section, enter a name for the new tab in the Name field. Note that this name cannot be the same as that of any other tab in the layout of that event type. This field accepts a maximum of 20 characters.
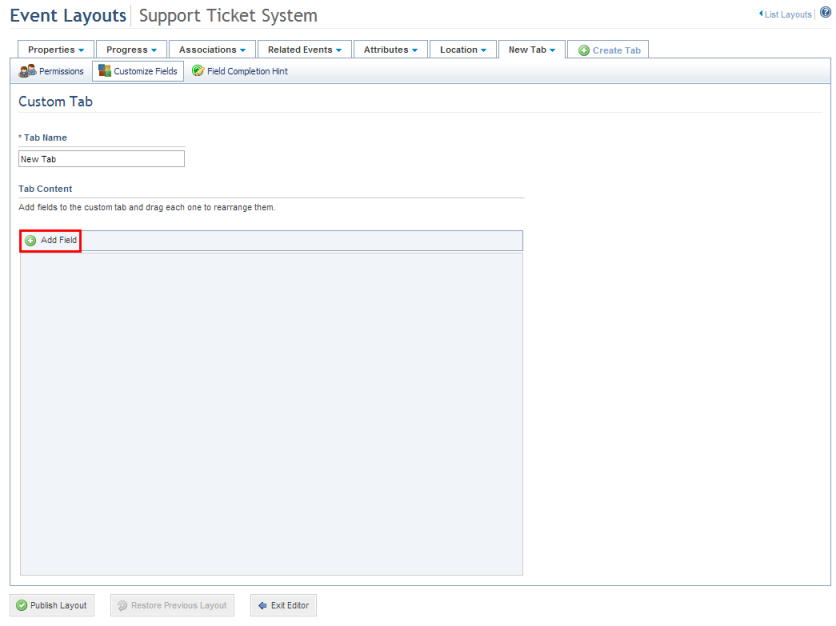
12. Click Add Field to add a field to the custom tab. These fields can be properties or attributes of the event type being edited or the Add Attachments option from the Progress tab (see figure below). A maximum of 60 fields can be added to each tab.
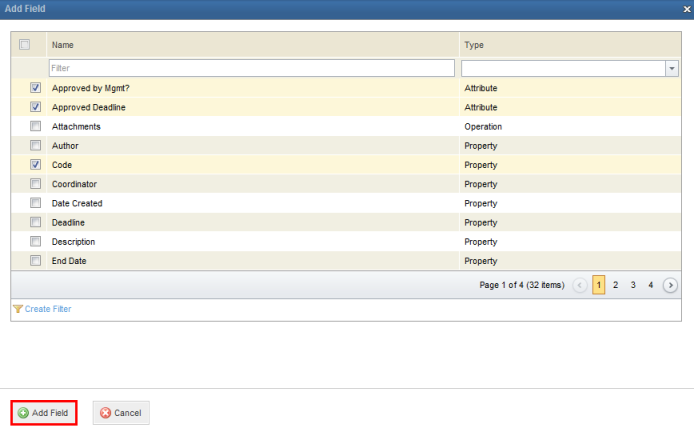
13. In the pop-up window that appears, mark the checkboxes next to the fields you want to add to the new tab and click Add Field (see figure below). At least one field must be added to each custom tab. The same field can also be added to more than one tab, and the value entered for it in any one of the tabs will be reflected in the rest.
14. To remove a field added to a tab, click Remove next to its name.
15. To change the order in which the fields appear, drag and drop each one into place.
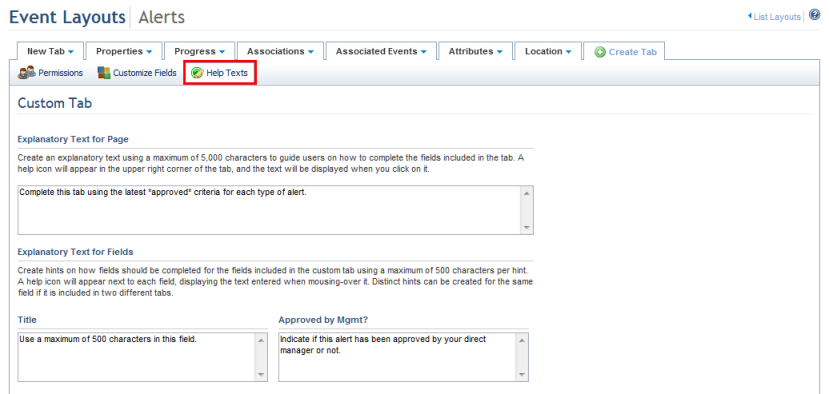
16. To add help texts on how each tab and each field on a custom tab should be completed, click Help Texts. Enter help text for the tab using a maximum of 5,000 characters and help texts for each field using a maximum of 500 characters (see figure below). Distinct hints can be created for the same field if it is included in two different tabs.
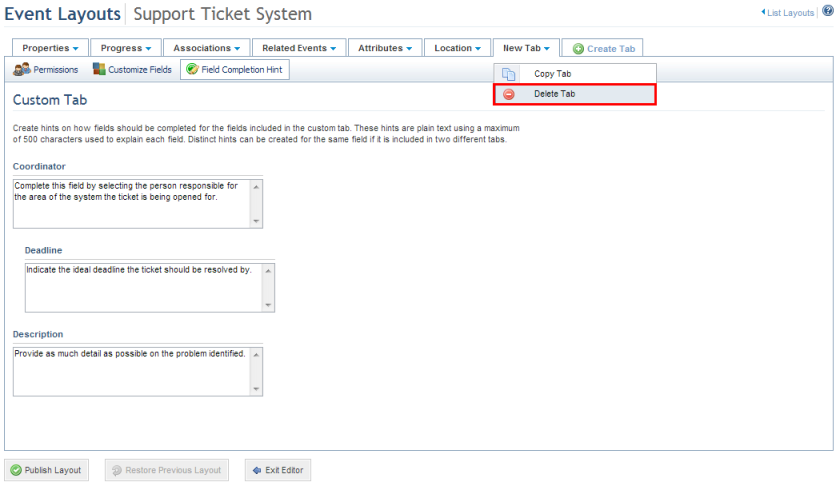
17. To delete a custom tab, click the arrow next to its name and select Delete Tab (see figure below).
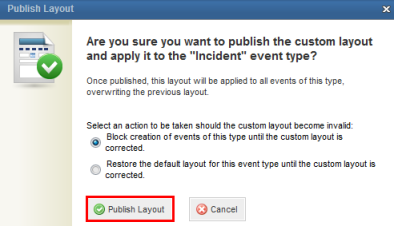
18. Click Publish Layout to make the custom layout available in the Workflow module.
19. In the window that appears, define the behavior to be taken on by the system if the custom layout becomes invalid after publication, for any reason (see figure below). If a custom layout becomes invalid, you can prevent events of the type from being created until the inconsistencies in the layout are corrected, or restore the default layout. After selecting an option, click Publish Layout.
The system displays a success message and returns to the list of layouts.
20. If you want to discard changes made to a published layout, click Restore Previous Layout. Note that this option is also available in the main list of layouts.
The system requests confirmation to restore the layout (see figure below).
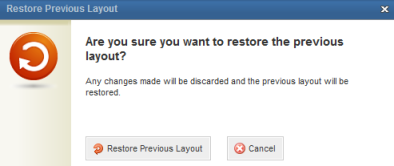
21. Click Restore Previous Layout to confirm. If you want to quit the operation, click Cancel.
The system displays a success message and discards the changes made.
22. If you want to return to the list without publishing the layout being edited, click Exit Editor or the List Layouts link in the upper right corner of the page.