This topic explains how to create a query to view compliance metrics for requirements with cross-references to other requirements analyzed in projects. After selecting the project, you must also select an authoritative document analyzed in the project, as well as the authoritative document containing requirements that are cross-referenced to the requirements analyzed in the project.
It is important to note these queries only identify cross-references in the direction in which they were registered. In other words, the system will only display one-way results for these mappings. For example, if a cross-reference was created from "Authoritative Document 1" to "Authoritative Document 2", the reverse of this association ("Authoritative Document 2" -> "Authoritative Document 1") is not automatically registered, and will not be identified in query results.
Also, note that in cross-reference queries, the metrics displayed for requirements do not consider results for child requirements, and will only display compliance metrics for requirements analyzed directly through associated questions.
1. Access the Compliance module.
2. In the Queries section, click the List Queries option.
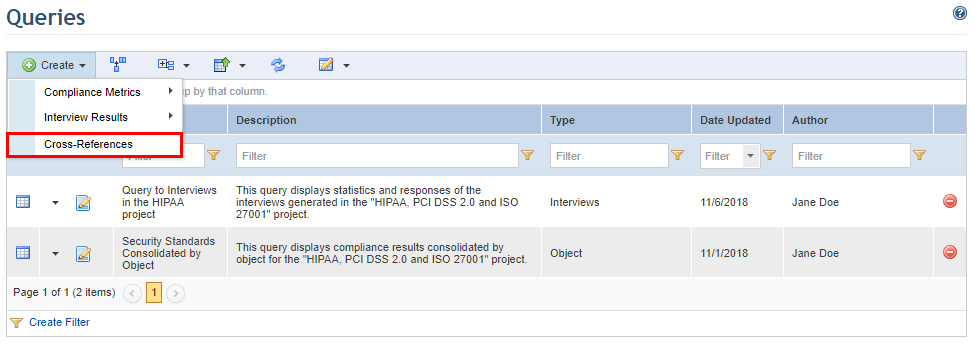
3. In the Queries section, click Create and select the Cross-Reference option (see figure below).

The system displays the Scope step in the wizard for creating queries, where the compliance project, the authoritative document containing the requirements analyzed in the project, and the authoritative document with requirements that were cross-referenced with those from the first document can be selected (see figure below).
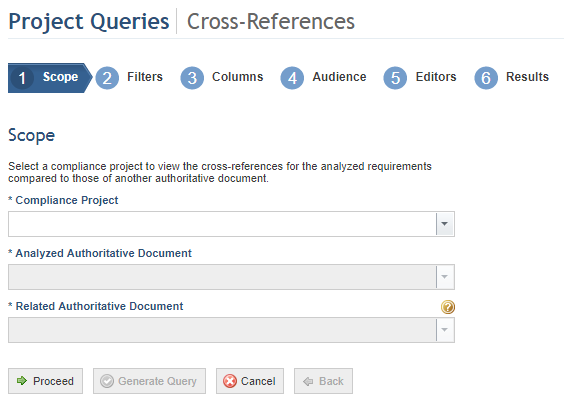
4. In the Compliance Project field, select the project you want to include in the scope of the query.
5. In the Analyzed Authoritative Document field, select an authoritative document analyzed in the project whose requirements are cross-referenced with requirements from another authoritative document.
6. In the Related Authoritative Document field, select the authoritative document whose requirements are cross-referenced with requirements from the first authoritative document selected.
Note: If the requirements from the authoritative documents selected do not contain cross-references, an alert will appear and you will not be able to proceed creating the query.
7. When finished selecting the scope, click Proceed to continue creating the query. If you want to generate the query, click Generate Query. If you want to cancel query creation, click Cancel.
When Proceed is clicked, the system displays the Filters step, where you can select the object types by which the results can be filtered (see figure below).
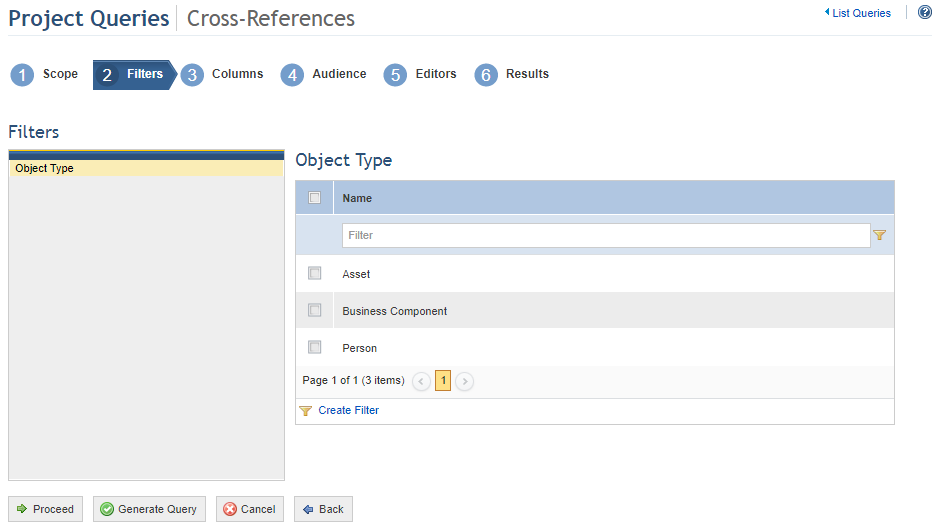
8. In the Filters section, you can filter the results of the query by object type. Selecting a filter for this type of query indicates that you want only the questions related to the object types included in the filter to be displayed in the query results. Choose the types of objects by which you want to filter the results of the query by marking the checkbox next to each (see figure below).
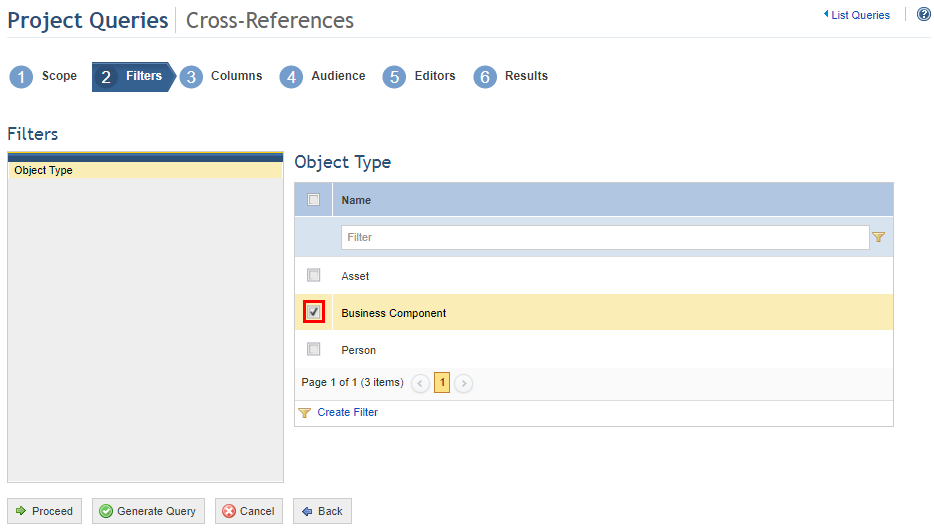
9. After selecting the filters, click Proceed to continue creating the query. If you want to generate the query, click Generate Query. If you want to cancel query creation, click Cancel. To return to the previous step at any point during this wizard, click Back.
When Proceed is clicked, the system displays the Columns step, where the columns to be displayed in the query results can be selected (see figure below).
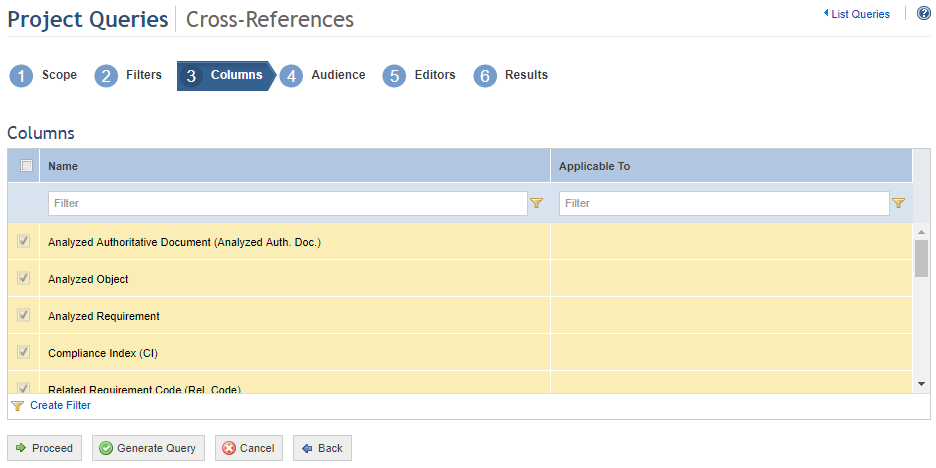
10. Select the columns you want to include in the query results by marking the checkboxes next to each. By default, the system will show some pre-selected options that can be removed, while others are required columns. To include or remove optional columns in the results, simply mark or unmark the checkboxes next to their names.
11. Click Proceed to continue creating the query. If you want to generate the query, click Generate Query. If you want to cancel query creation, click Cancel. To return to the previous step at any point during this wizard, click Back.
When Proceed is clicked, the system displays the Audience step, where you can select which people and groups will be able to view the query in the Home module and in this module, if they have permission to access it (see figure below).
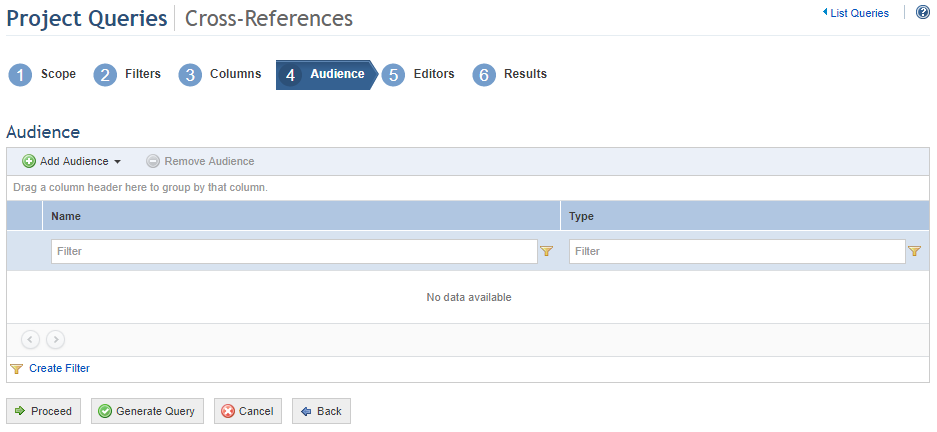
12. Click Add Audience and select People or Groups to add them.
13. If, for example, you selected People, select the people to be added and click Add People (see figure below). If you want to quit the operation, click Cancel.
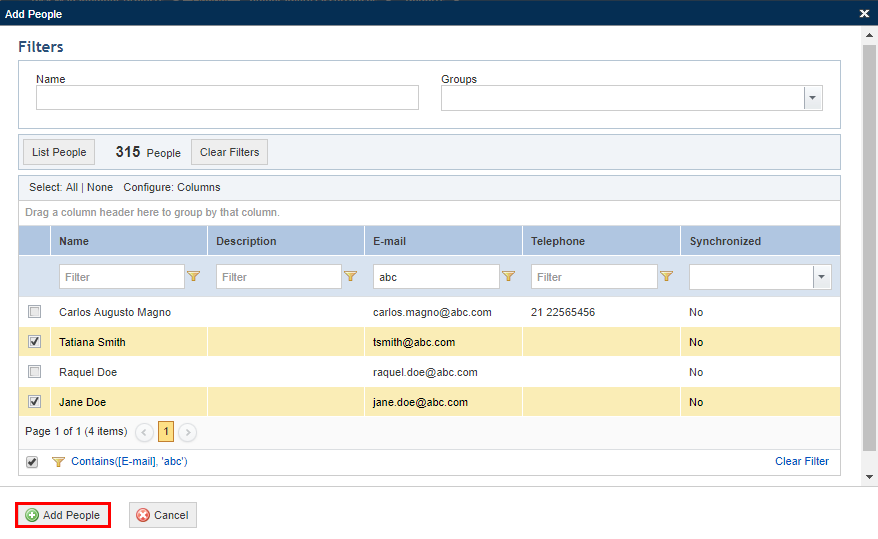
The system displays the people selected.
14. To remove people or groups from the audience, mark the checkboxes next to their names and click Remove Audience.
The system requests confirmation to remove the people or groups from the audience (see figure below).
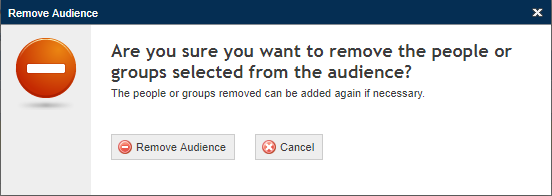
15. Click Remove Audience to confirm. If you want to quit the operation, click Cancel.
The system removes the people selected from the audience.
16. Click Proceed to continue creating the query. If you want to generate the query, click Generate Query. If you want to cancel query creation, click Cancel. To return to the previous step, click Back.
When Proceed is clicked, the system displays the Editors step, where you can select which people and groups will be able to edit the query, receiving the same permissions to it as the author (see figure below).
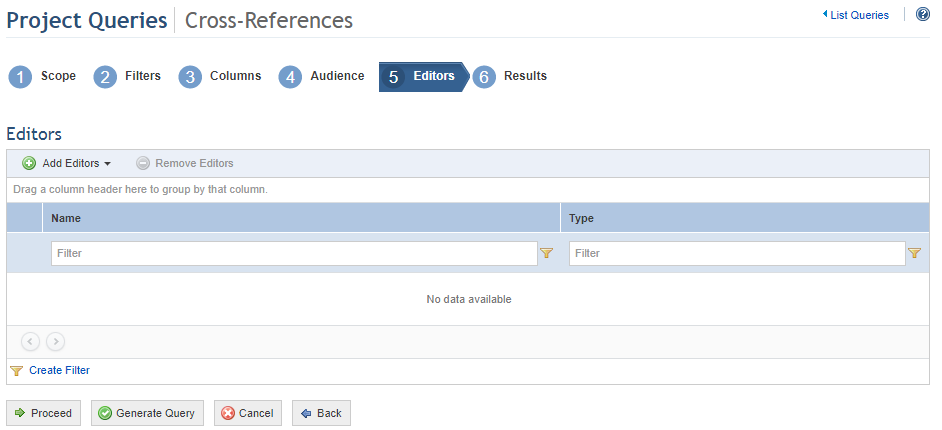
17. Click Add Editors and select People or Groups to add them to the list of editors.
18. If, for example, you selected People, select the people to be added and click Add People (see figure below).

The system displays the people selected.
19. To remove people or groups from the list of editors, mark the checkboxes next to their names and click Remove Editors.
The system requests confirmation to remove the people or groups from the list of editors (see figure below).
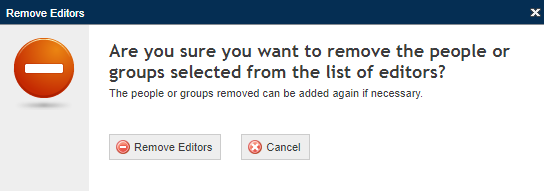
20. Click Remove Editors to confirm. If you want to quit the operation, click Cancel.
The system removes the people selected from the list of editors.
21. Click Proceed or Generate Query to run the query. If you want to cancel query creation, click Cancel. To return to the previous step, click Back.
When Proceed is clicked, the system displays the results of the query according to what was selected in the previous steps (see figure below).
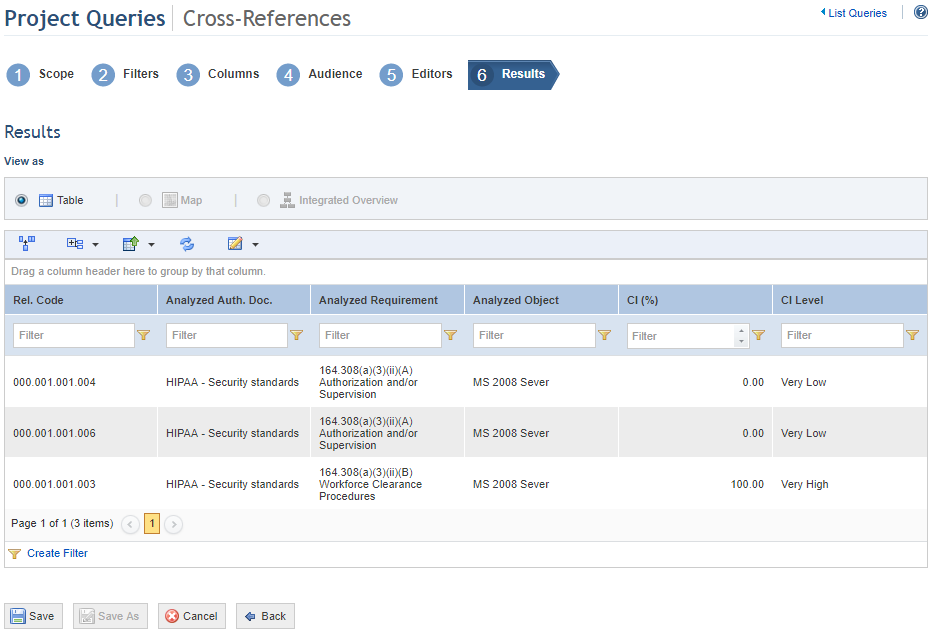
22. Click Save to save the query data. If you do not want to save the query, click Cancel. To return to the previous step, click Back.
When Save is clicked, the system displays a window where a name and description for the query can be entered (see figure below).
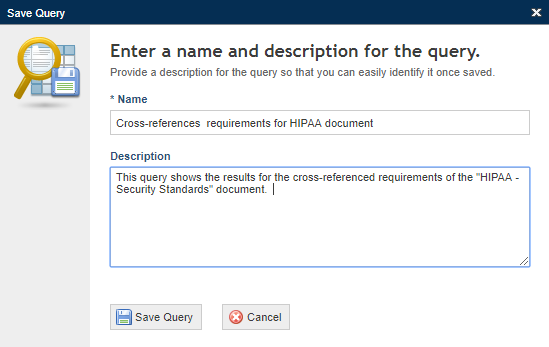
23. In the Name field, enter a name to identify the purpose and reach of the query.
24. In the Description field, enter the main characteristics of the query.
25. When finished, click Save Query. If you want to quit the operation, click Cancel.
The system displays a success message.