1. Access the Knowledge module.
2. Select Knowledge Bases from the Risk Knowledge option on the menu.
3. In the Knowledge Bases section, click Edit next to the knowledge base for which you want to create a control.
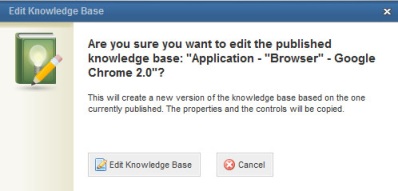
Note: If the knowledge base is published, the system will request confirmation to edit it (see figure below).
4. To confirm editing, click Edit Knowledge Base. If you want to quit the operation, click Cancel.
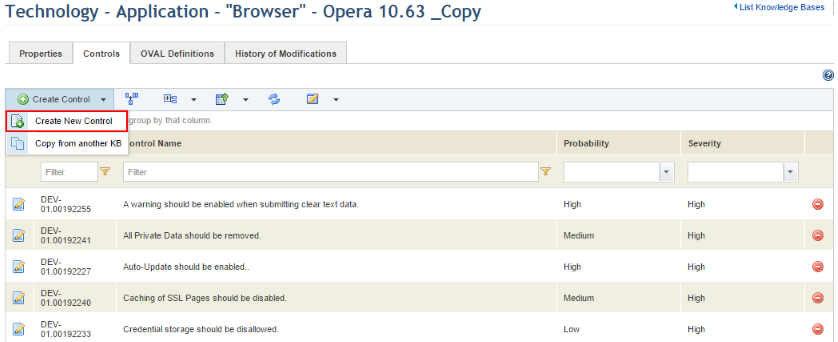
5. Click the Controls tab.
6. Click Create Control and select the Create New Control option (see figure below).
The system displays a screen where information on the new control can be entered (see figure below).
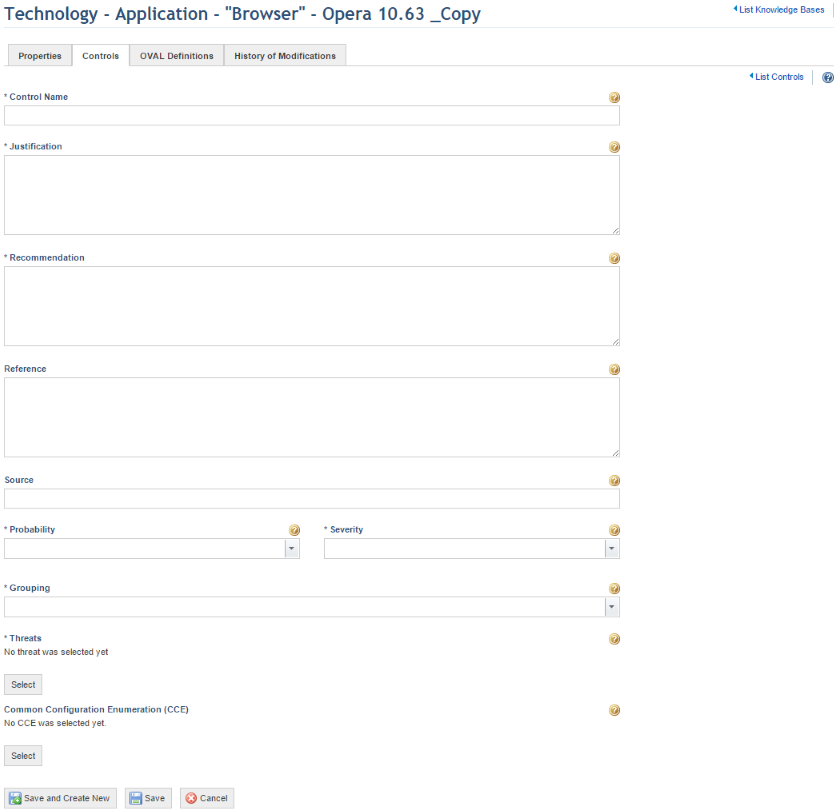
7. In the Control Name field, enter a brief description of the best practice or rule that should be analyzed in the asset component. For standardization purposes, the control names must be at most two or three lines and use the expression "should + verb". For example: "The use of personal equipment in the organization facilities should be previously requested by the user".
8. In the Justification field, describe the benefits that the control implementation may bring or the losses that can occur if it is not implemented.
9. In the Recommendation field, describe the procedures for implementing the control. It’s helpful to standardize the control recommendations by adopting the following rules:
•Use the following opening phrase "This control can be implemented using the following procedure:".
•Describe the steps for implementation, numbering them sequentially.
•Add notes, if necessary. Alternatively, the important points to implement the control can be entered, even when they refer to content (standards, procedures, etc.).
•For general-purpose controls (that is, non-exclusive), the following notice should be added at the end of this field: "Warning! Control prepared for generic environments. Evaluate applicability and possible impacts before implementing."
For example:
"This control can be implemented using the following procedure:
Use digital certificates for encrypting sensitive messages.
Note: The use of encryption mechanisms must follow the guidelines established in the policy for use of the organization’s encryption controls."
"Attention! Control prepared for generic environments. Evaluate applicability and possible impacts before implementing."
10. In the Reference field, describe where additional information about the control and its implementation can be found. This information may be the name of the document or the link where the document is available for download. This field is optional, but when it is filled out it allows a control to be associated with a reliable source or authoritative document.
11. In the Source field, enter the information sources used to prepare the control. This information may be the name of the document or the link where the document is available for download. This field is optional, but when it is filled out it allows the user responsible for the knowledge base to later update the control, regardless of the original author. Whenever possible, indicate the specific location of the citations that gave origin to the control (topic, page, etc.).
12. In the Probability field, select the estimated level of exposure or the probability of the absence of the control being exploited by threats associated with the asset. The probability level varies from "Very Low" to "Very High", as follows:
•Very Low: unlikely
•Low: is not very likely
•Medium: likely
•High: is very likely
•Very High: is almost certain
The following criteria should be used to select the probability level:
•The probability must be proportional to the reach of the control.
•If unsure, always use the lower value.
•Avoid using the "Very High" and "Very Low" extremes indiscriminately.
•Maintain coherence between the scores of the knowledge base controls.
13. In the Severity field, select from the drop-down list the estimated degree of severity if the absence of the control is exploited by any of the associated threats. The severity level varies from "Very Low" to "Very High", as follows:
•Very Low: almost no impairment
•Low: not very severe impairment
•Medium: severe impairment
•High: very severe impairment
•Very High: extremely severe impairment
The following criteria should be used to select the severity level:
•The severity must be proportional to the reach of the control.
•If unsure, always use the lower value.
•Avoid using the "Very High" and "Very Low" extremes indiscriminately.
•Maintain coherence between the scores of the knowledge base controls.
14. In the Groupings field, select the grouping with which the control will be associated. This allows the controls to be found and analyzed according to a subject in common. It’s helpful to establish which groupings will be used before the controls are prepared and registered (if they do not exist yet). This can be done in the Groupings section of the Knowledge module. If the control source is a document structured into sections and topics, the document sections can be used as groupings.
15. In the Threats field, click Select to associate threats with the control (see figure below).

The system displays the Select Threats window (see figure below).
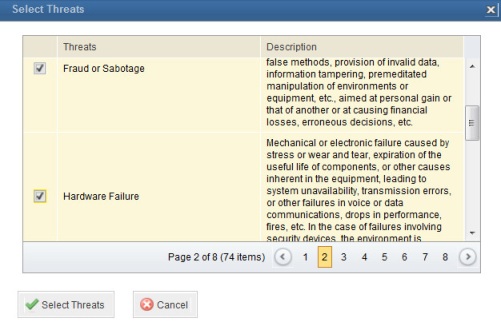
16. Select the threats to which the asset associated with the control will be exposed to in the absence of the control by marking the checkboxes and click Select. Additional threats can be created in the Threats section of the Knowledge module. Only those directly associated with the absence of the control should be selected, thus avoiding the selection of indirect threats.
17. To remove a threat associated with a control, click Remove next to it (see figure below).

18. In the Common Configuration Enumeration (CCE) field, click Select to choose CCEs to be associated with the control. This field is optional and is only displayed for technology knowledge bases. Note that it should only be completed if there is a CCE name corresponding to the control created.
The system displays a window with the CCEs from the list selected in the Properties tab of the knowledge base (see figure below). If no lists were selected, all the CCEs registered in the system will be displayed, in which case they can be filtered through the Platform column.
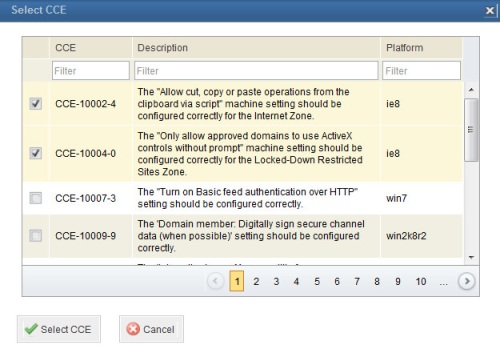
19. Mark the checkboxes next to the CCEs you want to associate with the control and click Select CCE. If you want to quit the operation, click Cancel.
20. When finished, click Save to record the new control. If you want to save the control and create a new one, click Save and Create New. If you want to quit the operation, click Cancel.
The system displays a success message.