This topic explains how to close one or more events through the list of events. However, you can also close events individually through the Progress tab of each. This is done by clicking Edit next to the event you want to close, selecting the Progress tab in the screen that appears, and clicking Close Event. The Close Event window will be displayed, where steps 3-6 below can be followed to close the event.
1. Access the Workflow module.
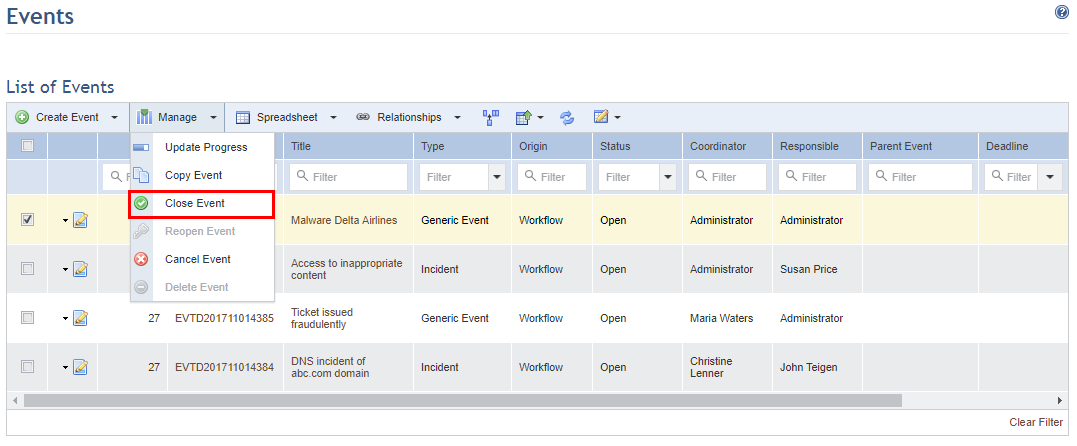
2. In the Events section, mark the checkboxes next to the events you want to close, click Manage and select Close Event from the drop-down list that appears (see figure below).
The system displays a screen with information on why the event is being closed, its progress, and the end date should be entered, which will be applied to all events selected (see figure below).

3. In the Comment field, enter the reason why the event is being closed and any other relevant information.
4. The Percentage of Progress field automatically changes the value to 100, since it is understood that all the activities necessary for closing the event were completed. If this is not the case, the event should not be closed and you should consider cancelling it instead.
5. In the End Date field, set the end date for the activity to which the event refers.
Note: When closing events through the main list, the date suggested for this field will be the current date. However, when closing an event through its Progress tab, the date suggested will be that defined in the End Date field of its Properties tab, when available. In either case, the end date can be changed as necessary.
6. When finished, click Close Event to close the event. If you want to quit the operation, click Cancel.
The system displays a success message.