How to Answer a Questionnaire
This topic explains how to answer a questionnaire for an
asset component included in the scope of a risk management project.
1.
Access the Risk module.
2.
In the Risk Management Projects section, click the List Projects
option.
3.
In the List of Projects section, click Edit next to the risk
project containing the questionnaire you want to answer.
4.
Click the Analysis tab.
5.
In the Questionnaires section, click Edit Questionnaire ( )
next to the asset component for which you want to answer the questionnaire. If
the questionnaire, the analysis phase, or the project is closed, this button
will be disabled, in which case you will have to reopen the questionnaire before
you can answer or edit the responses to the controls.
)
next to the asset component for which you want to answer the questionnaire. If
the questionnaire, the analysis phase, or the project is closed, this button
will be disabled, in which case you will have to reopen the questionnaire before
you can answer or edit the responses to the controls.
Note: If the questionnaire has not yet been opened, an
alert may appear if its associated knowledge base is not the latest version. If
this happens, you must decide whether to keep the current version of the
knowledge base or update it to the most recent version before the questionnaire
is opened. You can change the knowledge base version by editing the analysis
parameters for the asset component in the inventory phase. Once opened,
knowledge base versions associated with questionnaires cannot be modified.
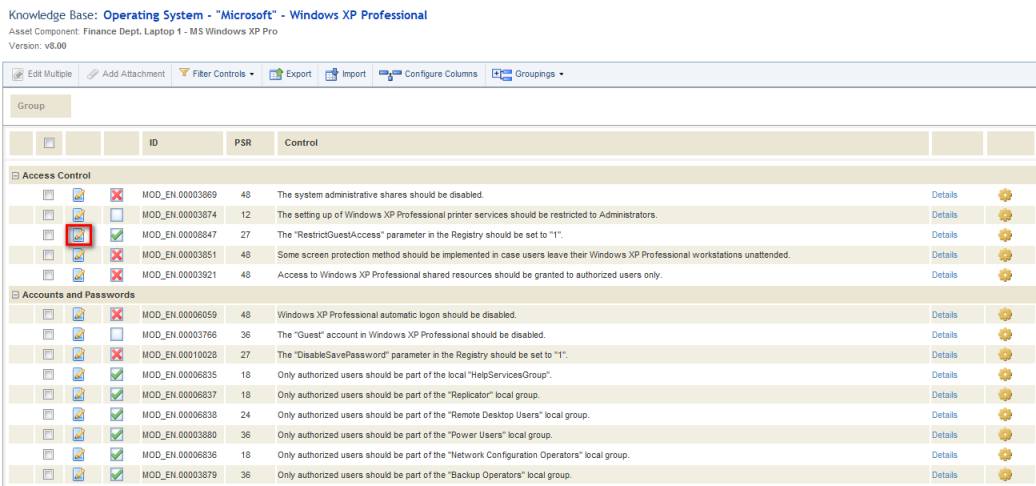
The system displays the
questionnaire with the controls to be answered (see figure below).
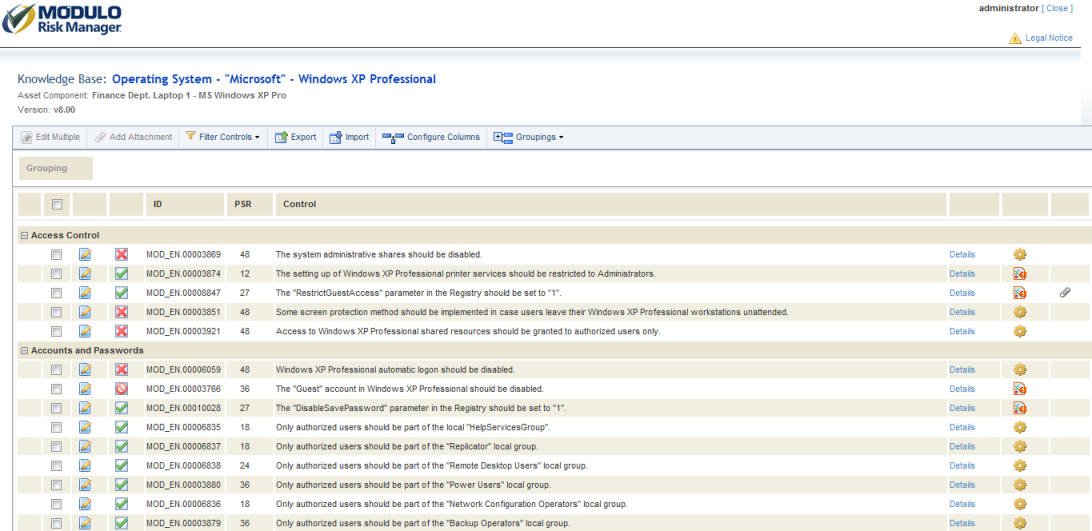
The system presents the following for each control:
•
Edit: an Edit button to answer or edit the response to a
control.
•
Control Status: Implemented /
Not Implemented
/
Not Implemented / Not Applicable
 /
Not Answered.
/
Not Answered.
•
ID: unique numeric ID of the control.
•
PSR: this column shows the risk level associated with the
non-implementation of each control in terms of its PSR score.
•
Control: name of the control.
•
Details: a Details button ( )
to view the justification and recommendation for each control.
)
to view the justification and recommendation for each control.
•
Response Method: control answered manually ( ),
control answered manually to overwrite an existing response obtained through the
results of an automated collection or interview (
),
control answered manually to overwrite an existing response obtained through the
results of an automated collection or interview ( ),
control answered automatically using the results of an automated collection
(
),
control answered automatically using the results of an automated collection
( ), control answered automatically
through the responses provided to an interview (
), control answered automatically
through the responses provided to an interview ( ).
).
•
Attachments: indicates that evidence was attached to the control
( ).
).
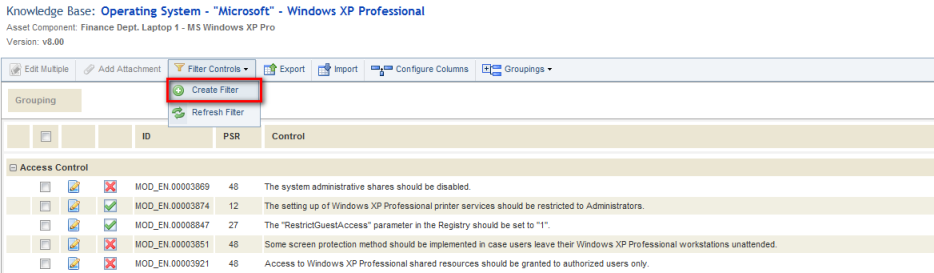
6.
To filter the controls listed by status or by control grouping, click Filter
Controls and select Create Filter (see figure below).
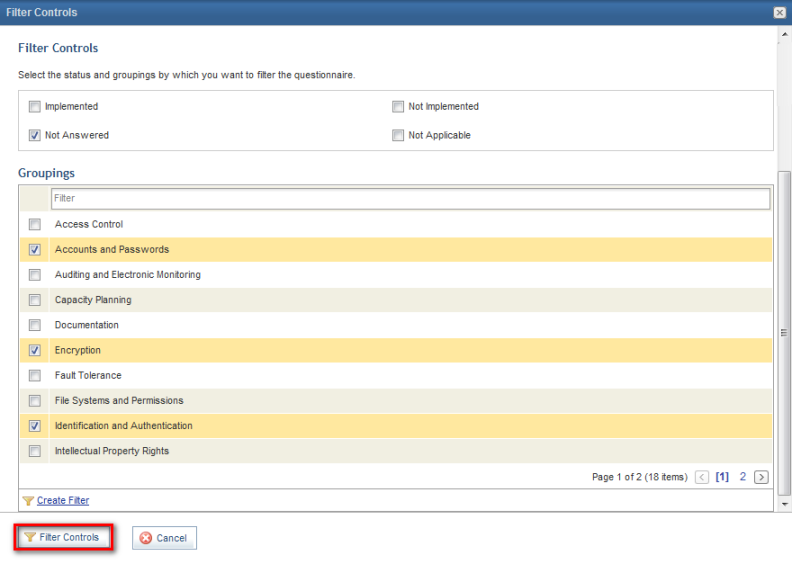
7.
In the window that appears, mark the checkboxes next to the status or groupings
by which you want to filter the controls and click Filter Controls. If
you want to quit the operation, click Cancel (see figure below).
8.
To refresh the filter after any changes are made to the questionnaire, click
Filter Controls and select Refresh Filter.
9.
To clear all filters applied to the questionnaire, click Clear Filters at
the bottom right corner of the page.
10. To view
details on a control, including its justification, the recommendation on how to
implement it, associated threats, the documents on which it is based, and its
source, click Details ( ) (see figure below).
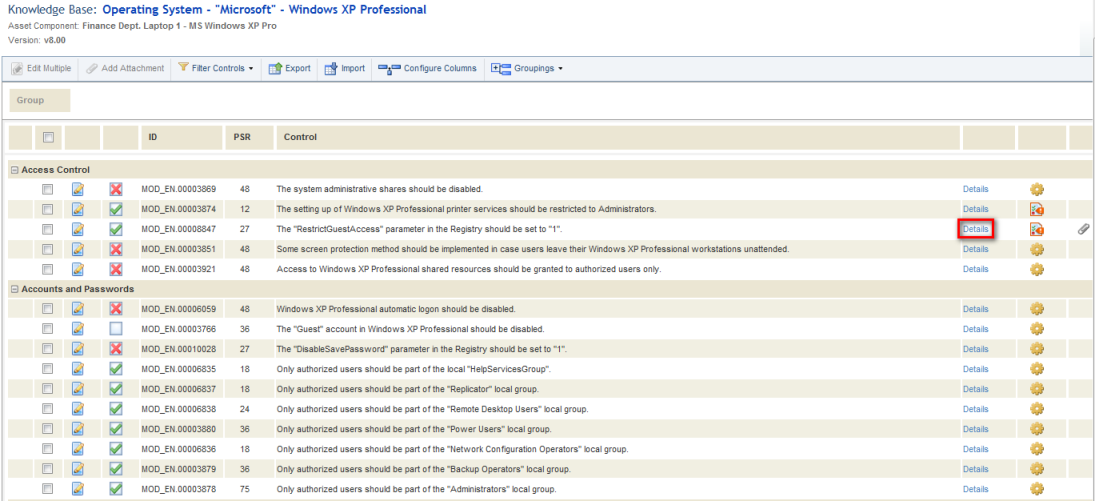
The system displays a window with
the details for the control (see figure below).

11. When
finished viewing the control details, click Close to return to the main
screen.
12. Click
Edit next to the control to be answered (see figure below).
The system displays an area where
the control can be answered (see figure below).
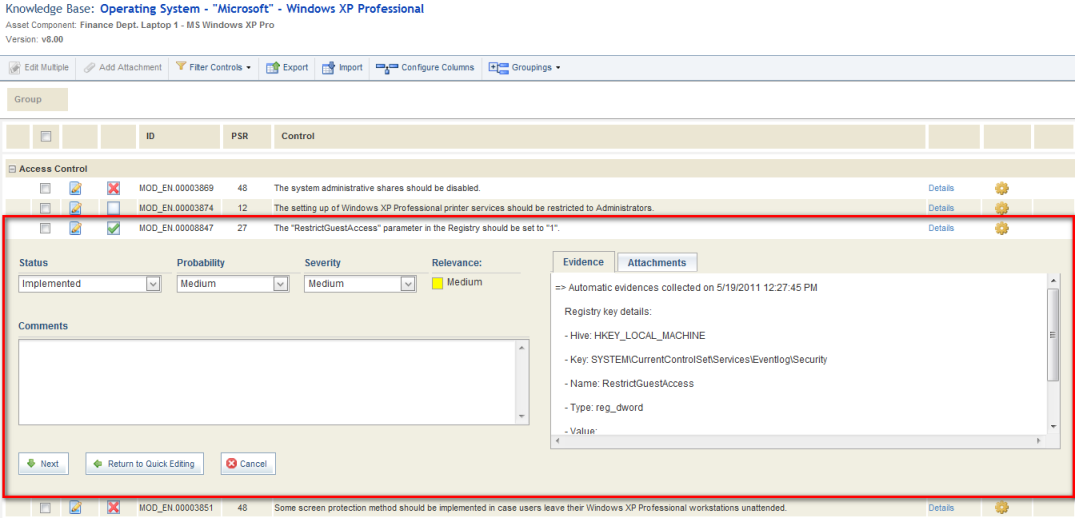
13. Select the
status of the control from the Status field. The options are
Implemented, Not Implemented, Not Applicable, and Not
Answered.
14. Click the
Probability field to change the probability of the control, which ranges
from Very Low to Very High.
15. Click the
Severity field to change the severity of the control, which ranges from
Very Low to Very High.
Note: The relevance of the
asset associated with the control is displayed here for reference, and is
configured when the asset component is created in the Organization
module.
16. In the
Comments field, enter any additional information regarding the response
to the control. This field accepts a maximum of 5,000 characters.
17. Click the
Evidence tab to view any additional evidence as to whether or not the
control is implemented. Evidence is entered by interviewees and reviewers when a
comment field is included in a survey and a rule is created to add the comments
as evidence in the questionnaire automatically, or when questions are associated
with controls. Evidence from automated collections used to answer the control is
also displayed here. This evidence will also be available as a column option in
the Status of Controls and Controls organizational and risk queries.
18. Click the
Attachments tab to view attachments added as evidence as to whether or
not the control is implemented. Attachments can be included by interviewees and
reviewers when a field for attaching evidence is included in a survey and a rule
is created to include the attachments to the questionnaire control. Attachments
can also be added manually by the analyst.
19. To add an
attachment, click Add Attachment (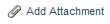 ).
).
20. In the
window that appears, click Browse to locate the file to be attached as
evidence.
21. In the
dialog box that appears, locate the file and click Open.
22. Enter any
additional information on the evidence being attached in the Comments
field using up to 5,000 characters.
23. Click
Add Attachment (see figure below).

The system displays a success
message.
Note: In events to
treat non-implemented controls, the attachment and its comments will be
displayed in the event’s Attachments column of the Controls
section under the Associations tab. This allows users to view and
download the attachments directly in the Workflow module, without having
to access the project.
24. To delete
the evidence attached, click Delete next to the file you want to
delete.
The system requests confirmation of
the deletion.
25. Click
Delete Attachment to confirm. If you want to quit the operation, click
Cancel.
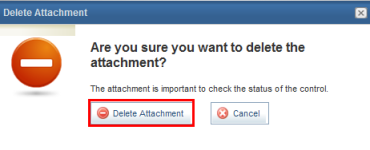
The system displays a success
message.
26. When
finished answering the control, click Next to save the responses and
continue to the next control in the questionnaire. To save the responses and
return to the main questionnaire screen, click Return to Quick Editing.
If you want to quit the operation, click Cancel.
When Next or Return to
Quick Editing are clicked, the system displays a success message.
27. An
alternative way to answer a control is by using the quick editing option. Click
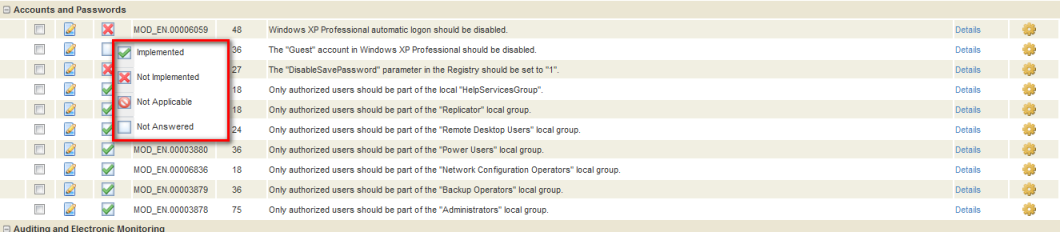
Status ( ) next to the control and select the
new status from the list that appears (see figure below).
) next to the control and select the
new status from the list that appears (see figure below).
The system displays a success
message.
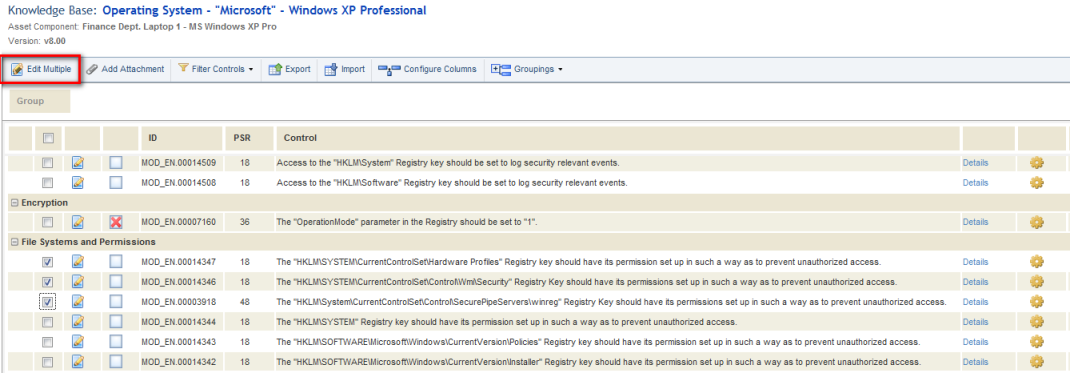
28. To answer
multiple controls at once, select the controls you want to answer and click
Edit Multiple (see figure below).
The system displays a window where
a response can be provided for all the controls selected (see figure below).
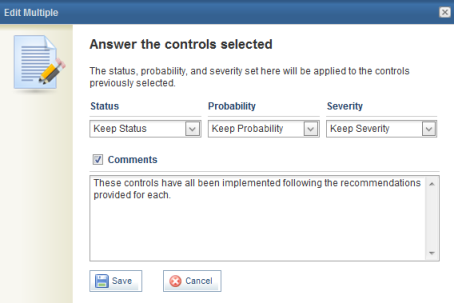
29. Click
Save to save the responses provided for the controls selected. If you
want to quit the operation, click Cancel.
The system displays a success
message.
Note: The option to answer multiple controls at once
should be used carefully so that inaccurate statuses are not defined for
controls, thus masking the total risk calculated at the end of the project.
30. When
finished answering all the controls or to save the responses already provided,
click Close in the upper right corner or close the browser window.