 )
(see figure below). This icon will be marked in yellow whenever you have unread
messages.
)
(see figure below). This icon will be marked in yellow whenever you have unread
messages. This topic provides orientation on how to use the chat feature to send messages to a person or a group. This feature will only enabled after the value of the EnableChat element is set to "true" in appSettings in the web.config file for the application, as follows:
<add key="EnableChat" value="true" />
For further details, get in touch with your account manager.
1. Access the Integration module, the Events solution, or the Dispatch solution.
2. Click Integration Map, View Event and Activity Map, Manage Calls, Manage Dispatches, or Monitoring.
3.
In the side menu to the right, click Chat ( )
(see figure below). This icon will be marked in yellow whenever you have unread
messages.
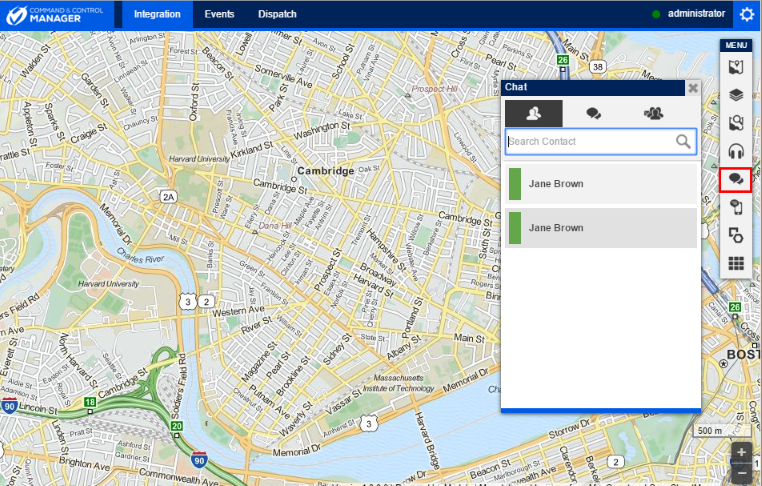
The system displays the Chat window with the complete list of contacts. Users logged in the system will be displayed with a green bar next to their names.
4. To search for a contact in the list, enter their name in the Search Contact field.
5.
To send a message, in the Contacts ( )
tab, click the name of the user you want to contact and enter the text.
)
tab, click the name of the user you want to contact and enter the text.
6.
To send a file with the message, click Attach ( )
displayed in the text box . Select the file you want to attach and click
Send. You can send photos, videos, and audio files up to 20 MB in
size.
)
displayed in the text box . Select the file you want to attach and click
Send. You can send photos, videos, and audio files up to 20 MB in
size.
7.
To view unread messages and any messages you received while you were offline,
click Back ( ) and then go to the New Messages
(
) and then go to the New Messages
( ) tab. This tab will be marked in
yellow whenever there is an unread message. The number of unread messages is
displayed next to the name of the person who sent it.
) tab. This tab will be marked in
yellow whenever there is an unread message. The number of unread messages is
displayed next to the name of the person who sent it.
8.
To send a message to several users at once, click the Broadcast ( )
tab. Mark the checkboxes next to the users you want to send the message to or
mark the Select all checkbox to send it to all users listed on this tab.
Then, enter the message in the text box below and click Send.
)
tab. Mark the checkboxes next to the users you want to send the message to or
mark the Select all checkbox to send it to all users listed on this tab.
Then, enter the message in the text box below and click Send.